Products for USB Sensing and Control


Quantity Available: 104
| Qty | Price |
|---|---|
| 10 | $14.25 |
| 25 | $12.75 |
| 50 | $11.25 |
| 100 | $10.50 |
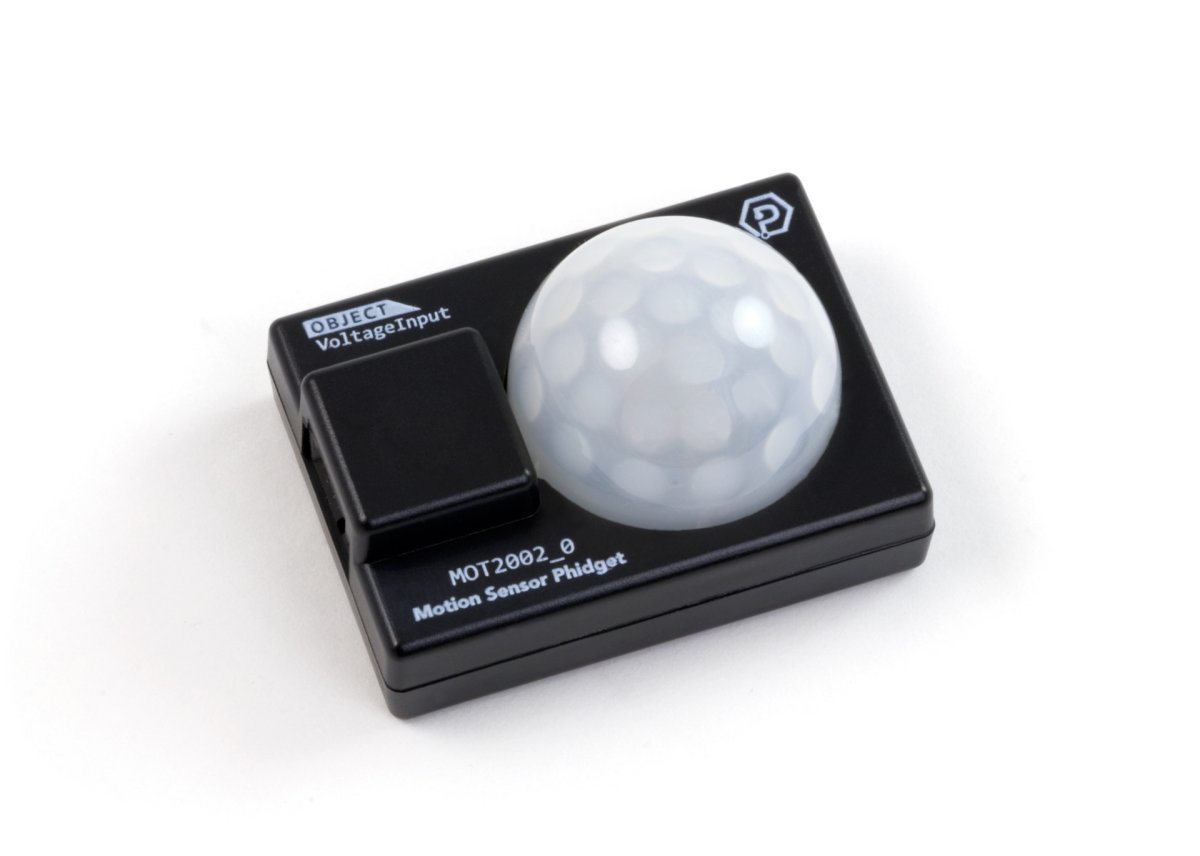
The Motion Sensor Phidget allows you to detect motion up to ten meters away. This sensor will output a steady voltage when no objects are detected. The voltage output will increase or decrease when motion is detected. Movement that fills more of the sensor’s field of view will result in a larger change in voltage.
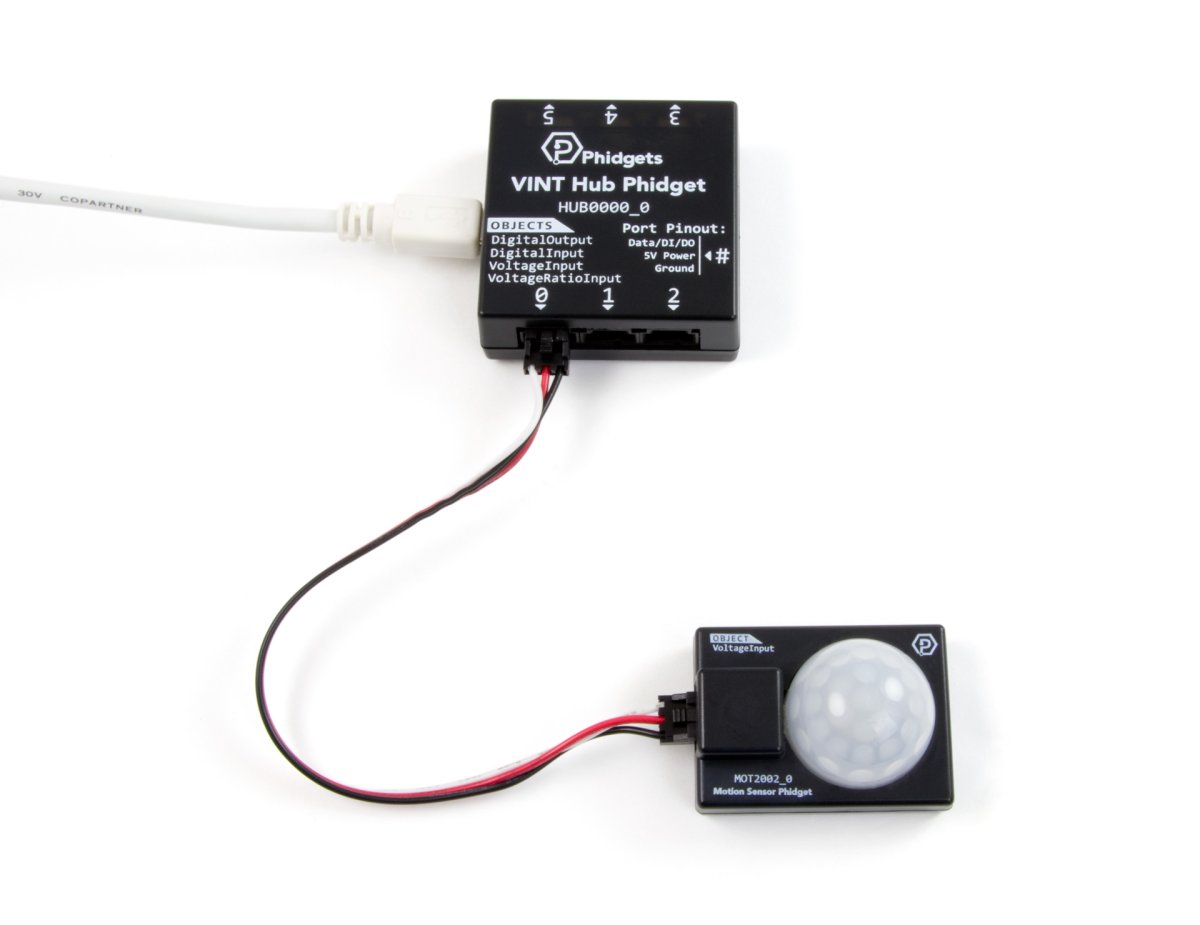
This Phidget connects to your computer through a VINT Hub.
This sensor automatically re-calibrates, so objects that stop moving inside the sensor’s view won’t trigger the sensor until they start moving again.
This sensor can be read by any Phidget with an Analog Input or VINT Hub port. VINT Hub ports can behave just like Analog Inputs, but have the added flexibility of being able to be used as digital inputs, digital outputs, or ports to communicate with VINT devices. For more information about VINT, see the VINT Overview page.
| Product | Voltage Inputs | ||
|---|---|---|---|
| Part Number | Price | Number of Voltage Inputs | Voltage Input Resolution (bits) |
 VINT Hub Phidget
|
$40.00 | 6 (Shared) | *** 15 bit |
 1-Port VINT Hub Phidget
|
$26.00 | 1 (Shared) | ** 16 bit |
 VINT Hub Phidget
|
$35.00 | 6 (Shared) | * 15 bit |
 Wireless VINT Hub
|
$60.00 | 6 (Shared) | * 16 bit |
 PhidgetSBC4
|
$120.00 | 6 (Shared) | * 16 bit |
 PhidgetInterfaceKit 8/8/8
|
$80.00 | 8 | — |
 PhidgetInterfaceKit 2/2/2
|
$50.00 | 2 | 10 bit |
 8x Voltage Input Phidget
|
$20.00 | 8 | 12 bit |
 PhidgetInterfaceKit 8/8/8
|
$80.00 | 8 | 10 bit |
 PhidgetInterfaceKit 8/8/8 Mini-Format
|
$70.00 | 8 | 10 bit |
 PhidgetInterfaceKit 8/8/8 w/6 Port Hub
|
$110.00 | 8 | 10 bit |
 PhidgetTextLCD 20X2 : White : Integrated PhidgetInterfaceKit 8/8/8
|
$70.00 | 8 | 10 bit |
This sensor requires a Phidget cable to connect it to an InterfaceKit or Hub. You can solder multiple cables together in order to make even longer Phidget cables, but you should be aware of the effects of having long wires in your system.
| Product | Physical Properties | |
|---|---|---|
| Part Number | Price | Cable Length |
 Phidget Cable 10cm
|
$1.50 | 100 mm |
 Phidget Cable 30cm
|
$1.75 | 300 mm |
 Phidget Cable 60cm
|
$2.00 | 600 mm |
 Phidget Cable 60cm
|
$2.00 | 600 mm |
 Phidget Cable 90cm
|
$2.00 | 900 mm |
 Phidget Cable 120cm
|
$2.25 | 1.2 m |
 Phidget Cable 150cm
|
$2.50 | 1.5 m |
 Phidget Cable 180cm
|
$2.75 | 1.8 m |
 Phidget Cable 350cm
|
$3.00 | 3.5 m |
 Phidget Cable Kit
|
$10.00 | 80 mm |
 Phidget Cable Extension Wire 22AWG
|
$0.75/Meter | — |
The MOT2002 detects changes in infrared radiation caused by the movement of a person or object whose temperature differs from their surroundings. The sensor will return 0 when there is no movement detected. When there is movement detected, the sensor will return a non-zero value.
As the MOT2002 detects temperature differences, it is well suited to detecting the motion of people by their body temperature.
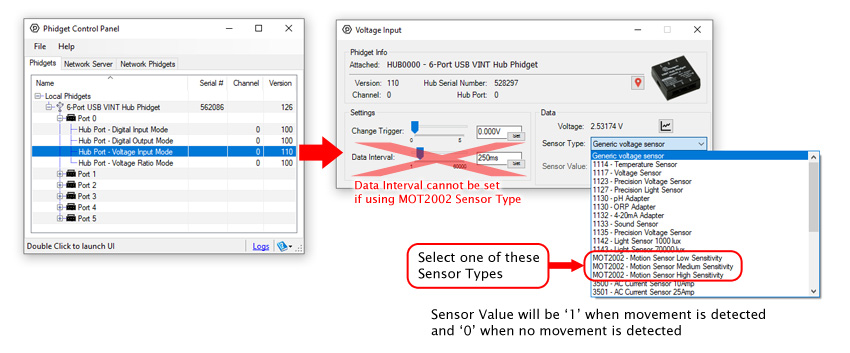
Double click on the Voltage Input channel class under the port your MOT2002 is connected to.
You can see the voltage from the sensor fluctuate when motion is detected.
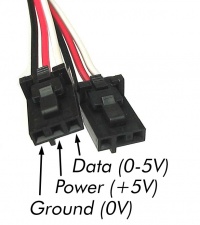
The Phidget Cable is a 3-pin, 0.100 inch pitch locking connector. Pictured here is a plug with the connections labelled. The connectors are commonly available - refer to the Analog Input Primer for manufacturer part numbers.
The Change Trigger is the minimum change in the sensor data needed to trigger a new data event.
The Data Interval is the time (in ms) between data events sent out from your Phidget.
The Data Rate is the reciprocal of Data Interval (measured in Hz), and setting it will set the reciprocal value for Data Interval and vice-versa.
You can modify one or both of these values to achieve different data outputs. You can learn more about these properties here.
Before you open a Phidget channel in your program, you can set these properties to specify which channel to open. You can find this information through the Control Panel.
1. Open the Control Panel and double-click on the red map pin icon:

2. The Addressing Information window will open. Here you will find all the information you need to address your Phidget in your program.

See the Phidget22 API for your language to determine exact syntax for each property.
The objects detected by the MOT2002 must be emitting infrared light in order to be detected, which means they must be giving off heat or be a significantly different temperature than the background it’s contrasted against.
The MOT2002 needs a period of stillness so it can establish a baseline before using any of the filters in the SensorType selection. You can aid this process by setting a short data interval (e.g. 1ms) before setting the SensorType. If you can't guarantee a period of stillness for the filter to calibrate to when it first starts up, you should either set up your program to ignore the out of range errors, or use the raw VoltageInput value and come up with your own rules for how to quantify movement.
| Sensor Properties | |
|---|---|
| Controlled By | Voltage Input |
| Sensor Output Type | Non-Ratiometric |
| Sensor Type | Motion (PIR) |
| Motion Sensor | |
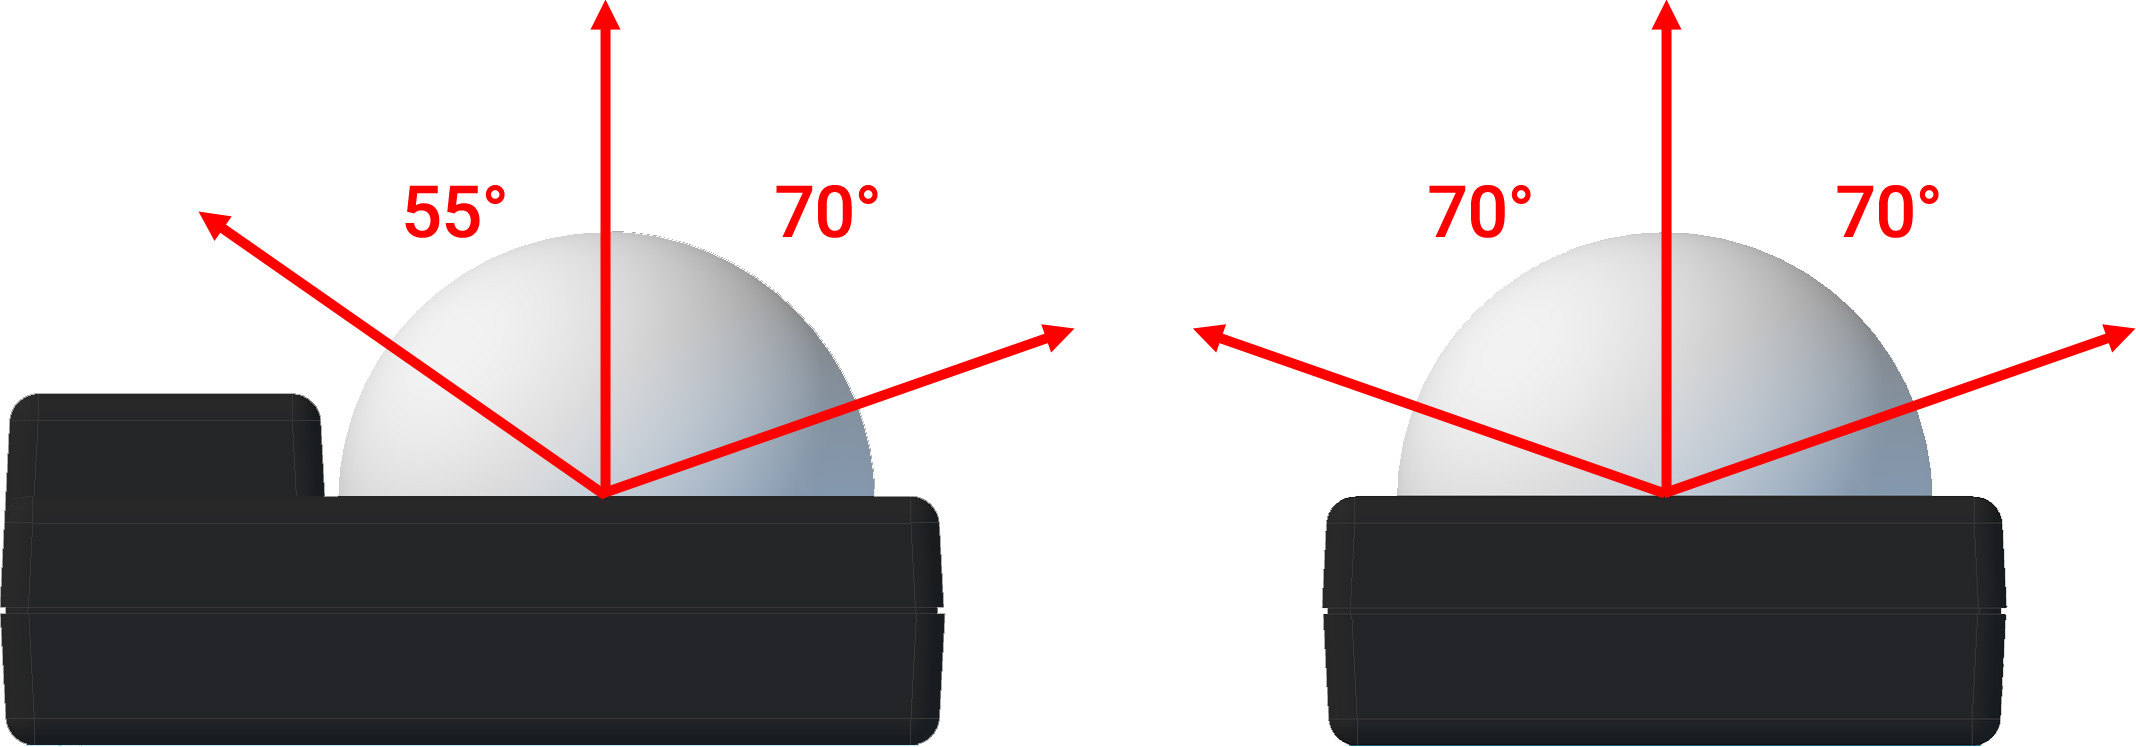
| Horizontal Detection Range | 70° |
| Vertical Detection Range | * 70° |
| Motion Detection Distance | ** 10 m |
| Electrical Properties | |
| Current Consumption | 140 μA |
| Physical Properties | |
| Operating Temperature Min | -30 °C |
| Operating Temperature Max | 85 °C |
| Customs Information | |
| Canadian HS Export Code | 8473.30.00 |
| American HTS Import Code | 8473.30.11.80 |
| Country of Origin | CN (China) |
* - Detection angle is reduced on the side of the lens where the connector blocks its view:
** - Detection distance varies with the size and speed of the object. Our testing was conducted with people moving at walking speed.
| Date | Board Revision | Device Version | Comment |
|---|---|---|---|
| February 2020 | 0 | N/A | Product Release |
This device doesn't have an API of its own. It is controlled by opening a VoltageInput channel on the Phidget that it's connected to. For a list of compatible Phidgets with Voltage Inputs, see the Connection & Compatibility tab.
You can find details for the VoltageInput API on the API tab for the Phidget that this sensor connects to.