Language - C
Get Started
With the Phidget22 library, it's easy to create C or C++ applications that work with Phidget devices.
C Libraries
If you've installed the Phidget drivers for Windows, macOS, or Linux, then you already have the files you need for your C project.
Windows Considerations
When adding directories for your project dependencies, add
C:/Program Files/Phidgets/Phidget22And for the linker, you can add
C:/Program Files/Phidgets/Phidget22/phidget22.lib}}     #(for 64-bit systems)
C:/Program Files/Phidgets/Phidget22/x86/phidget22.lib}} #(for 32-bit systems)
macOS Considerations
Legacy Phidgets running a HID USB stack require a driver extension (macOS 10.15 and newer) or a kernel extension (macOS 10.14 and earlier). During development, we recommend downloading the appropriate package which will install the extension. When deploying applications, review the README in the macOS Development Files for information about bundling the extension with your application.
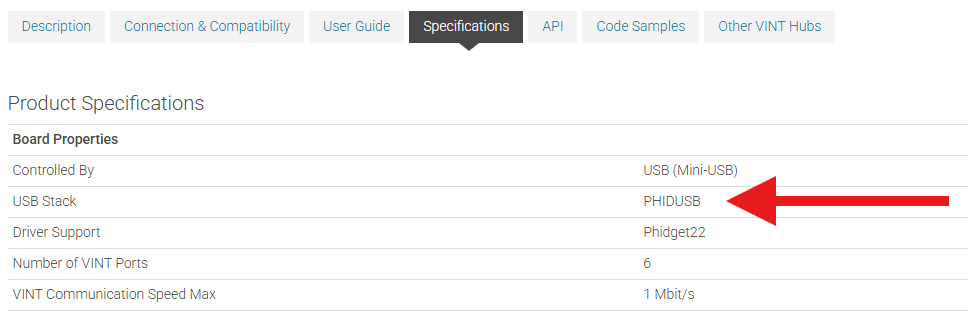
Determining USB Stack
To determine which USB stack your device is running, navigate to the product page and then to the specification tab, and look for the USB Stack specification. If you are using a VINT device, navigate to the product page for the VINT Hub you are using.
Linux Considerations
Linux restricts access to USB devices to the root user.
To run your C application as a regular user, you'll need to set up udev rules on your system.
Library Files
If you would like to manually manage the Phidget22 library files, you can download them here.
Development Environment Configuration
GCC
|
The most common tool for C development is GCC, whether used in the command line or through an IDE. GCC is packaged with many other IDEs and packages, so you may already have it installed. Windows
We recommend installing Cygwin or MinGW, ensuring you select all gcc packages when prompted by the installer. To compile your code, go to the folder where your code is and open the command prompt by typing 'cmd' in the address bar. The specific command you will use depends on your compiler of choice: #Cygwin x86:
gcc example.c -o example -I"/cygdrive/c/Program Files/Phidgets/Phidget22"-L"/cygdrive/c/Program Files/Phidgets/Phidget22/x86" -lphidget22
#Cygwin x64:
gcc example.c -o example -I"/cygdrive/c/Program Files/Phidgets/Phidget22" -L"/cygdrive/c/Program Files/Phidgets/Phidget22" -lphidget22
#MinGW:
gcc example.c -o example -I"C:/Program Files/Phidgets/Phidget22" -L"C:/Program Files/Phidgets/Phidget22/x86" -lphidget22
After running the commands above for either Cygwin or MinGW, an executable file called example.exe will be created. Enter the following command to run the program: ./example.exe
MacOS
If you don't already have gcc installed, you can get it by installing Xcode. To compile the program, enter the following command in the terminal, substituting "example" for the name of your C file: gcc example.c -o example -F /Library/Frameworks -framework Phidget22 -I /Library/Frameworks/Phidget22.framework/Headers
Finally, run the program by entering the following command in the terminal: ./example
Success! The project is now running with Phidgets. Linux
On Linux, gcc is installed through the package manager: apt-get install gcc
To compile the program, enter the following command in the terminal, substituting "example" for the name of your C file: gcc example.c -o example -lphidget22
After compiling, you can run the program by entering the following command in the terminal: ./example
Success! The project is now running with Phidgets. |
Visual Studio
| If you want to jump right into a pre-configured project, you can download one on our Code Sample Generator page. | 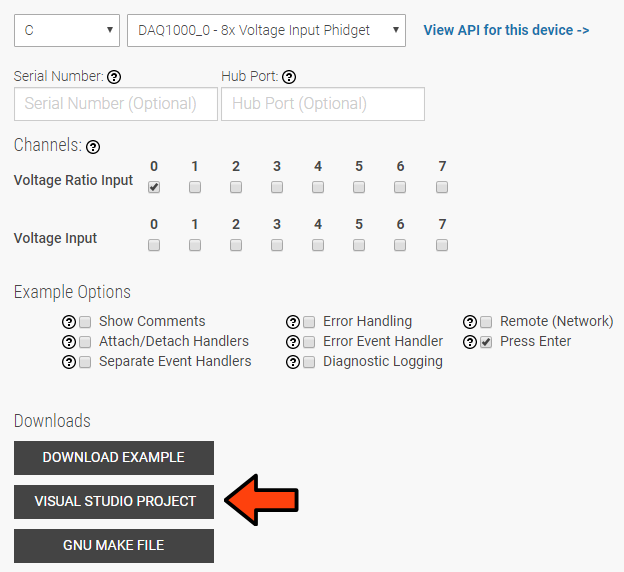 |
| To configure a new project, follow these steps. | |
| First, create a new Win32 Console Application: | 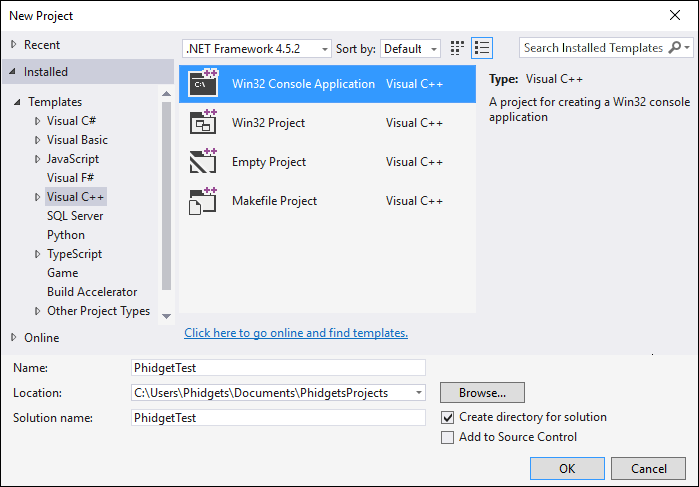 |
| If you are using a 64-bit machine, select x64, otherwise, select x86: | 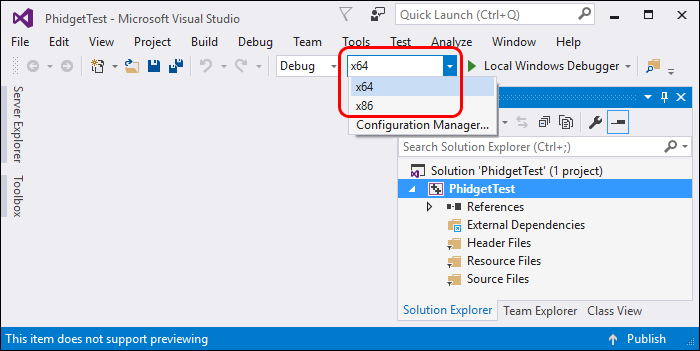 |
| Next, right click on the source folder and click New Item: |  |
| Give the source file a name and click Add: | 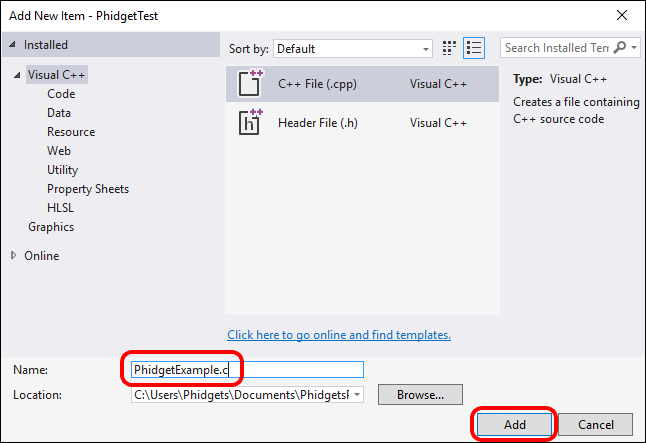 |
| Right click your project and access its properties: | 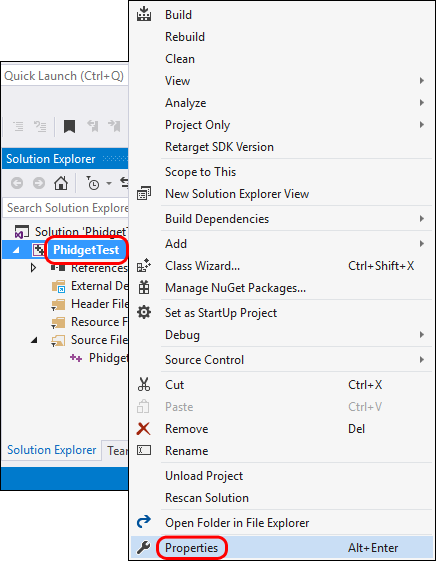 |
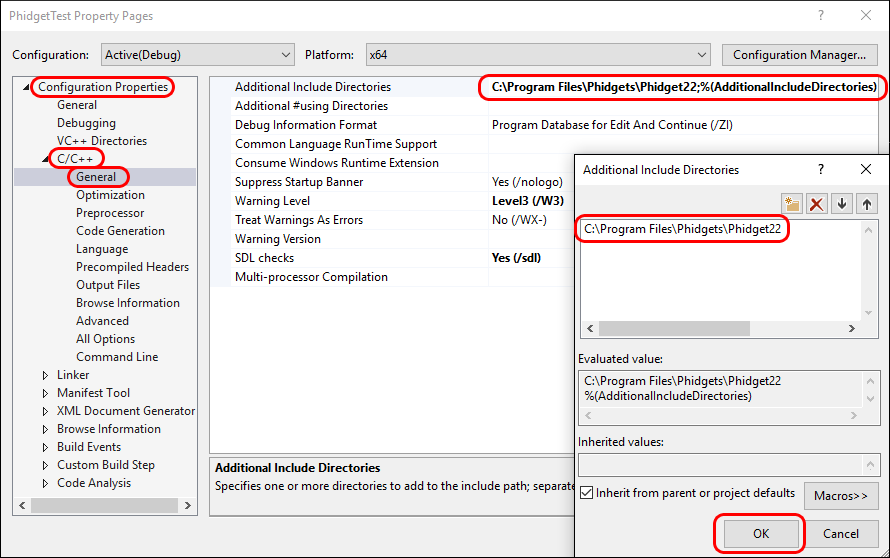
Go to Configuration Properties -> C/C++ -> General and add this to the additional include directories:
C:\Program Files\Phidgets\Phidget22 |
 |
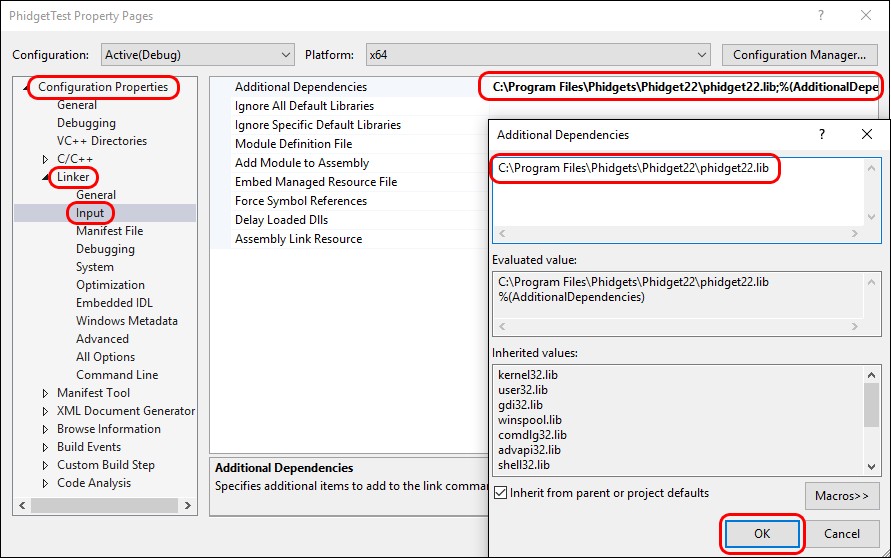
Go to Configuration Properties -> Linker -> Input and add the appropriate line to additional dependencies:
C:\Program Files\Phidgets\Phidget22\phidget22.lib #(for 64-bit systems)
C:\Program Files\Phidgets\Phidget22\x86\phidget22.lib #(for 32-bit systems) |
 |
Lastly, include the Phidget library at the beginning of your program:
#include < phidget22.h >
|
PhidgetSBC Web Interface
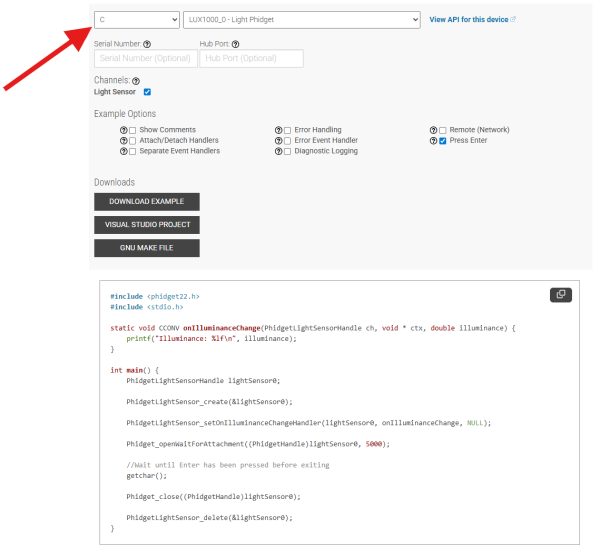
Example Code
Navigate to our Code Sample Generator to view and download code samples that are tailored to your specific device.
Phidget Programming Basics
To learn more about the structure of the example code, visit our Phidget Programming Basics guide.