Products for USB Sensing and Control

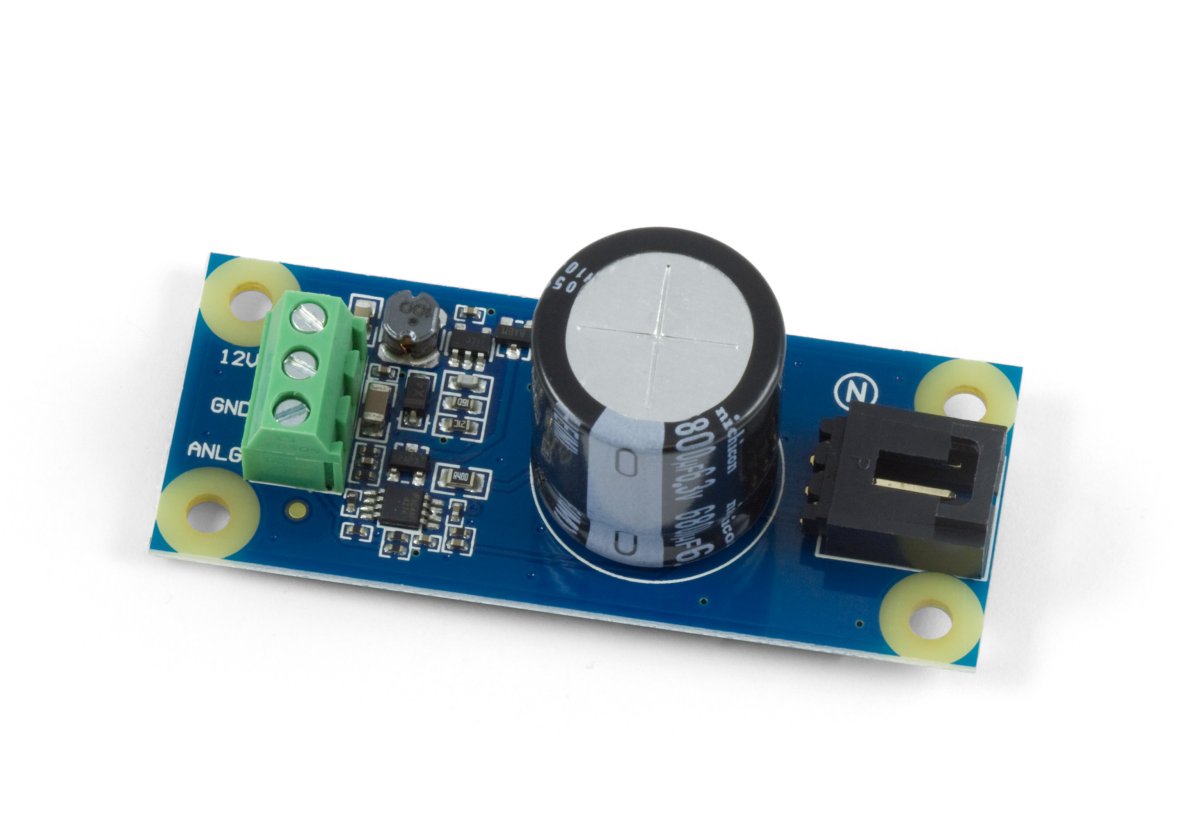
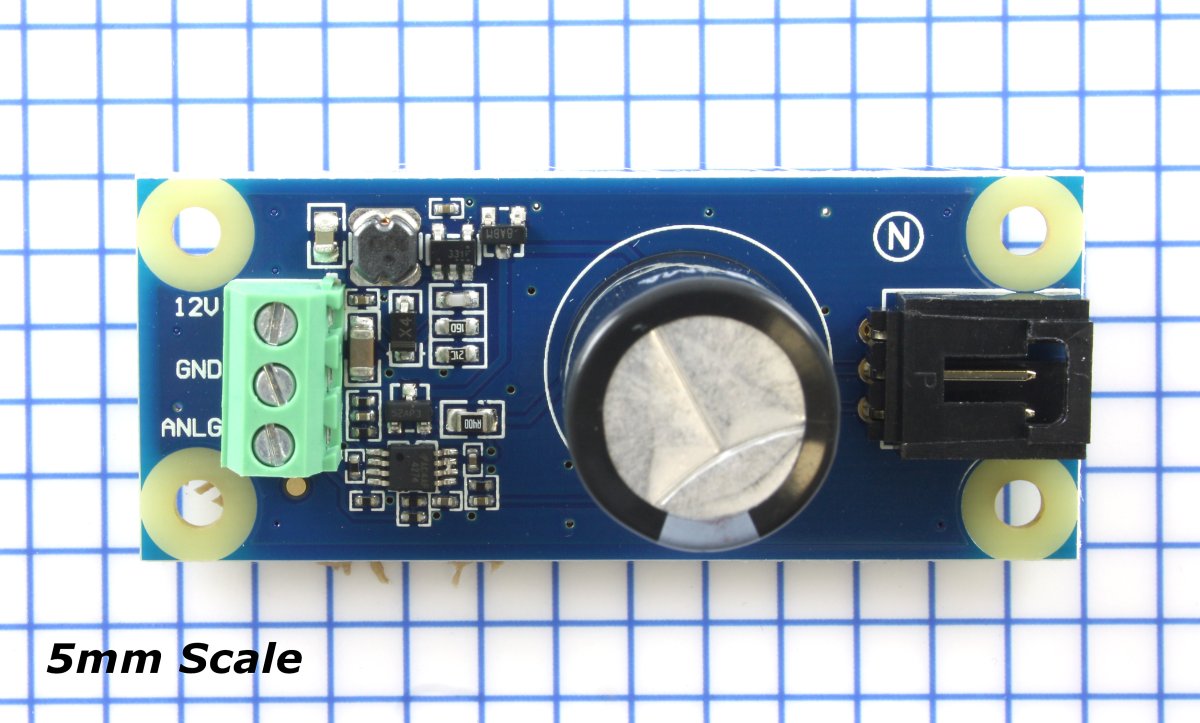


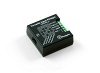
The 5V to 12V Sensor Adapter provides an easy solution for using 12V sensors with Phidgets. Simply hook up the sensor to the terminal blocks, and connect it to aPhidget Voltage Input or VINT Hub Port. The 1144 is powered by the Phidget it's plugged into, so you don't need a separate power supply for the sensor.
For a list of sensors that can be interfaced with the 1144, see the Connection & Compatibility tab.
This adapter can take the 5V it recieves from your Phidget Interface or Hub and step it up to power a 12V sensor, while also sending the 0-5V signal from the sensor back to your Interface or Hub. Here's a list of 12V proximity sensors that can make use of this adapter:
| Product | Sensor Properties | ||
|---|---|---|---|
| Part Number | Price | Sensor Type | Controlled By |
 Capacitive Proximity Sensor - 15mm
|
$30.00 | Proximity (Capacitive) | Digital Input (5V) |
 Capacitive Proximity Sensor - 8mm
|
$20.00 | Proximity (Capacitive) | Digital Input (5V) |
 Inductive Proximity Sensor - 5mm
|
$10.00 | Proximity (Inductive) | Digital Input (5V) |
And a list of 12V voltage/current/power sensors:
| Product | Physical Properties | Sensor Properties | |
|---|---|---|---|
| Part Number | Price | Recommended Wire Size | Sensor Type |
 AC Active Power Sensor 0-110V*0-15A (60Hz)
|
$187.50 | 12 - 24 AWG | Power (AC) |
 AC Active Power Sensor 0-110V*0-5A (60Hz)
|
$187.50 | 12 - 24 AWG | Power (AC) |
 AC Active Power Sensor 0-250V*0-5A (60Hz)
|
$187.50 | 12 - 24 AWG | Power (AC) |
 DC Current Sensor 0-10mA
|
$95.00 | 12 - 24 AWG | Current (DC In-Line) |
This adapter can be read by any Phidget with an Analog Input or VINT Hub port. It will connect to either one using the included Phidget cable. VINT Hub ports can behave just like Analog Inputs, but have the added flexibility of being able to be used as digital inputs, digital outputs, or ports to communicate with VINT devices. For more information about VINT, see the VINT Overview page.
| Product | Voltage Inputs | ||
|---|---|---|---|
| Part Number | Price | Number of Voltage Inputs | Voltage Input Resolution (bits) |
 VINT Hub Phidget
|
$40.00 | 6 (Shared) | *** 15 bit |
 1-Port VINT Hub Phidget
|
$26.00 | 1 (Shared) | ** 16 bit |
 VINT Hub Phidget
|
$35.00 | 6 (Shared) | * 15 bit |
 Wireless VINT Hub
|
$60.00 | 6 (Shared) | * 16 bit |
 PhidgetSBC4
|
$120.00 | 6 (Shared) | * 16 bit |
 PhidgetInterfaceKit 8/8/8
|
$80.00 | 8 | — |
 PhidgetInterfaceKit 2/2/2
|
$50.00 | 2 | 10 bit |
 8x Voltage Input Phidget
|
$20.00 | 8 | 12 bit |
 PhidgetInterfaceKit 8/8/8
|
$80.00 | 8 | 10 bit |
 PhidgetInterfaceKit 8/8/8 Mini-Format
|
$70.00 | 8 | 10 bit |
 PhidgetInterfaceKit 8/8/8 w/6 Port Hub
|
$110.00 | 8 | 10 bit |
 PhidgetTextLCD 20X2 : White : Integrated PhidgetInterfaceKit 8/8/8
|
$70.00 | 8 | 10 bit |
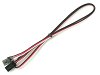
This sensor comes with its own Phidget cable to connect it to an InterfaceKit or Hub, but if you need extras we have a full list down below. You can solder multiple cables together in order to make even longer Phidget cables, but you should be aware of the effects of having long wires in your system.
| Product | Physical Properties | |
|---|---|---|
| Part Number | Price | Cable Length |
 Phidget Cable 10cm
|
$1.50 | 100 mm |
 Phidget Cable 30cm
|
$1.75 | 300 mm |
 Phidget Cable 60cm
|
$2.00 | 600 mm |
 Phidget Cable 60cm
|
$2.00 | 600 mm |
 Phidget Cable 90cm
|
$2.00 | 900 mm |
 Phidget Cable 120cm
|
$2.25 | 1.2 m |
 Phidget Cable 150cm
|
$2.50 | 1.5 m |
 Phidget Cable 180cm
|
$2.75 | 1.8 m |
 Phidget Cable 350cm
|
$3.00 | 3.5 m |
 Phidget Cable Kit
|
$10.00 | 80 mm |
 Phidget Cable Extension Wire 22AWG
|
$0.75/Meter | — |
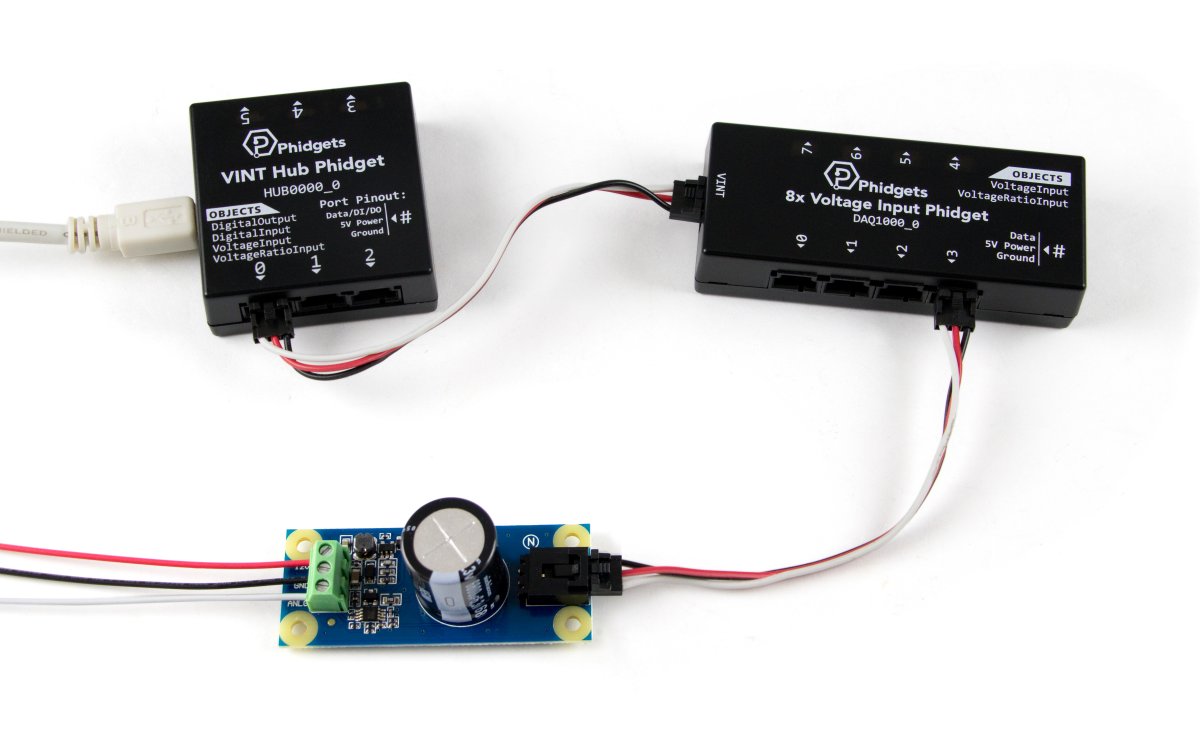
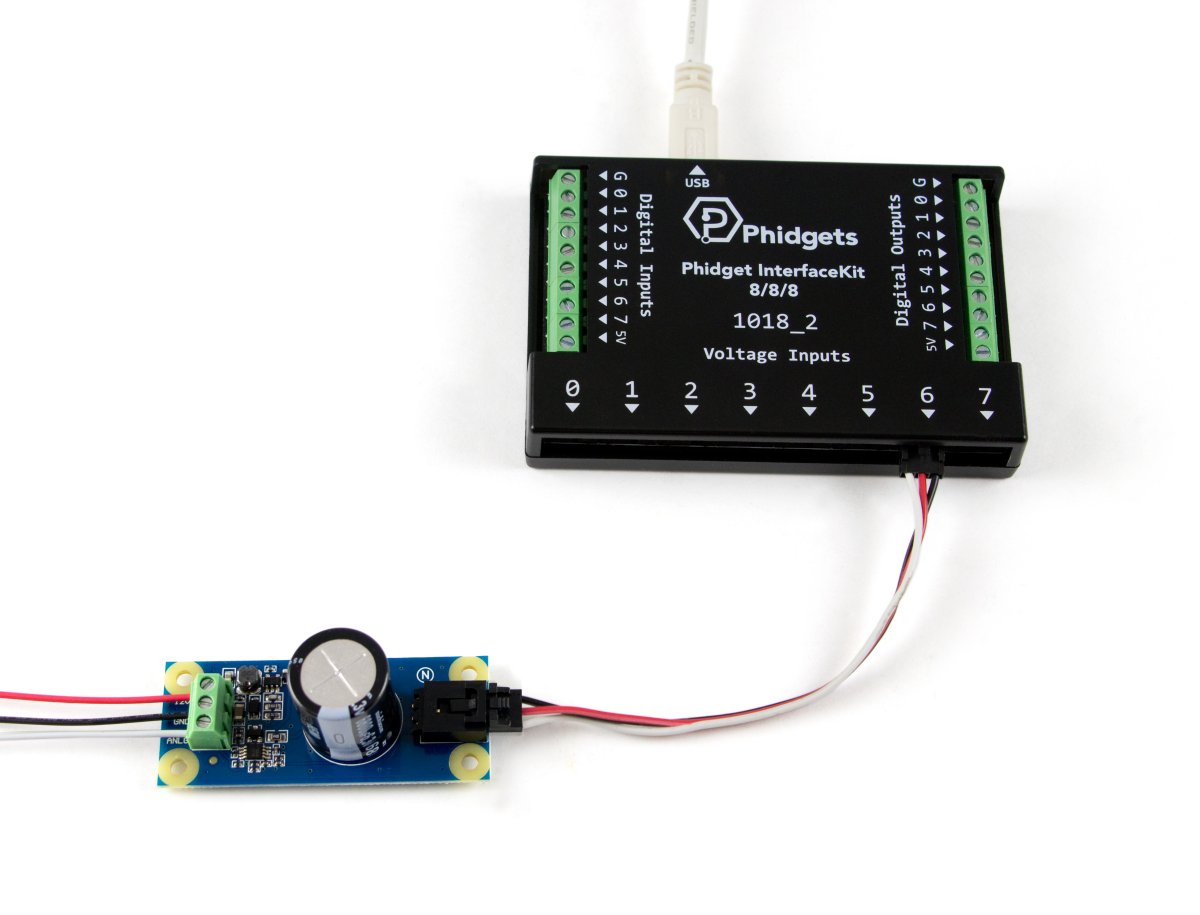
Welcome to the 1144 user guide! In order to get started, make sure you have the following hardware on hand:
Next, you will need to connect the pieces:
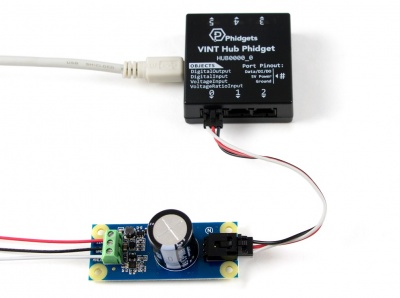
Now that you have everything together, let's start using the 1144!
In order to demonstrate the functionality of the 1144, we will connect it to the HUB0000, and then run an example using the Phidget Control Panel on a Windows machine.
The Phidget Control Panel is available for use on both macOS and Windows machines. If you would like to follow along, first take a look at the getting started guide for your operating system:
Linux users can follow the getting started with Linux guide and continue reading here for more information about the 1144.
After plugging in the 1144 into the HUB0000, and the HUB0000 into your computer, open the Phidget Control Panel. You will see something like this:
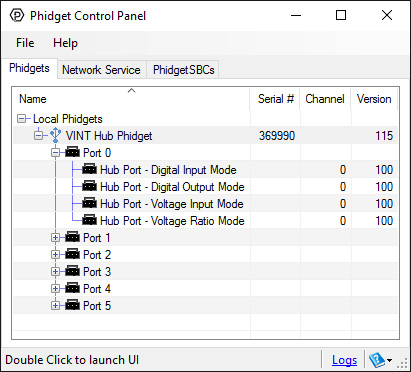
The Phidget Control Panel will list all connected Phidgets and associated objects, as well as the following information:
The Phidget Control Panel can also be used to test your device. Double-clicking on an object will open an example.
Double-click on a Voltage Input object in order to run the example:
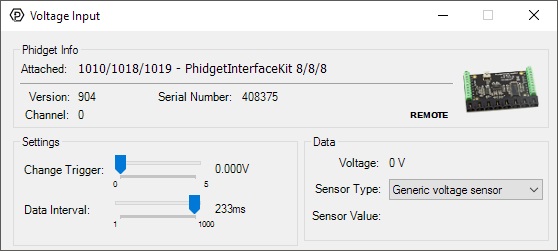
General information about the selected object will be displayed at the top of the window. You can also experiment with the following functionality:
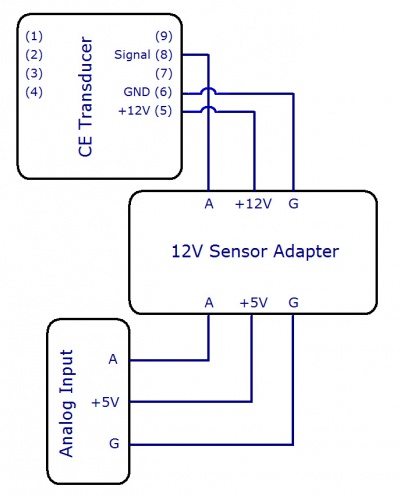
To interface with a CE transducer sold by us, simply connect the wires as shown in the following image.
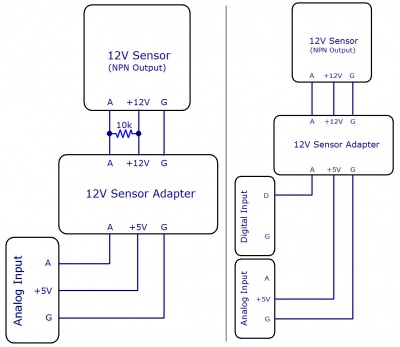
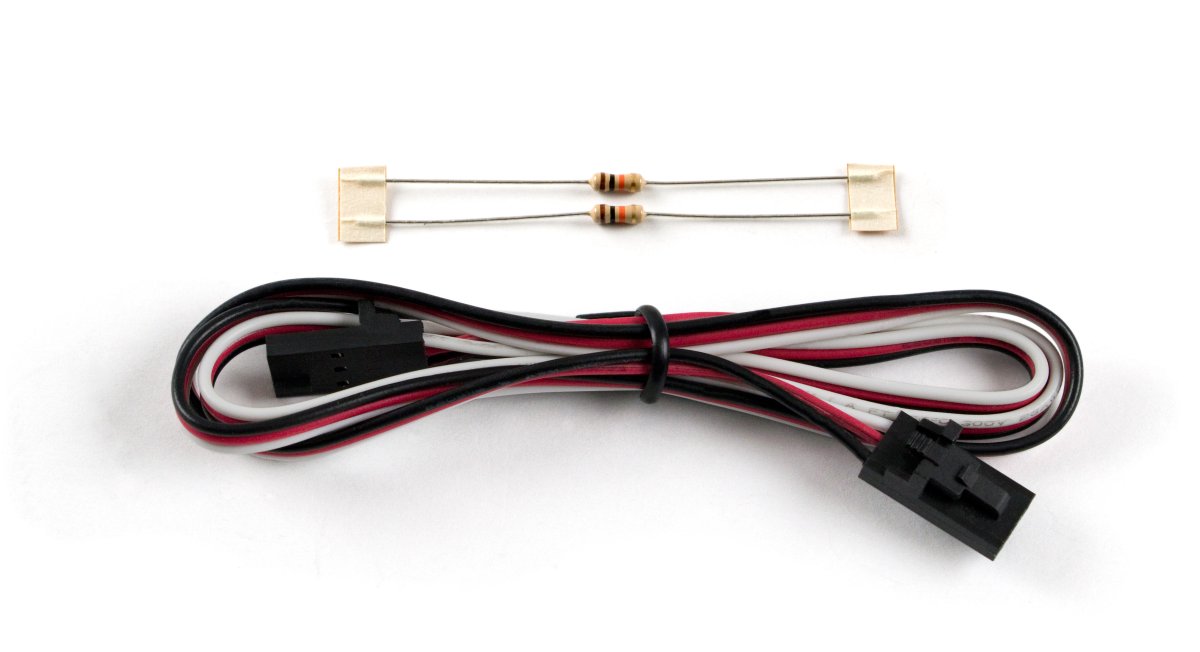
In order to interface with a 12V sensor with an NPN output, you need a 12V sensor adapter and an Interface Kit. There are two ways to connect them, as shown in the figures. The first way simply involves connecting the 12V sensor adapter to an analog input on the Interface Kit, and then attaching the 12V sensor to the adapter with a 10kΩ pull-up resistor placed across the +12V and analog signal lines, as pictured. There should be two 10kΩ resistors packaged with your 12V sensor adapter.
When using this setup, the voltage input will show a voltage of about 5V when the NPN sensor is open, and a much lower value (less than 1V) when the sensor is closed. Likewise, if you're using an active-low digital input, the input will be low when the NPN sensor is open, and high when it is closed.
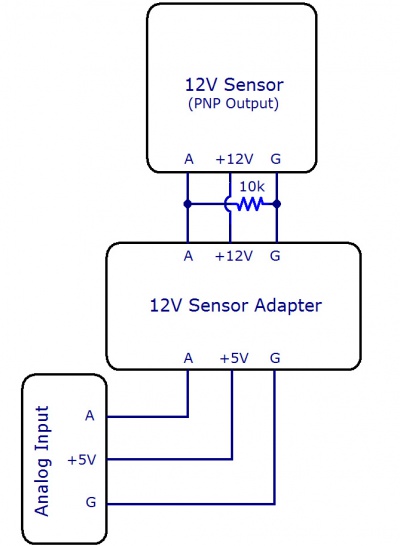
In order to interface with a 12V sensor with an PNP output, you need a 12V sensor adapter and an Interface Kit. Simply connect the 12V sensor adapter to an analog input on the HUB0000 (, and then attach the 12V sensor to the adapter with a 10kΩ pull-down resistor placed across the ground and analog signal lines, as pictured. There should be two 10kΩ resistors packaged with your 12V sensor adapter.
The 1144 returns a voltage between 0 and 5 volts. Check the documentation for your specific sensor to determine the formula for converting from return voltage to the measured value.
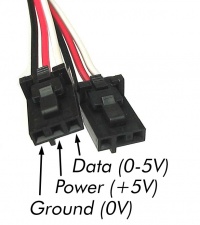
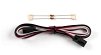
The Phidget Cable is a 3-pin, 0.100 inch pitch locking connector. Pictured here is a plug with the connections labelled. The connectors are commonly available - refer to the Analog Input Primer for manufacturer part numbers.
| Sensor Properties | |
|---|---|
| Controlled By | Voltage Input (0-5V) |
| Sensor Output Type | Non-Ratiometric |
| Electrical Properties | |
| Available External Voltage | 12 V DC |
| Available External Current | 20 mA |
| Supply Voltage Min | 4.8 V DC |
| Supply Voltage Max | 5.3 V DC |
| Current Consumption Max | 50 mA |
| Output Impedance | 1 kΩ |
| Physical Properties | |
| Recommended Wire Size | 16 - 26 AWG |
| Operating Temperature Min | -40 °C |
| Operating Temperature Max | 85 °C |
| Customs Information | |
| Canadian HS Export Code | 8473.30.00 |
| American HTS Import Code | 8473.30.11.80 |
| Country of Origin | CN (China) |
| Date | Board Revision | Device Version | Comment |
|---|---|---|---|
| October 2012 | 0 | N/A | Product Release |
This device doesn't have an API of its own. It is controlled by opening a VoltageInput channel on the Phidget that it's connected to. For a list of compatible Phidgets with Voltage Inputs, see the Connection & Compatibility tab.
You can find details for the VoltageInput API on the API tab for the Phidget that this adapter connects to.