Spatial Guide
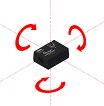
Phidget Spatials combine data from accelerometers, magneometers, and gyroscopes into one sensor. This guide explains how the sensors are combined using AHRS, what you can do with this data.
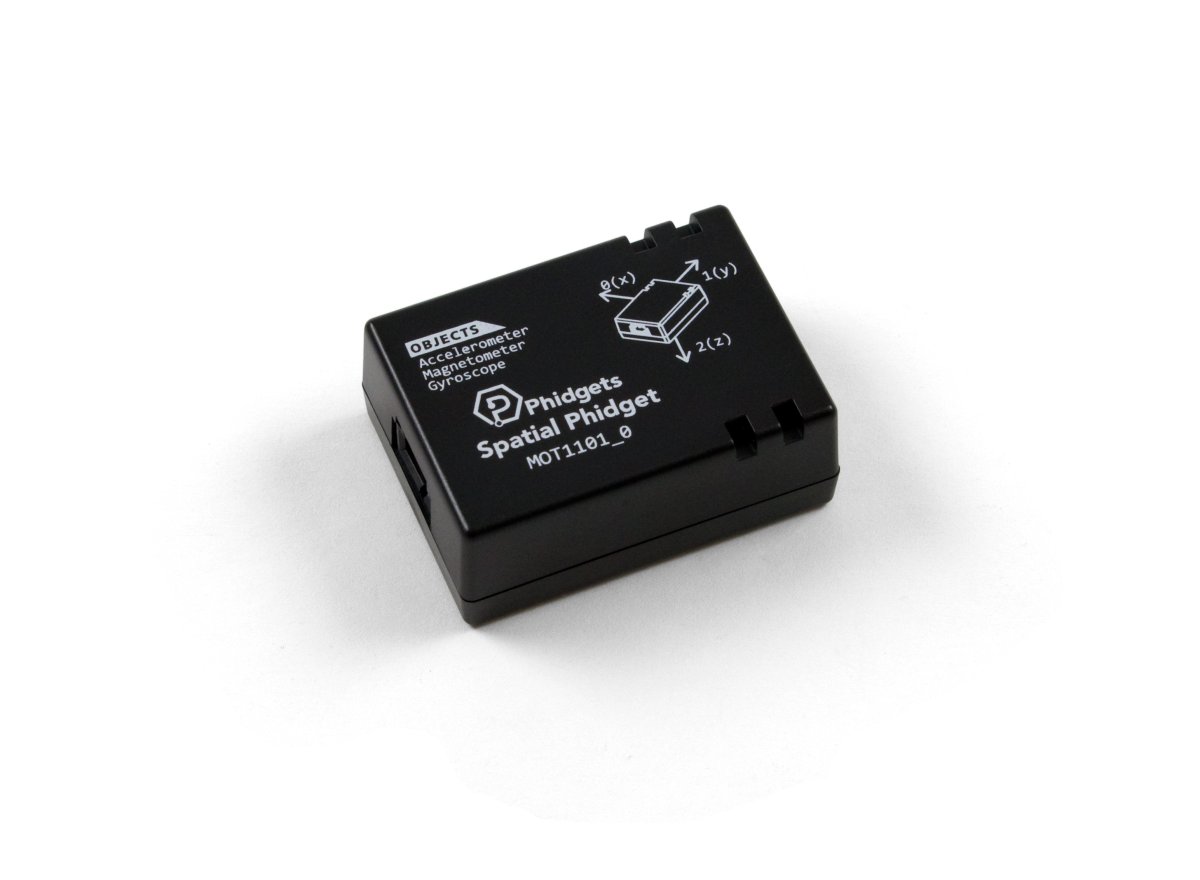
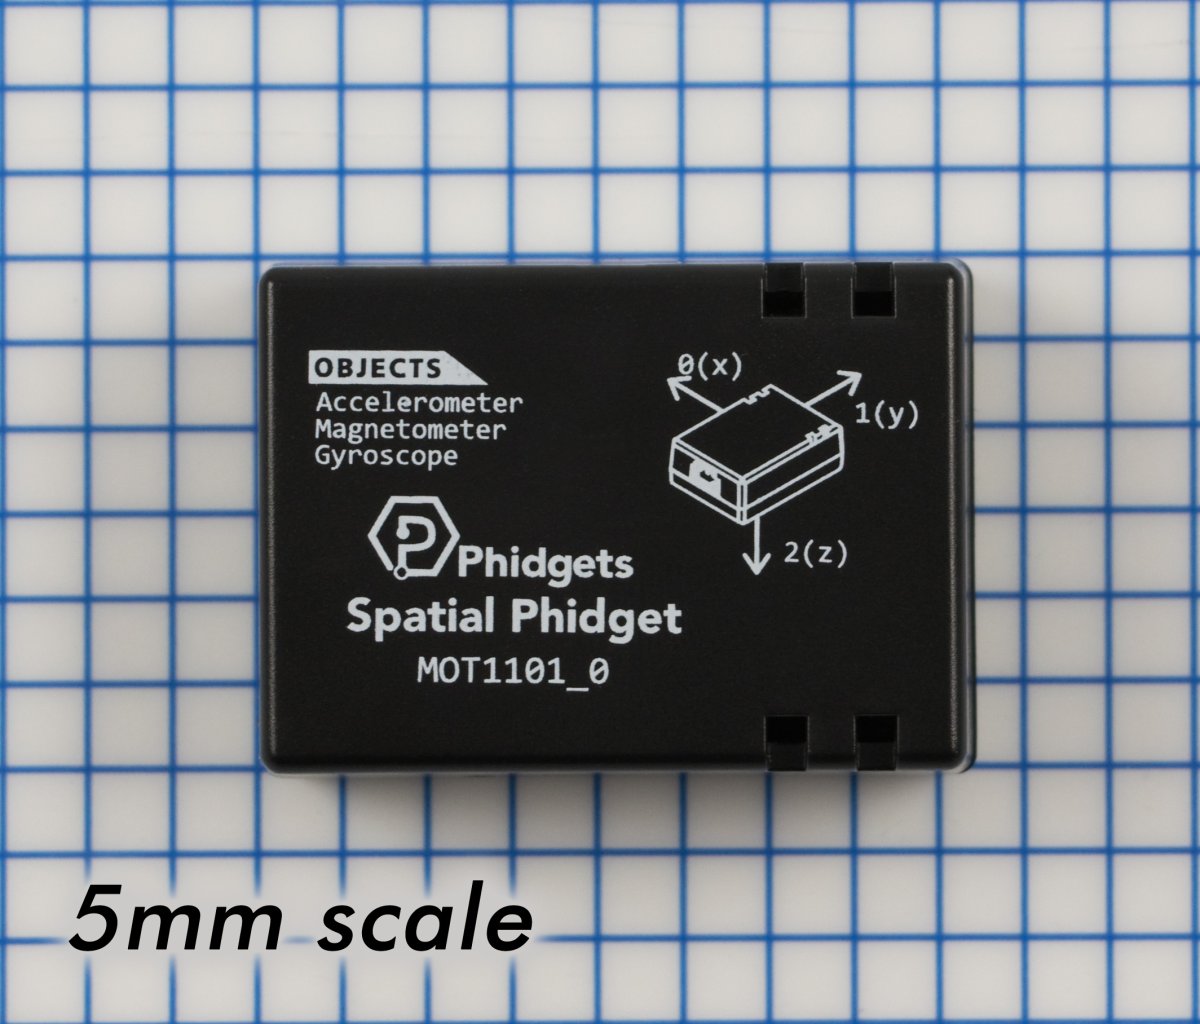
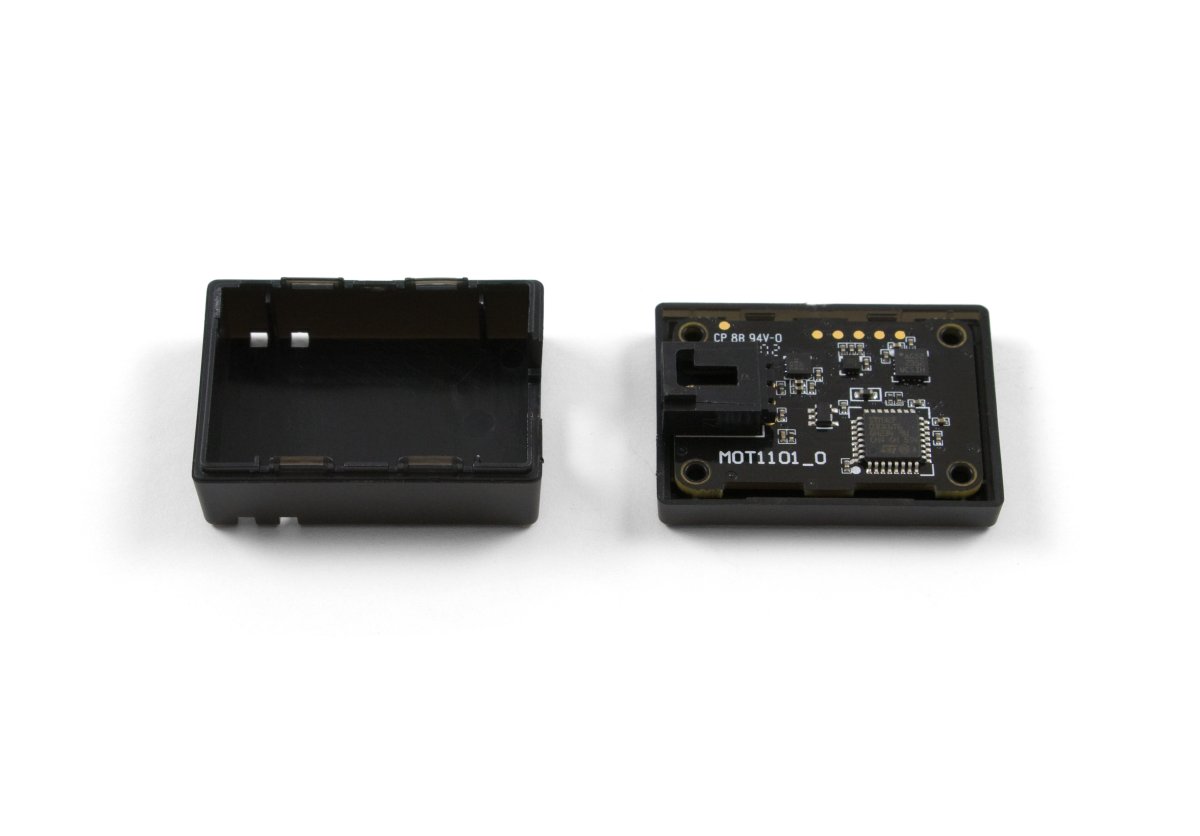


The MOT1101 combines an accelerometer, gyroscope, and magnetometer. You can use the data from each of these sensors separately or combine them to track the movement and direction of a robot or vehicle, or to detect movement, tilt or vibration of an object. This Phidget connects to your computer through a VINT Hub.
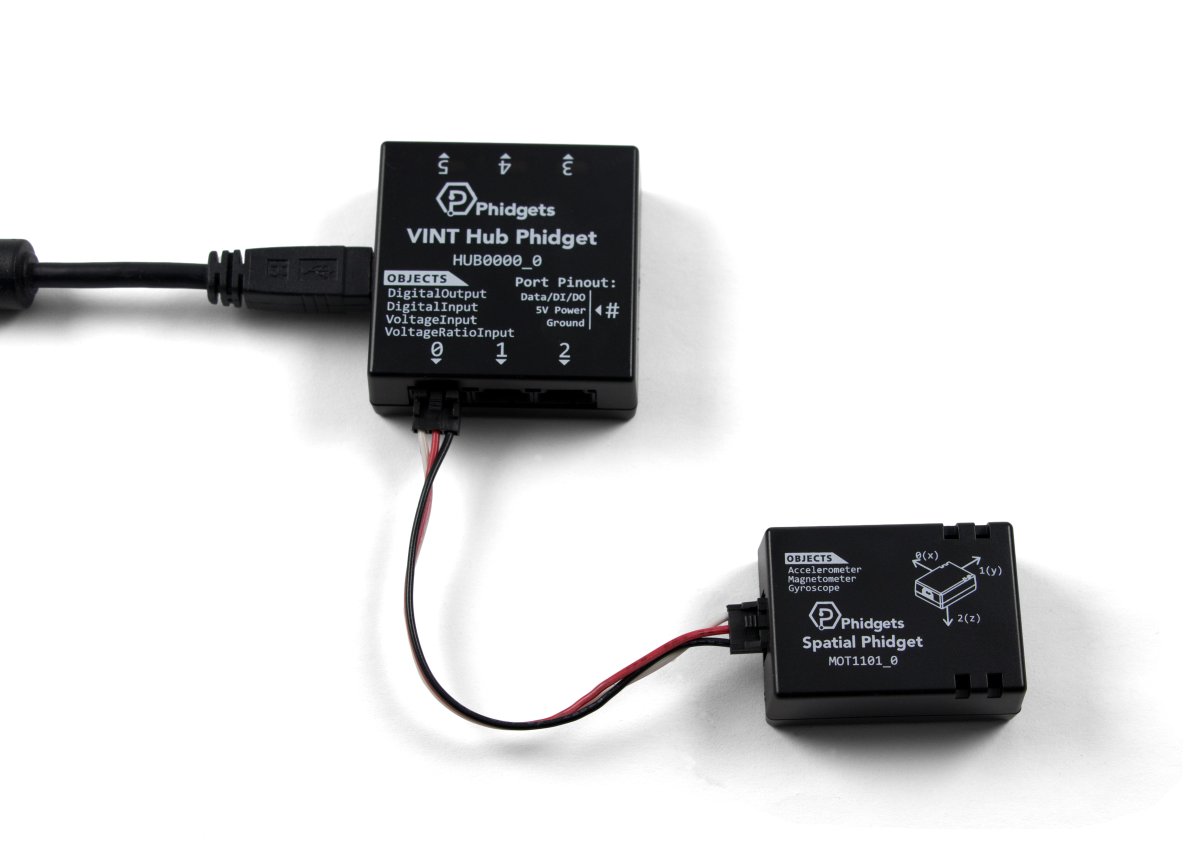
This Phidget is a smart device that must be controlled by a VINT Hub. For more information about VINT, have a look at the VINT Overview page. You can use a Phidget Cable to simply and easily connect the two devices. Here's a list of all of the different VINT Hubs currently available:
| Product | Board Properties | |||
|---|---|---|---|---|
| Part Number | Price | Number of VINT Ports | VINT Communication Speed Max | Controlled By |
 VINT Hub Phidget
|
$40.00 | 6 | 1 Mbit/s | USB (Mini-USB) |
 1-Port VINT Hub Phidget
|
$26.00 | 1 | 1 Mbit/s | USB (USB-A) |
 VINT Hub Phidget
|
$35.00 | 6 | 1 Mbit/s | USB (Mini-USB) |
 Wireless VINT Hub
|
$60.00 | 6 | 100 kbit/s | Local Network (Ethernet or Wi-Fi) |
 PhidgetSBC4
|
$120.00 | 6 | 100 kbit/s | — |
Use a Phidget cable to connect this device to the hub. You can solder multiple cables together in order to make even longer Phidget cables, but you should be aware of the effects of having long wires in your system.
| Product | Physical Properties | |
|---|---|---|
| Part Number | Price | Cable Length |
 Phidget Cable 10cm
|
$1.50 | 100 mm |
 Phidget Cable 30cm
|
$1.75 | 300 mm |
 Phidget Cable 60cm
|
$2.00 | 600 mm |
 Phidget Cable 60cm
|
$2.00 | 600 mm |
 Phidget Cable 90cm
|
$2.00 | 900 mm |
 Phidget Cable 120cm
|
$2.25 | 1.2 m |
 Phidget Cable 150cm
|
$2.50 | 1.5 m |
 Phidget Cable 180cm
|
$2.75 | 1.8 m |
 Phidget Cable 350cm
|
$3.00 | 3.5 m |
 Phidget Cable Kit
|
$10.00 | 80 mm |
 Phidget Cable Extension Wire 22AWG
|
$0.75/Meter | — |
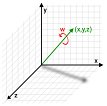
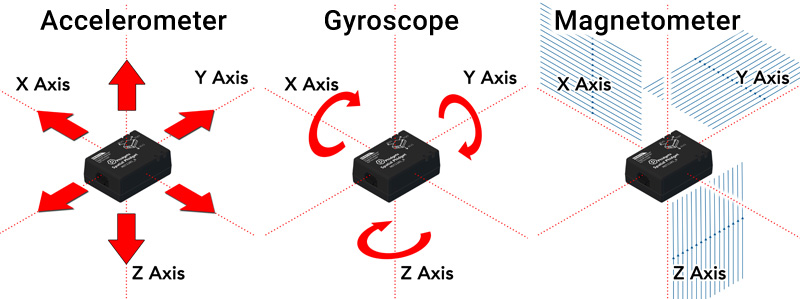
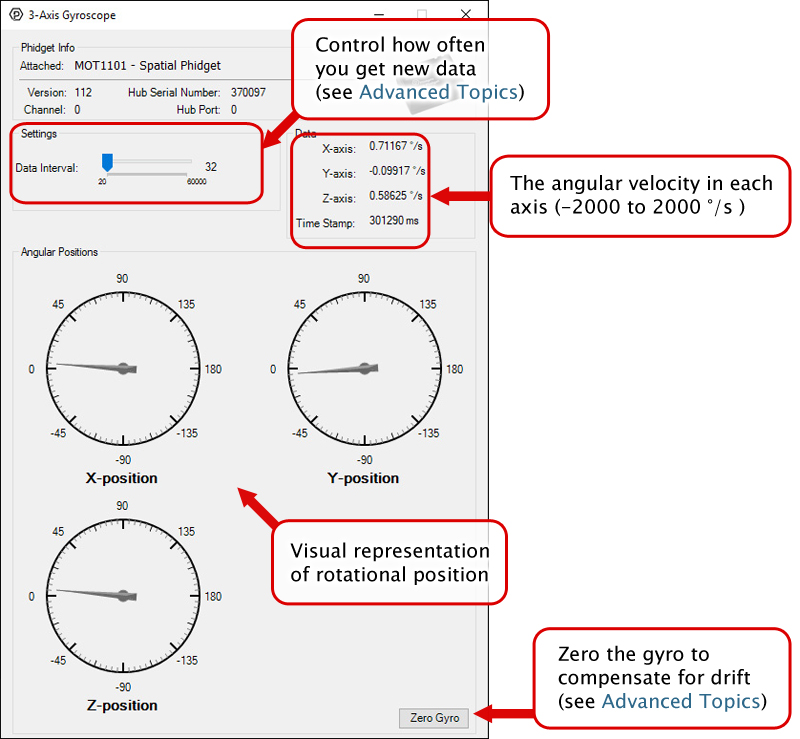
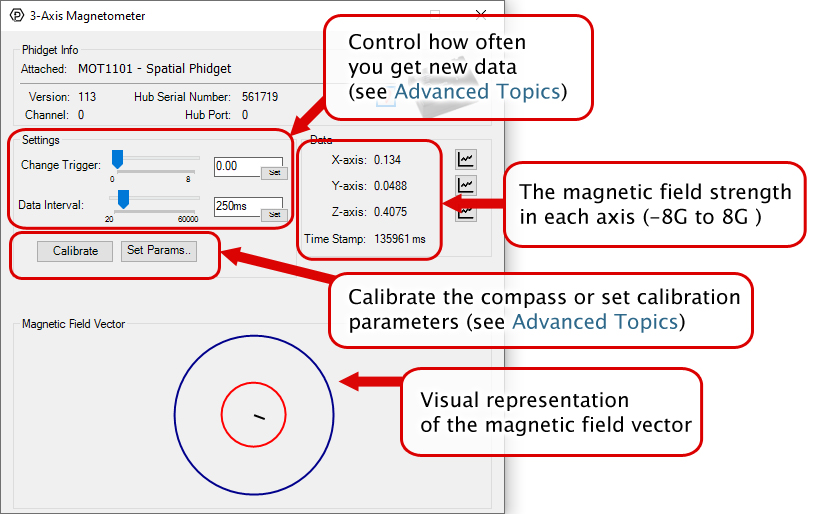
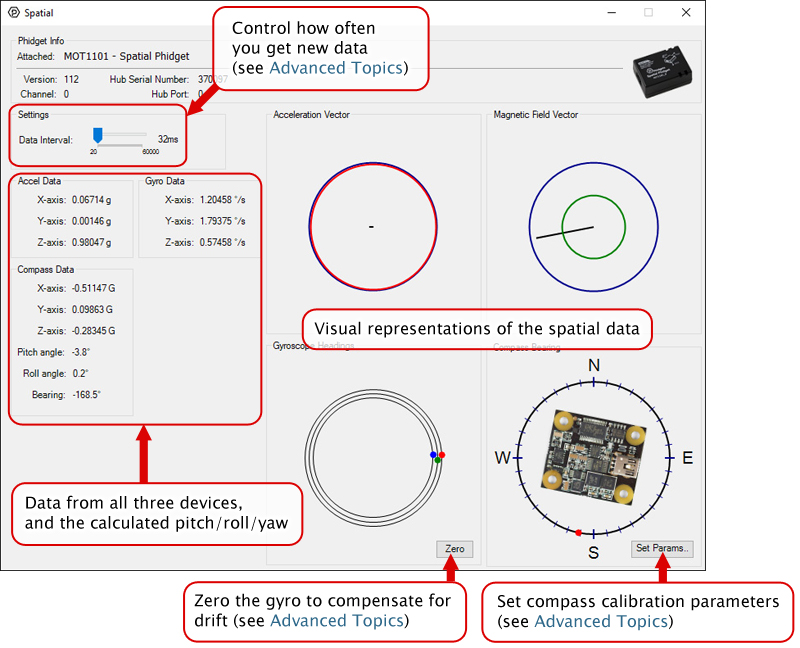
The MOT1101 combines an accelerometer (±8g), gyroscope (± 2000°/s), and magnetometer (± 8 G). Each sensor measures in the x, y, and z-axis. You can also use the Spatial object to obtain data from all three sensors, synchronized to the same timestamp.
You can use your Control Panel to explore your Phidget's channels.
1. Open your Control Panel, and you will find the following channels:
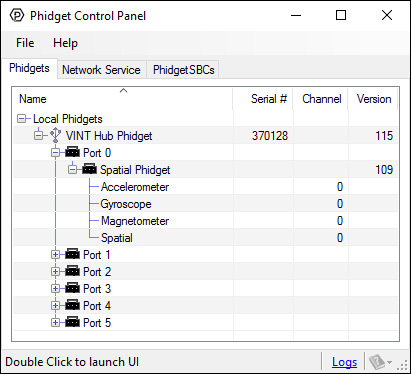
2. Double click on a channel to open an example program. Each channel belongs to a different channel class:
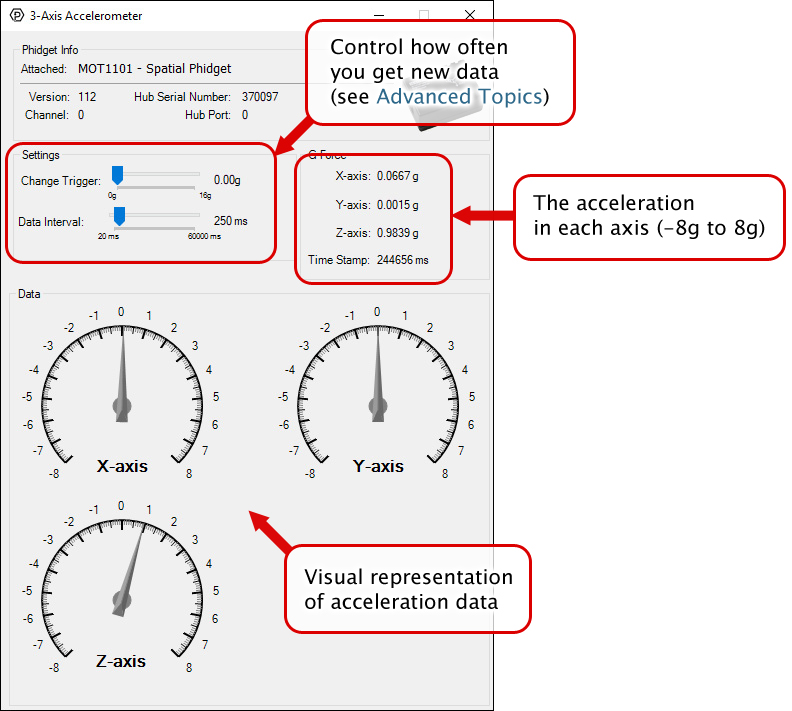
In your Control Panel, double click on "Accelerometer":
In your Control Panel, double click on "Gyroscope":
In your Control Panel, double click on "Magnetometer":
In your Control Panel, double click on "Spatial":
Before you open a Phidget channel in your program, you can set these properties to specify which channel to open. You can find this information through the Control Panel.
1. Open the Control Panel and double-click on the red map pin icon:

2. The Addressing Information window will open. Here you will find all the information you need to address your Phidget in your program.

See the Phidget22 API for your language to determine exact syntax for each property.
Note: Graphing and logging is currently only supported in the Windows version of the Phidget Control Panel.
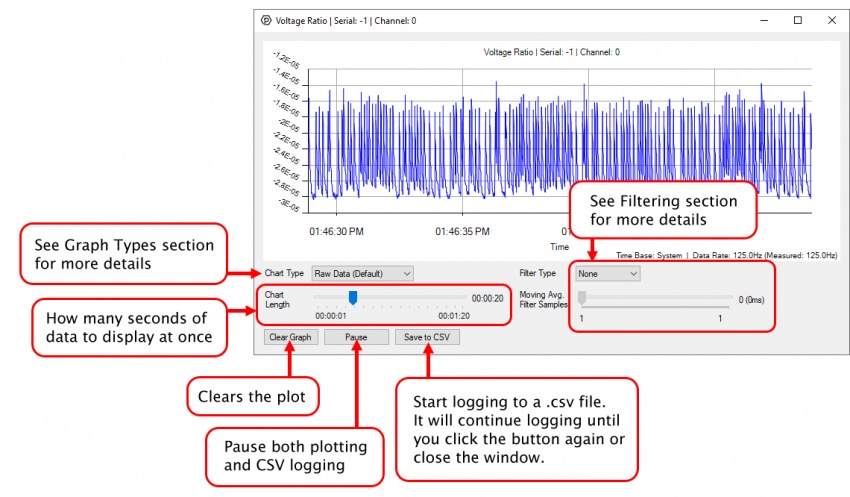
In the Phidget Control Panel, open the channel for your device and click on the ![]() icon next to the data type that you want to plot. This will open up a new window:
icon next to the data type that you want to plot. This will open up a new window:
If you need more complex functionality such as logging multiple sensors to the same sheet or performing calculations on the data, you'll need to write your own program. Generally this will involve addressing the correct channel, opening it, and then creating an Event Handler and adding graphing/logging code to it.
The quickest way to get started is to download some sample code for your desired programming language and then search google for logging or plotting in that language (e.g. "how to log to csv in python") and add the code to the existing change handler.
You can perform filtering on the raw data in order to reduce noise in your graph. For more information, see the Control Panel Graphing page.
You can perform a transform on the incoming data to get different graph types that may provide insights into your sensor data. For more information on how to use these graph types, see the Control Panel Graphing page.
The Change Trigger is the minimum change in the sensor data needed to trigger a new data event.
The Data Interval is the time (in ms) between data events sent out from your Phidget.
The Data Rate is the reciprocal of Data Interval (measured in Hz), and setting it will set the reciprocal value for Data Interval and vice-versa.
You can modify one or both of these values to achieve different data outputs. You can learn more about these properties here.
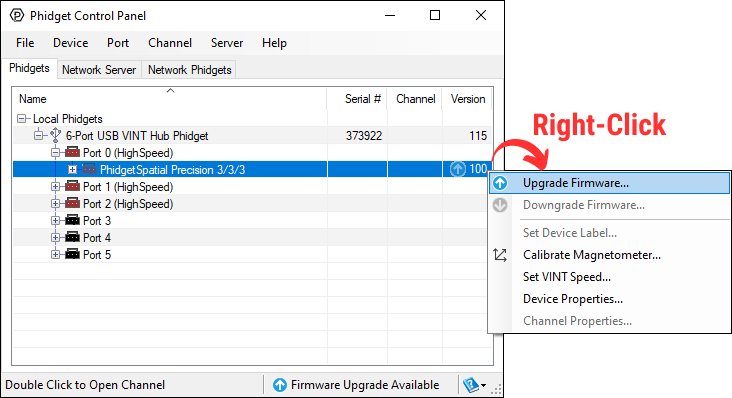
Firmware Upgrade
MacOS users can upgrade device firmware by double-clicking the device row in the Phidget Control Panel.
Linux users can upgrade via the phidget22admin tool (see included readme for instructions).
Windows users can upgrade the firmware for this device using the Phidget Control Panel as shown below.
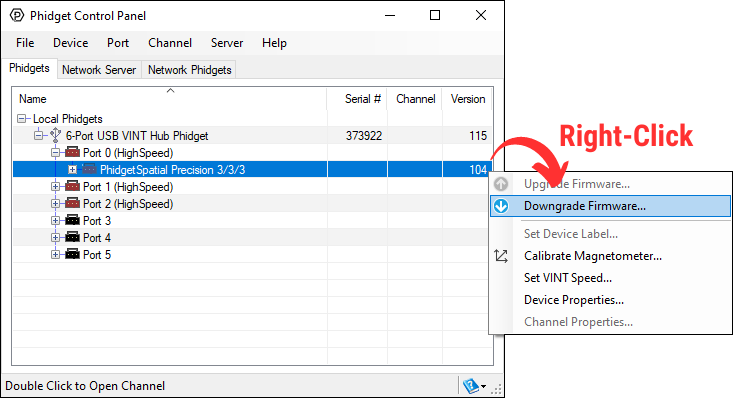
Firmware Downgrade
Firmware upgrades include important bug fixes and performance improvements, but there are some situations where you may want to revert to an old version of the firmware (for instance, when an application you're using is compiled using an older version of phidget22 that doesn't recognize the new firmware).
MacOS and Linux users can downgrade using the phidget22admin tool in the terminal (see included readme for instructions).
Windows users can downgrade directly from the Phidget Control Panel if they have driver version 1.9.20220112 or newer:
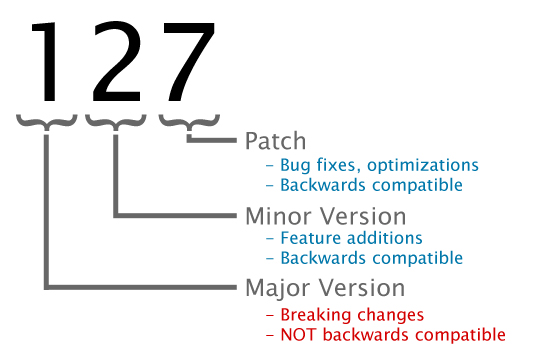
Firmware Version Numbering Schema
Phidgets device firmware is represented by a 3-digit number. For firmware patch notes, see the device history section on the Specifications tab on your device's product page.
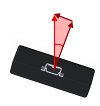
Phidget Spatials are excellent at detecting and measuring motion. Mounting your Phidget Spatial correctly will ensure you get the most accurate results possible.
We recommend mounting the board in its enclosure, directly to your system using M2 bolts. Follow these steps:
Ensure the bolts are tight enough to prevent the Phidget Spatial from moving, but not so tight that they strain the board. Any strain on the board can introduce unwanted measurement errors.
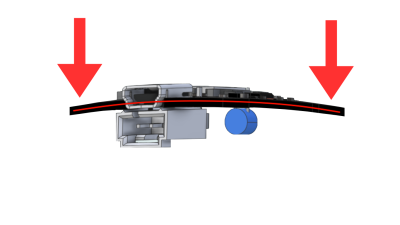
We recommend using a thread locker on your bolts to prevent them from slowly moving over time. This is especially important in systems that are exposed to vibrations.
| Board Properties | |
|---|---|
| Controlled By | VINT |
| Driver Support | Phidget22 |
| VINT Communication Speed Max | 100 kbit/s |
| Accelerometer | |
| Acceleration Measurement Max | ± 8 g |
| Acceleration Measurement Resolution | 1 mg |
| Accelerometer Noise | ± 5 mg |
| Sampling Interval Max | 60 s/sample |
| Sampling Interval Min | 20 ms/sample |
| Gyroscope | |
| Gyroscope Speed Max | ± 2000°/s |
| Gyroscope Resolution | * 0.07°/s |
| Gyroscope Noise | ± 0.5°/s |
| Sampling Interval Max | 60 s/sample |
| Sampling Interval Min | 20 ms/sample |
| Magnetometer | |
| Magnetic Field Max | ± 8 G |
| Magnetometer Resolution | 300 μG |
| Magnetometer Noise | ± 7.5 mG |
| Sampling Interval Max | 60 s/sample |
| Sampling Interval Min | 20 ms/sample |
| Electrical Properties | |
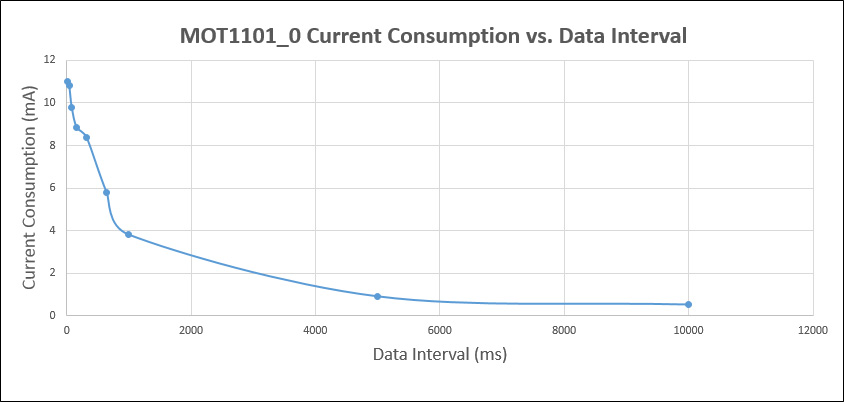
| Current Consumption Max | ** 11.5 mA |
| Current Consumption Min | 155 μA |
| Physical Properties | |
| Operating Temperature Min | -30 °C |
| Operating Temperature Max | 85 °C |
| Customs Information | |
| Canadian HS Export Code | 8471.80.00 |
| American HTS Import Code | 8471.80.40.00 |
| Country of Origin | CN (China) |
* - Gyroscope resolution varies with angular rate. See the table below for details.
| Angular Rate (°/s) | Resolution (°/s) |
|---|---|
| 0 - 250 | 0.00875 |
| 251 - 500 | 0.0175 |
| 501 - 2000 | 0.07 |
** - Current consumption varies depending on selected data interval. See the graph below for details.
| Date | Board Revision | Device Version | Comment |
|---|---|---|---|
| January 2018 | 0 | 112 | Product Release |
| January 2018 | 0 | 113 | Fixed issue occurring when DataInterval is set before Enable |
| Channel Name | API | Channel |
|---|---|---|
| 3-Axis Accelerometer | Accelerometer | 0 |
| 3-Axis Gyroscope | Gyroscope | 0 |
| 3-Axis Magnetometer | Magnetometer | 0 |
| Spatial | Spatial | 0 |
| API | Detail | Language | OS | |
|---|---|---|---|---|
| Accelerometer | Visual Studio GUI | C# | Windows | Download |
| Accelerometer | Objective-C | macOS | Download | |
| Accelerometer | Swift | macOS | Download | |
| Accelerometer | Swift | iOS | Download | |
| Accelerometer | Visual Basic | Windows | Download | |
| Accelerometer | Max | Multiple | Download | |
| Gyroscope | Visual Studio GUI | C# | Windows | Download |
| Gyroscope | Objective-C | macOS | Download | |
| Gyroscope | Swift | macOS | Download | |
| Gyroscope | Swift | iOS | Download | |
| Gyroscope | Visual Basic | Windows | Download | |
| Gyroscope | Max | Multiple | Download | |
| Magnetometer | Visual Studio GUI | C# | Windows | Download |
| Magnetometer | Objective-C | macOS | Download | |
| Magnetometer | Swift | macOS | Download | |
| Magnetometer | Swift | iOS | Download | |
| Magnetometer | Visual Basic | Windows | Download | |
| Magnetometer | Max | Multiple | Download | |
| Spatial | Compass Calibrator | C | Multiple | Download |
| Spatial | Visual Studio GUI | C# | Windows | Download |
| Spatial | Compass Calibrator | C# | Windows | Download |
| Spatial | Spatial AHRS/IMU | C# | Windows | Download |
| Spatial | Objective-C | macOS | Download | |
| Spatial | Swift | macOS | Download | |
| Spatial | Swift | iOS | Download | |
| Spatial | Visual Basic | Windows | Download | |
| Spatial | Max | Multiple | Download |
| Product | Accelerometer | Gyroscope | Magnetometer | ||||
|---|---|---|---|---|---|---|---|
| Part Number | Price | Acceleration Measurement Max | Acceleration Measurement Resolution | Gyroscope Speed Max | Gyroscope Resolution | Magnetometer Resolution | Magnetic Field Max |
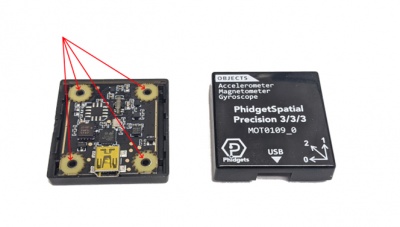
 PhidgetSpatial Precision 3/3/3
|
$100.00 | ± 16 g | 30 μg | — | 0.004°/s | 1.5 mG | ± 8 G |
 PhidgetAccelerometer
|
$40.00 | ± 8 g | 250 μg | — | — | — | — |
 Spatial Phidget
|
$30.00 | ± 8 g | 250 μg | — | 0.07°/s | 1.5 mG | ± 8 G |
 Accelerometer Phidget
|
$20.00 | ± 8 g | 1 mg | — | — | — | — |
 PhidgetSpatial Precision 0/0/3 High Resolution
|
$80.00 | ± 2 g | 76.3 μg | — | — | — | — |