Autonomous Light Tracking Rover
Some light autonomy
Intermediateby Ben
- The Getting Started Kit and Rover Kit. For more information, check out the Student Page
- The Light Sensor Tutorial
For more information, check out the Student Page.
Goal
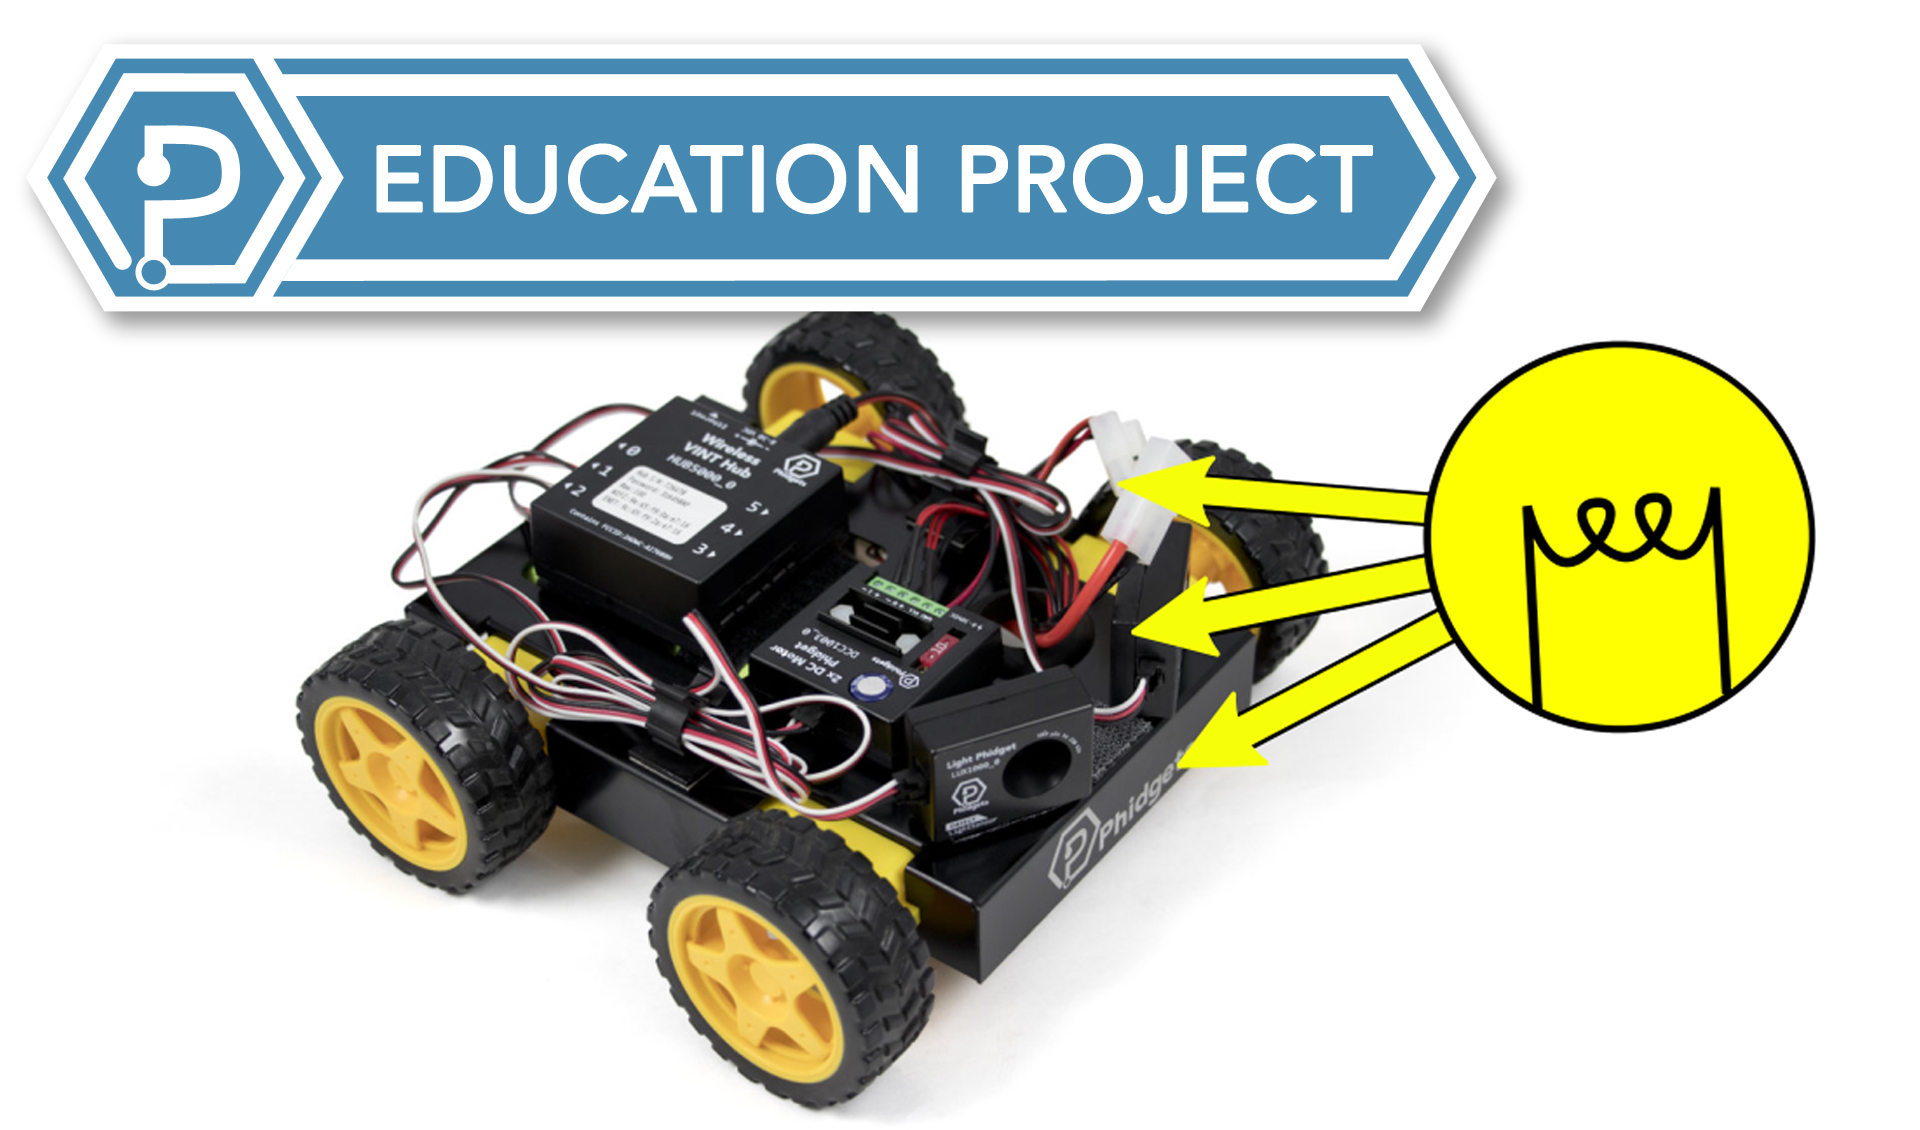
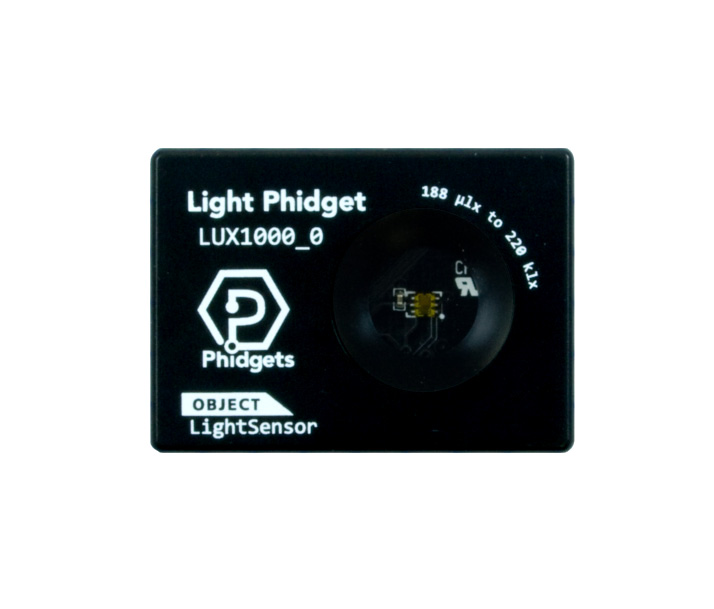
The focus of this project is the use of the Light Phidget. When completed, your rover will be able to turn itself towards the brightest light source in its field of view.
Parts Inventory
Hardware
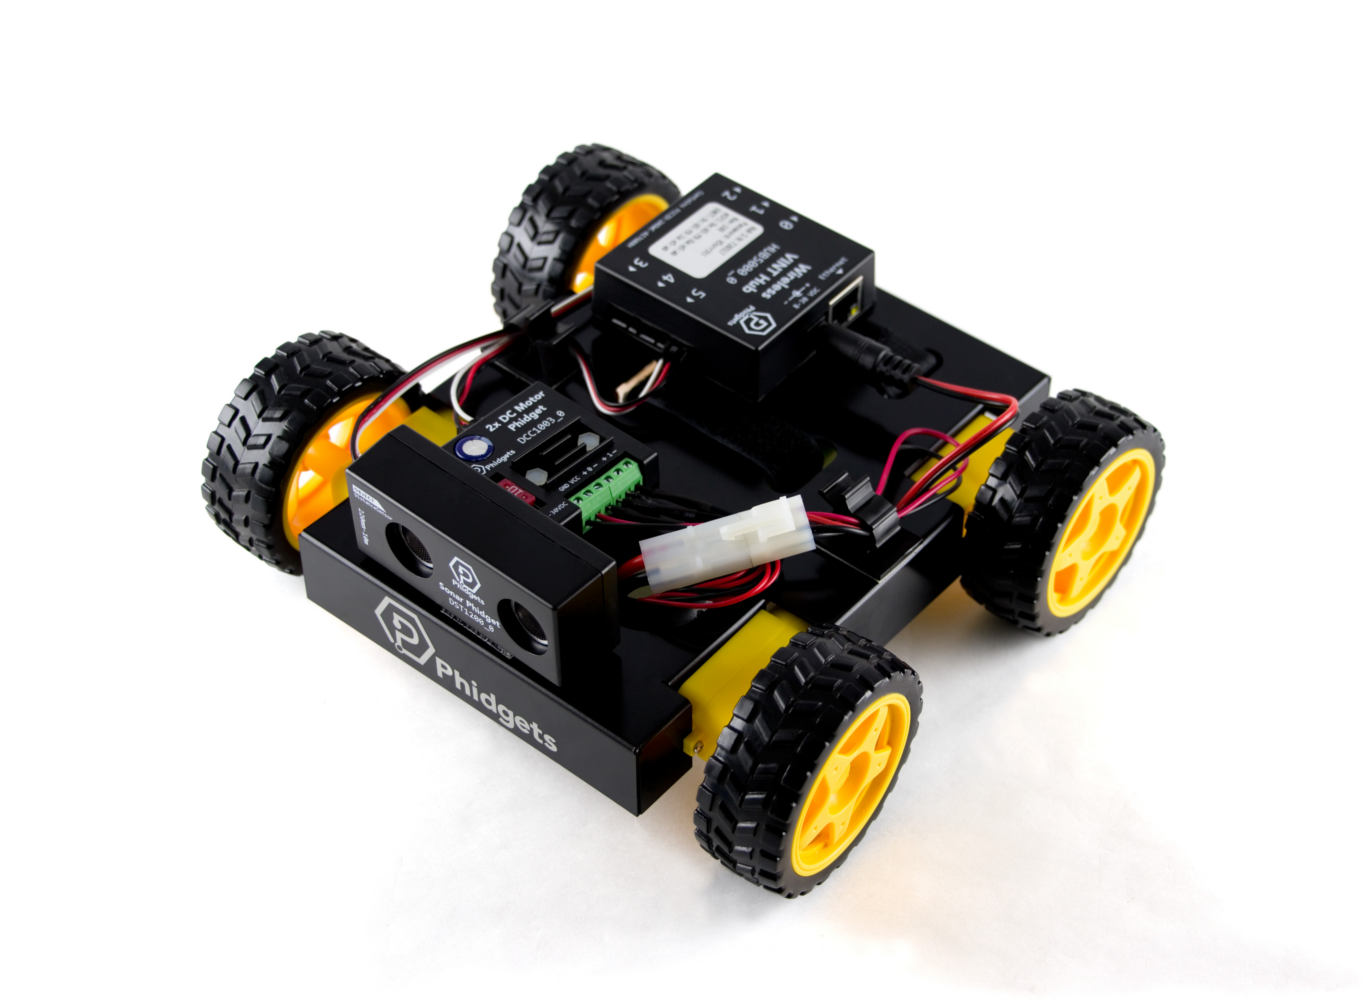
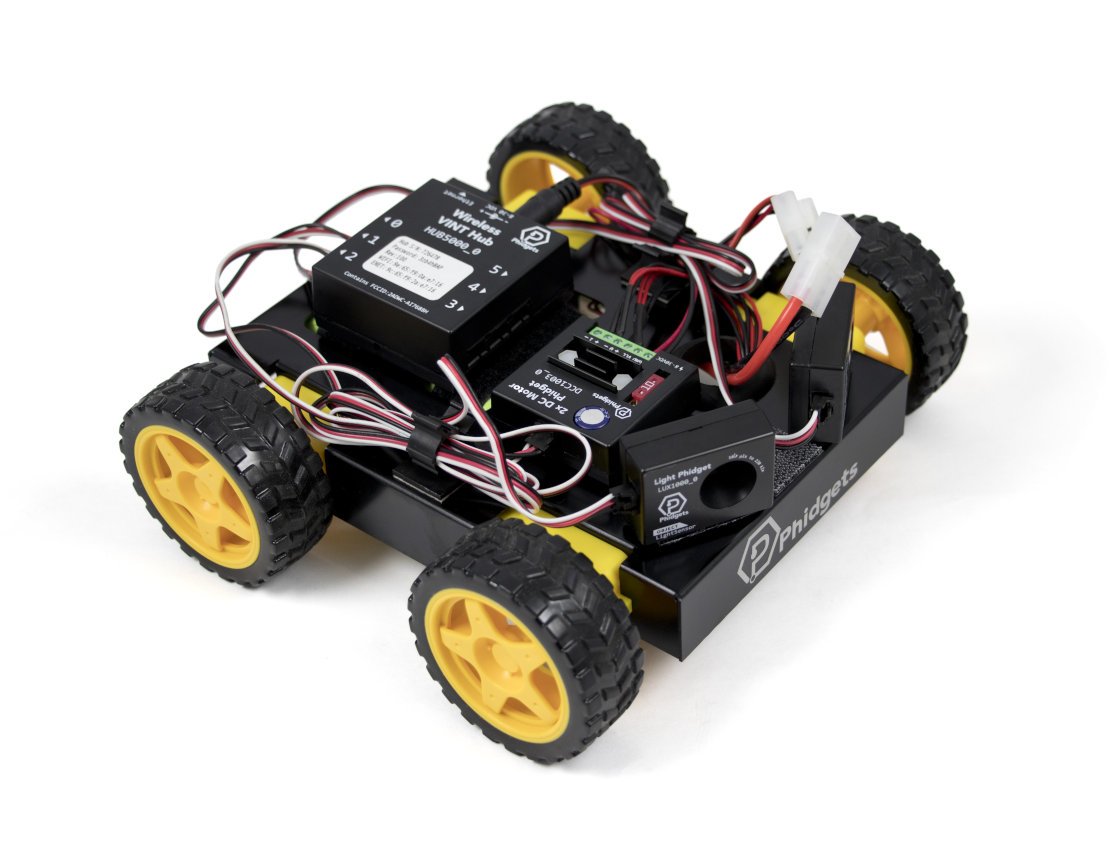
- Begin with a fully assembled Rover Kit.
- Remove the Sonar Phidget.
- Mount the two Light Phidgets on an angle, facing outward as shown in the image. Mounting the Light Phidgets on an angle increases the field of vision of the robot.
Interpreting Data
To create an autonomous vehicle, the motor commands must be derived entirely from the onboard Light Phidgets. By measuring the difference between the light intensity each Light Phidget recieves, you can create a simple algorithm which will turn the rover towards the brighter side. A greater difference between the readings from the Light Phidgets will result in a larger magnitude of turning correction.
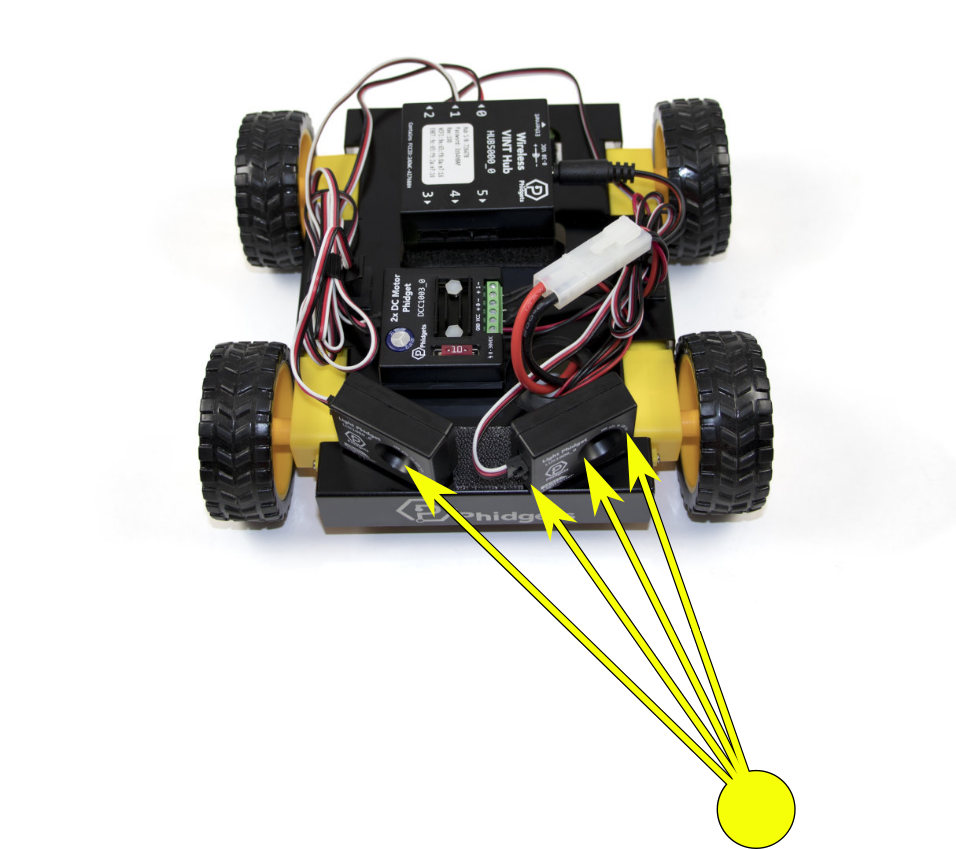
For example, in the image above, the left Light Phidget receives a greater share of light. With this input, the rover should turn to the left.
Software
Step 1: Setup
You will need to set up your four Phidgets. Code samples are provided bellow. For more assistance please see the flow chart to the right.
public static void main(String[] args) throws PhidgetException {
Net.addServer("", "192.168.100.1", 5661, "", 0);
LightSensor leftLight = new LightSensor();
LightSensor rightLight = new LightSensor();
DCMotor leftMotors = new DCMotor();
DCMotor rightMotors = new DCMotor();
// TODO: Address Objects, Register for Events, Open Objects,
// Set Light Objects Data Interval to Min,
// Set DCMotor Objects Acceleration to Max
}
def main():
Net.addServer("hub5000", "192.168.100.1", 5661, "", 0)
leftLight = LightSensor()
rightLight = LightSensor()
leftMotors = DCMotor()
rightMotors = DCMotor()
# TODO: Address Objects, Register for Events, Open Objects,
# Set Light Objects Data Interval to Min,
# Set DCMotor Objects Acceleration to Max
main()
static void Main(string[] args)
{
Net.AddServer("", "192.168.100.1", 5661, "", 0);
LightSensor leftLight = new LightSensor();
LightSensor rightLight = new LightSensor();
DCMotor leftMotors = new DCMotor();
DCMotor rightMotors = new DCMotor();
// TODO: Address Objects, Register for Events, Open Objects,
// Set Light Objects Data Interval to Min,
// Set DCMotor Objects Acceleration to Max
}
Step 2: Events
In your Illuminance Change Events, you will have to store the light value for use in your main loop.
leftLight.addIlluminanceChangeListener(new LightSensorIlluminanceChangeListener() {
public void onIlluminanceChange(LightSensorIlluminanceChangeEvent e) {
System.out.println("Left Illuminance: " + e.getIlluminance());
//TODO: Store illuminance for use in main loop
}
});
rightLight.addIlluminanceChangeListener(new LightSensorIlluminanceChangeListener() {
public void onIlluminanceChange(LightSensorIlluminanceChangeEvent e) {
System.out.println("Right Illuminance: " + e.getIlluminance());
//TODO: Store illuminance for use in main loop
}
});
def onIlluminanceChangeLeft(self, illuminance):
print("Illuminance Left: " + str(illuminance))
# TODO: Store illuminance value for use in control loop
def onIlluminanceChangeRight(self, illuminance):
print("Illuminance Right: " + str(illuminance))
# TODO: Store illuminance value for use in control loop
private static void Left_IlluminanceChange(object sender, LightSensorIlluminanceChangeEventArgs e)
{
Console.WriteLine("Illuminance Left: " + e.Illuminance);
// TODO: Store illuminance for use in main loop
}
private static void Right_IlluminanceChange(object sender, LightSensorIlluminanceChangeEventArgs e)
{
Console.WriteLine("Illuminance Right: " + e.Illuminance);
// TODO: Store illuminance for use in main loop
}
Step 3: Main Loop
In your main loop, you will use the illuminance values to move your motors.
//previous code above ...
while(programIsRunning) {
//TODO: define programIsRunning at the top of main
//TODO: Update Motors Target Velocity based on illuminance values
if (System.in.available() > 0) {
System.out.println("Ending Program");
programIsRunning = false;
}
Thread.sleep(50) //TODO: determine if this sleep time is adequate
}
//TODO: Close Phidgets before program exits
def main():
#previous code above ...
try:
while True:
#TODO: Update Motors Target Velocity based on illuminance values
time.sleep(0.05) #TODO: determine if this sleep time is adequate
except KeyboardInterrupt:
print("Ending Progam")
# TODO: Close Phidgets
main()
//previous code above ...
while (programIsRunning)
{
//TODO: define programIsRunning at the top of main
//TODO: Update Motors Target Velocity based on illuminance values
if (System.Console.KeyAvailable)
{
Console.WriteLine("Ending Program");
programIsRunning = false;
}
System.Threading.Thread.Sleep(20); //TODO: determine if this sleep time is adequate
}
// TODO: close Phidgets
Conclusion
You now have the beginnings of an autonomous light tracking rover! Through this project you have learned the basics of a Light Phidget. You have learned by tracking the intensity of light between two sensors, you can change the direction of the rover.
Next Steps
Next, try adding additional autonomous functionality to the rover like following a light source.
Or check out our other Rover Projects:
Have you made an autonomous rover? We'd love to hear about it at education@phidgets.com