Sorting Coloured Beads
by Patrick
Source Code
Download source code written is C# for Visual Studio.
Introduction
In this project, we will be building a robot to sort Perler beads by colour.
I have always wanted to build a colour sorting robot, so when my daughter got interested in Perler bead crafting, I saw this as a perfect opportunity.
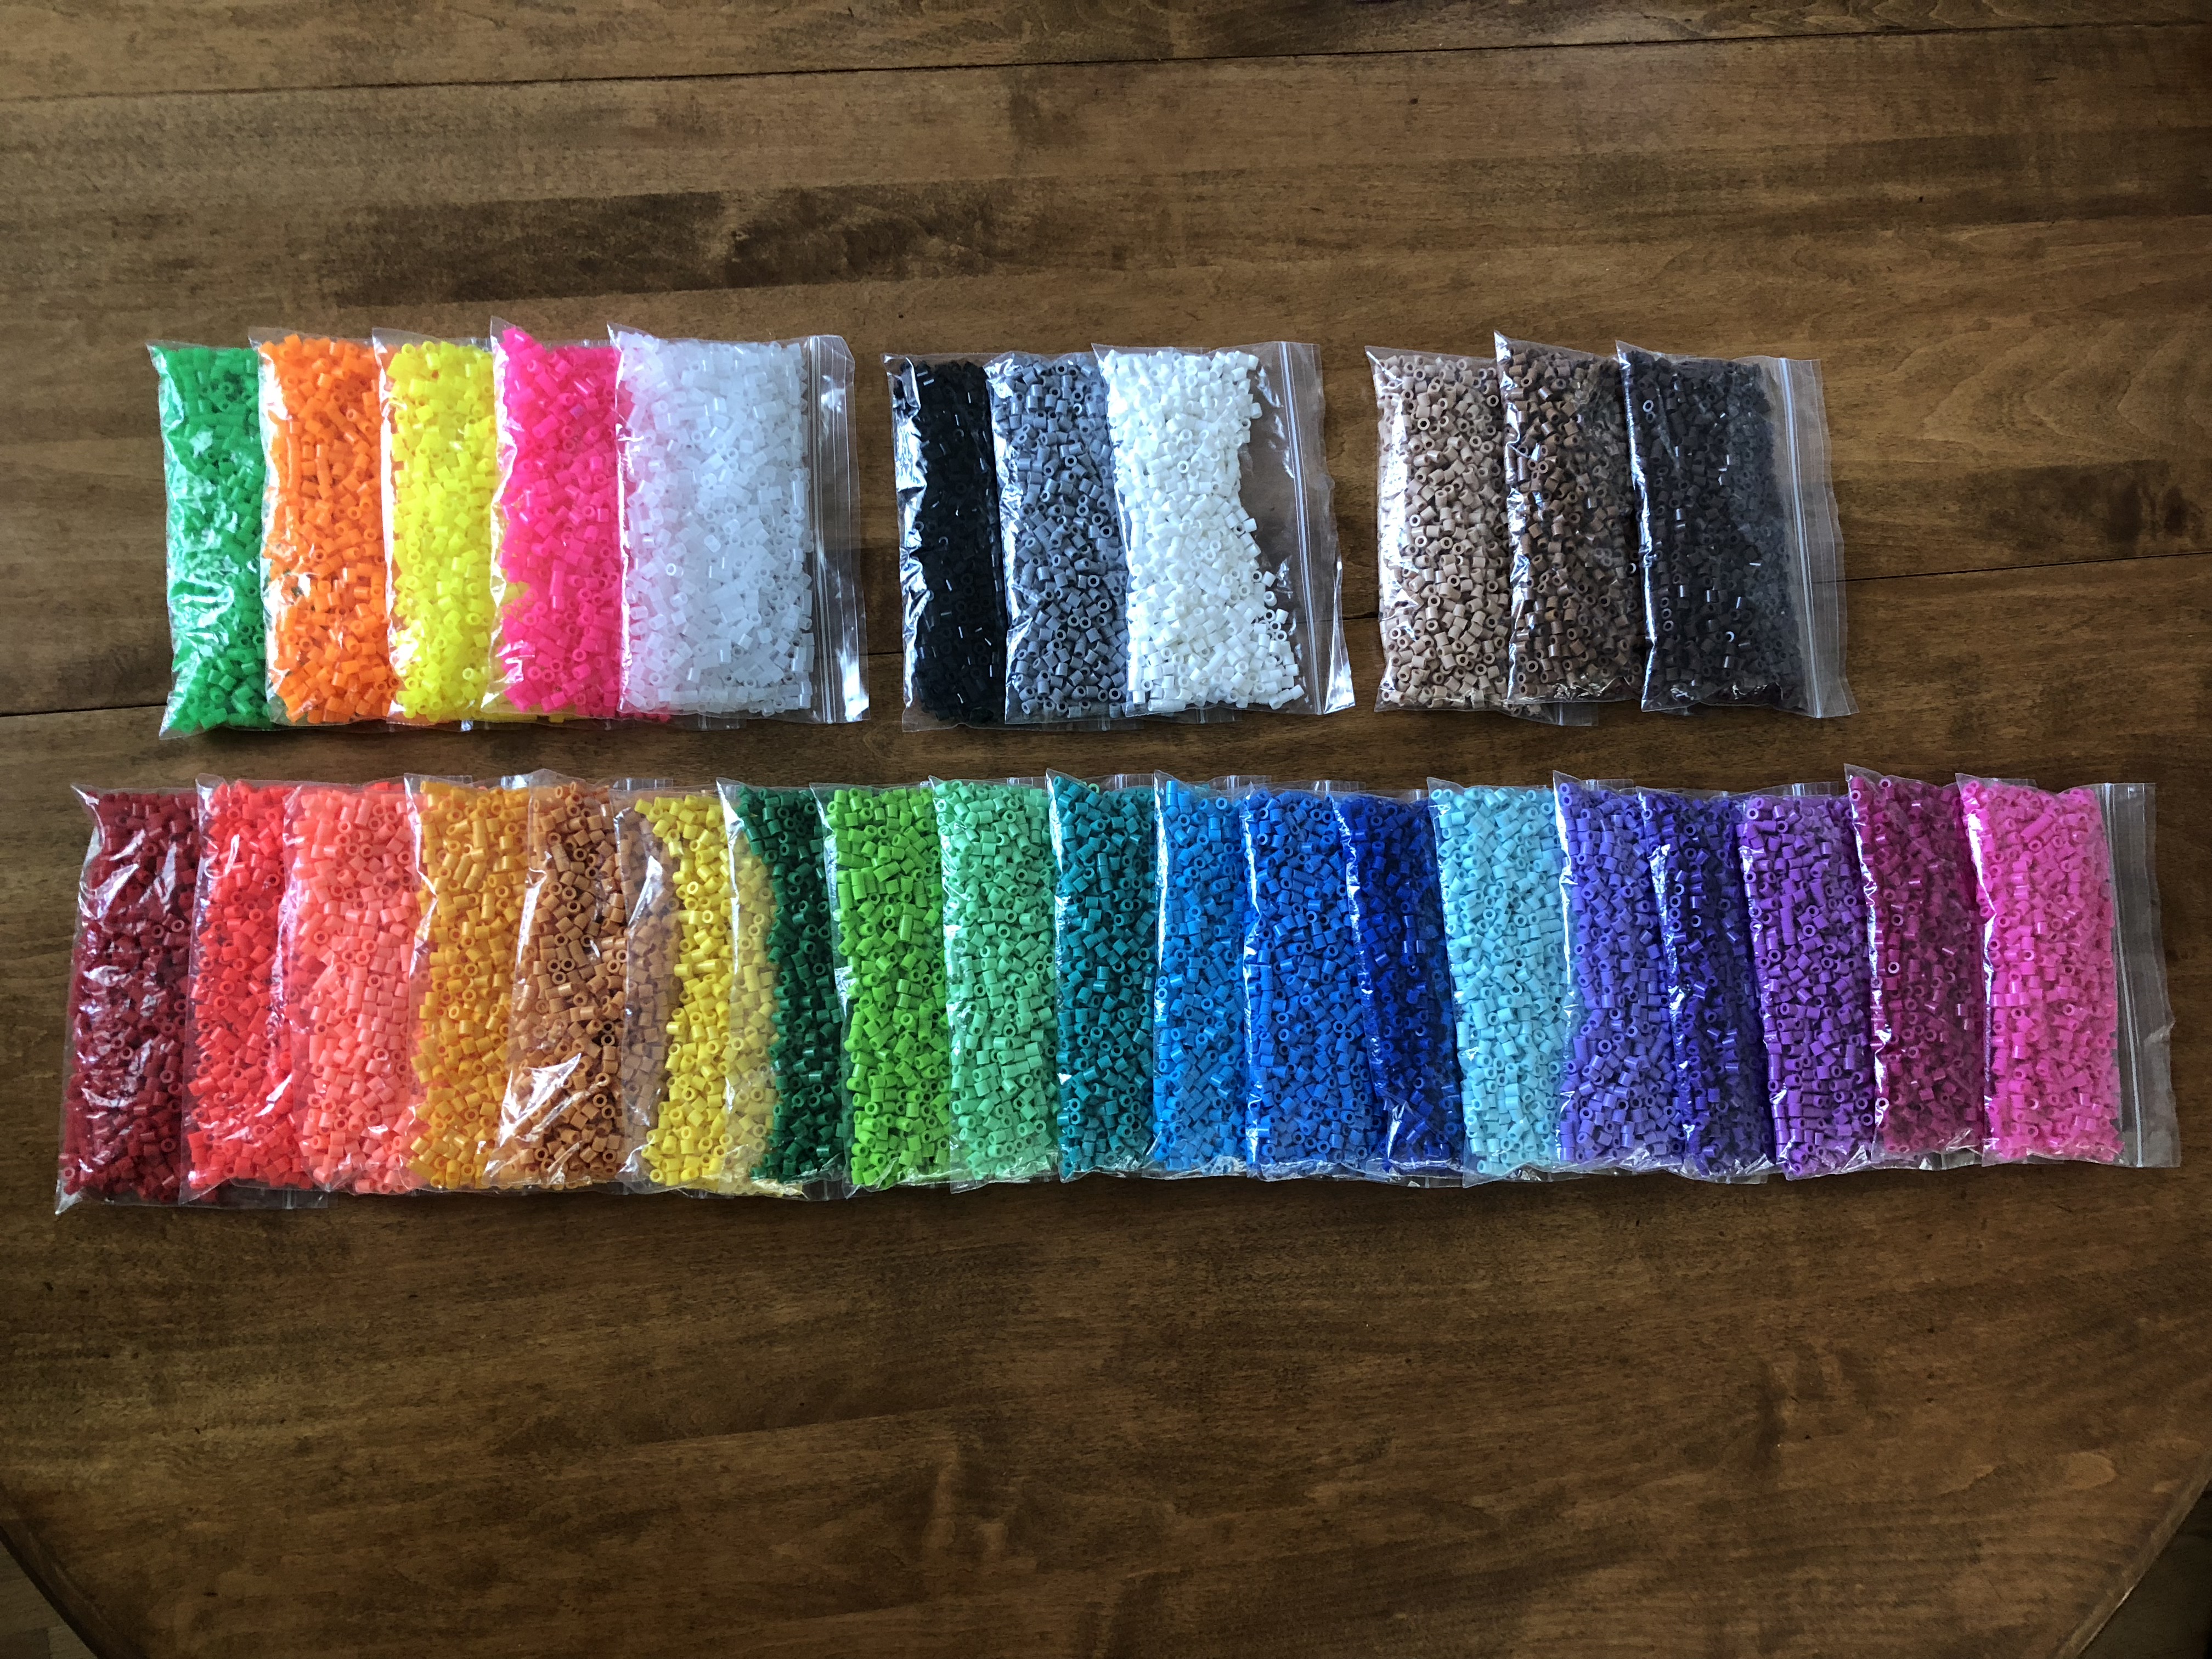
Perler beads are used to create fused art projects by placing many beads onto a pegboard, and then melting them together with an iron. You generally buy these beads in giant 22,000 bead mixed colour packs, and spend a lot of time searching for the colour you want, so I thought sorting them would increase art efficiency.
Hardware
Here is what I used to build this. I built it 100% with parts from phidgets.com, and things I had lying around the house.
Phidgets Boards, Motors, Hardware
- HUB0000 - VINT Hub Phidget
- 1108 - Magnetic Sensor
- 2x STC1001 - 2.5A Stepper Phidget
- 2x 3324 - 42STH38 NEMA-17 Bipolar Gearless Stepper
- 3x 3002 - Phidget Cable 60cm
- 3403 - USB2.0 4-Port Hub
- 3031 - Female Pigtail 5.5x2.1mm
- 3029 - 2 wire 100' Twisted Cable
- 3604 - 10mm White LED (Bag of 10)
- 3402 - USB Webcam
Other Parts
- 24VDC 2.0A Power Supply
- Scrap wood and metal from the garage
- Zip ties
- Plastic container with the bottom cut off
Step 1 - Design the Robot
We need to design something that can take a single bead from the input hopper, place it under the webcam, and then move it into the appropriate bin.
Bead Pickup
I decided to do the 1st part with 2 pieces of round plywood, each with a hole drilled in the same place. The bottom piece is fixed, and the top piece is attached to a stepper motor, which can rotate it beneath a hopper filled with beads. When the hole travels under the hopper, it picks up a single bead. I can then rotate it under the webcam, and then further rotate until it matches up with the hole in the bottom piece, at which point it falls through.
In this picture, I'm testing that the system can work. Everything is fixed except the top round piece of plywood, which is attached to a stepper motor out of view underneath. The webcam hasn't been mounted yet. I'm just using the Phidget Control Panel to turn to motor at this point.
Bead Storage
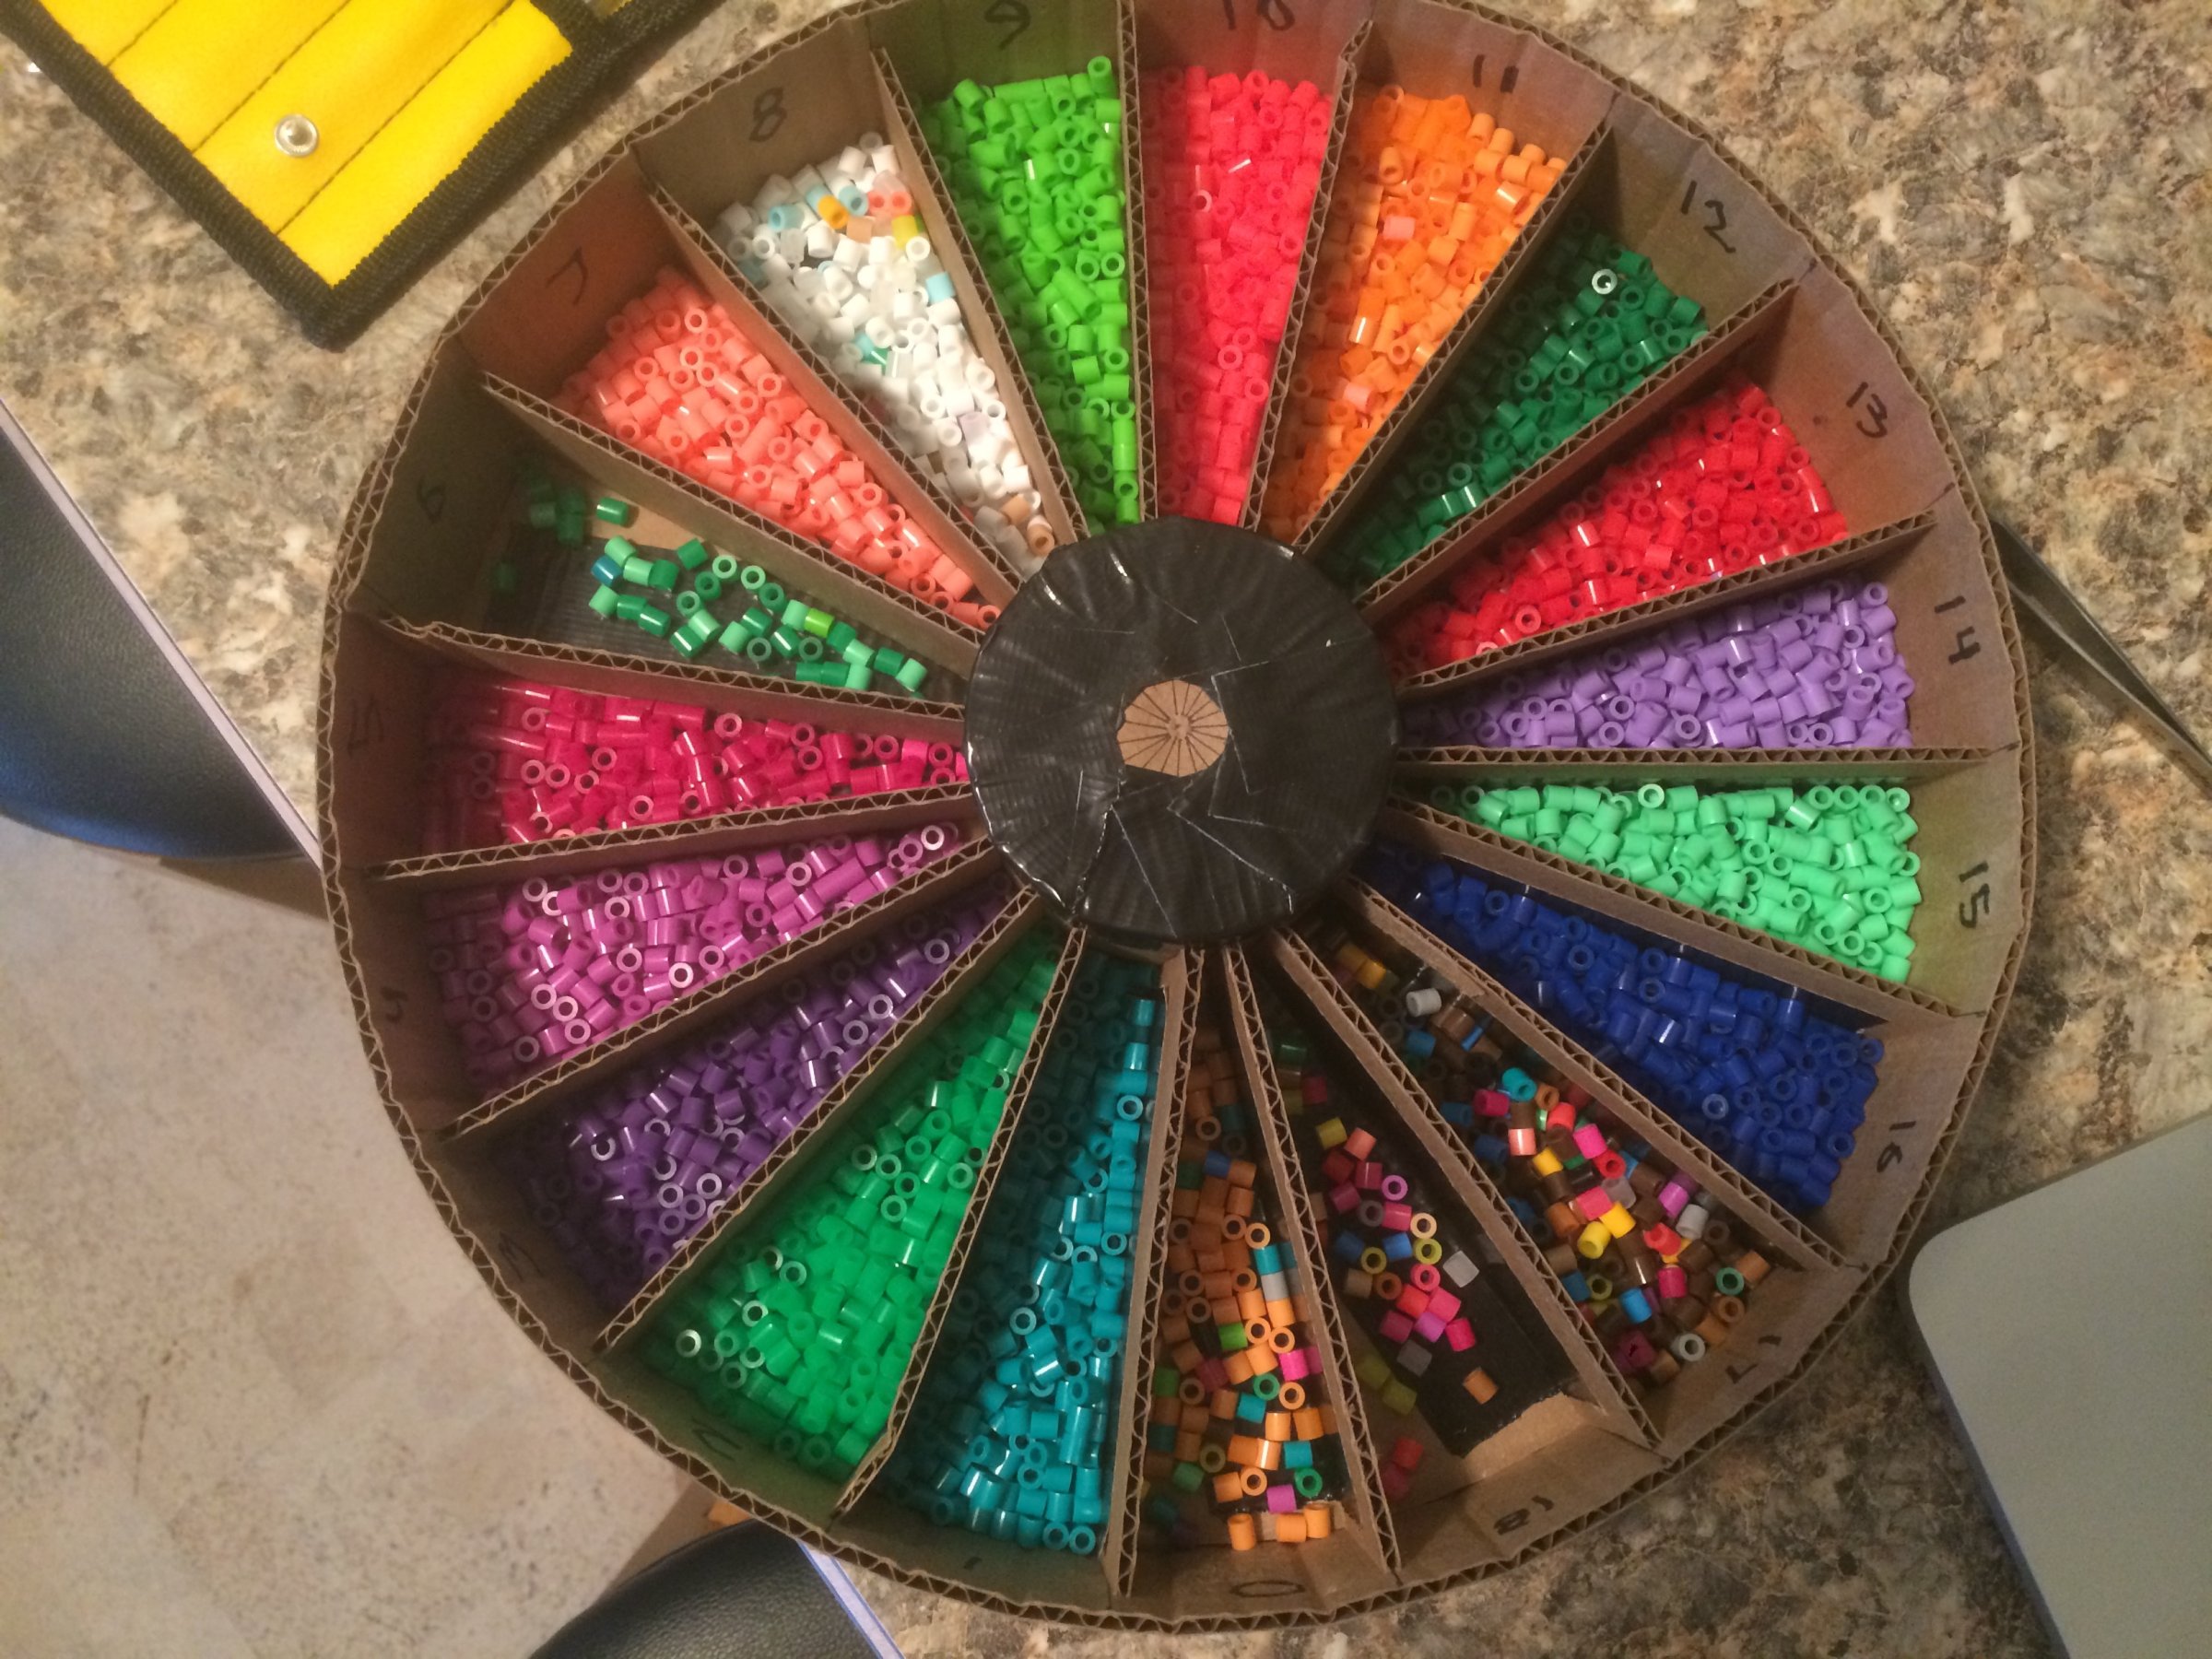
The next part is to design the bin system for holding each colour. I decided to use a second stepper motor below to support and rotate a round container with evenly spaced compartments. This can be used to rotate the correct compartment under the hole that the bead will drop out of.
I built this using cardboard and duct tape. The most important thing here is consistency - each compartment should be the same size, and the whole thing should be evenly weighted so it spins without skipping.
Bead removal is accomplished by means of a tight fitting lid which exposes a single compartment at a time, so the beads can be poured out.
Camera
The webcam is mounted over the top plate between the hopper and the lower plate hole location. This allows the system to look at the bead before dropping it. An LED is used to illuminate the beads under the camera, and ambient light is blocked, in order to provide a consistent lighting environment. This is very important for accurate colour detection, as ambient lighting can really throw off perceived colour.
Location Detection
It's important for the system to be able to detect the rotation of the bead separator. This is used to set up the initial position when starting up, but also to detect if the stepper motor has gotten out of sync. In my system, a bead will sometimes jam while being picked up, and the system needed to be able to detect and handle this situation - by backing up a bit and trying agian.
There are lots of ways to handle this. I decided to use an 1108 magnetic sensor, with a magnet embedded in the edge of the top plate. This allows me to verify the position on every rotation. A better solution would probably be an encoder on the stepper motor, but I had an 1108 lying around so I used that.
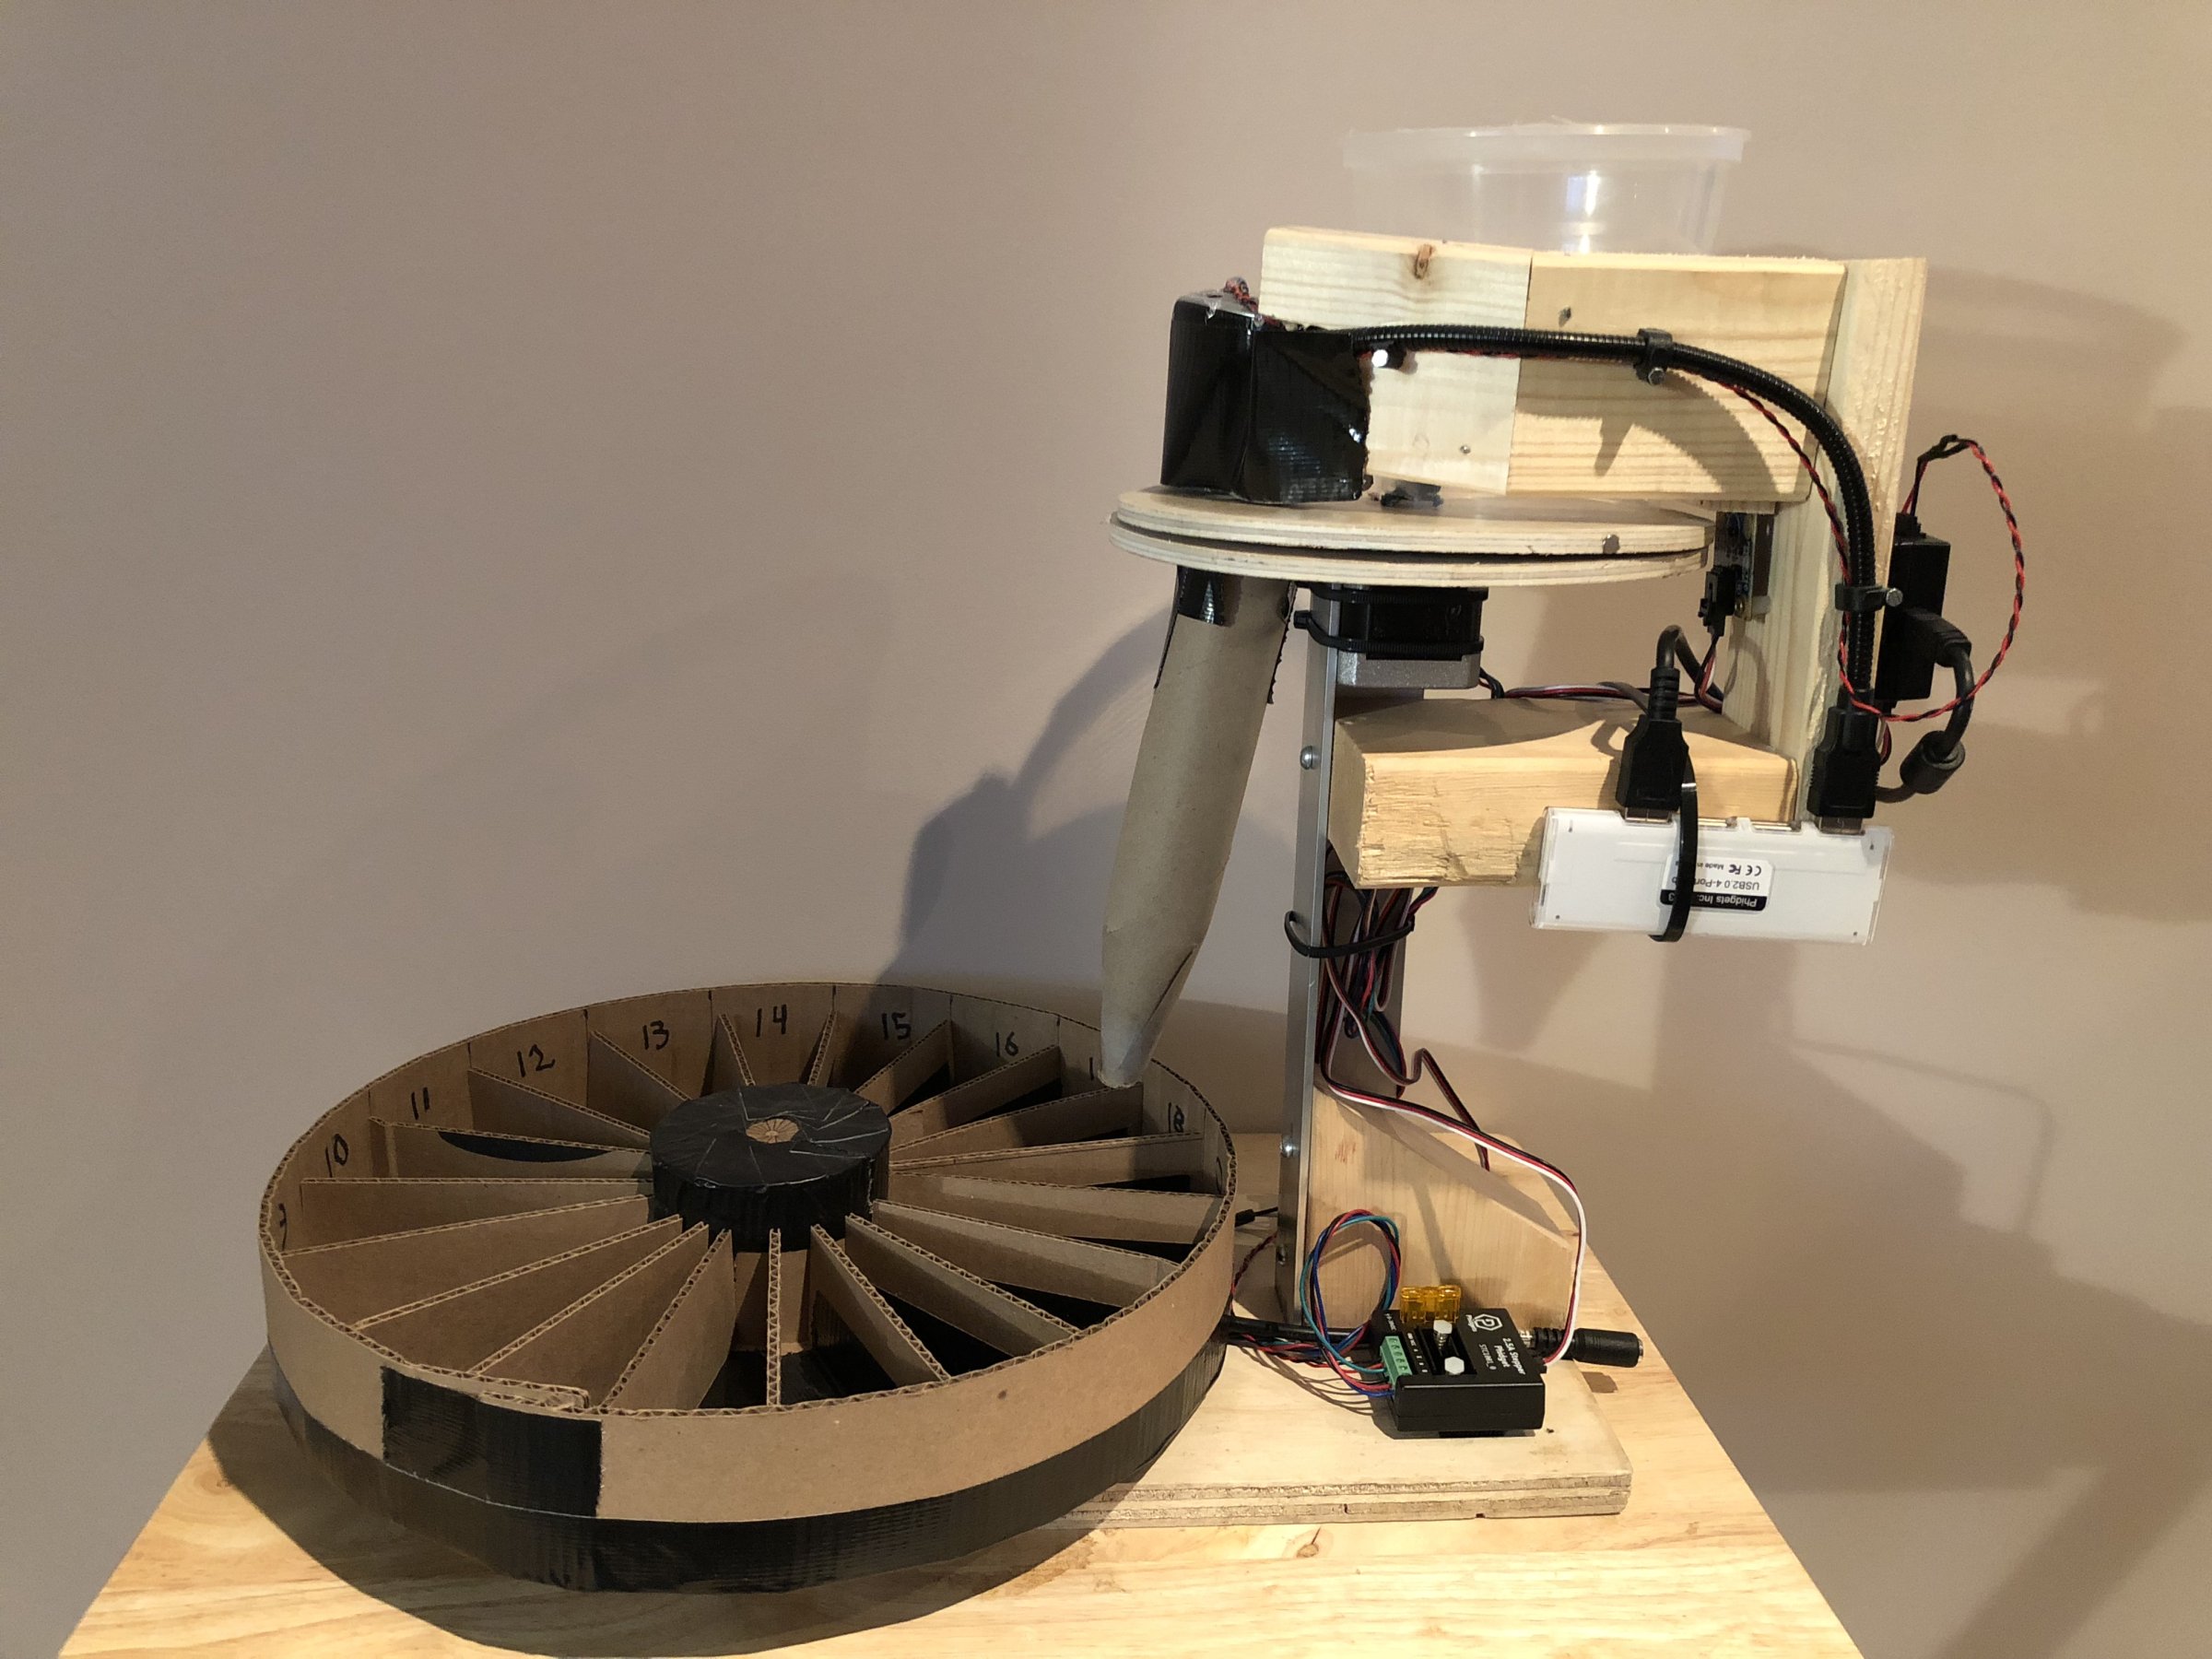
Finish the Robot
At this point, everything has been worked out, and tested. It's time to mount everything nicely and move onto writing software.
The 2 stepper motors are being driven by STC1001 stepper controllers. A HUB000 - USB VINT hub is used for running the stepper controllers, as well as reading the magnetic sensor and driving the LED. The webcam and HUB0000 are both attached to a small USB hub. A 3031 pigtail and some wire are used along with a 24V power supply to power the motors.
Step 2 - Write Code
C# and Visual Studio 2015 are used for this project. Download the source at the top of this page and follow along - the main sections are outlined below
Initialization
First, we must create, open and initialize the Phidget objects. This is done in the form load event, and the Phidget attach handlers.
private void Form1_Load(object sender, EventArgs e) {

    /* Initialize and open Phidgets */
    top.HubPort = 0;
    top.Attach += Top_Attach;
    top.Detach += Top_Detach;
    top.PositionChange += Top_PositionChange;
    top.Open();

    bottom.HubPort = 1;
    bottom.Attach += Bottom_Attach;
    bottom.Detach += Bottom_Detach;
    bottom.PositionChange += Bottom_PositionChange;
    bottom.Open();

    magSensor.HubPort = 2;
    magSensor.IsHubPortDevice = true;
    magSensor.Attach += MagSensor_Attach;
    magSensor.Detach += MagSensor_Detach;
    magSensor.SensorChange += MagSensor_SensorChange;
    magSensor.Open();

    led.HubPort = 5;
    led.IsHubPortDevice = true;
    led.Channel = 0;
    led.Attach += Led_Attach;
    led.Detach += Led_Detach;
    led.Open();
}

private void Led_Attach(object sender, Phidget22.Events.AttachEventArgs e) {
    ledAttachedChk.Checked = true;
    led.State = true;
    ledChk.Checked = true;
}

private void MagSensor_Attach(object sender, Phidget22.Events.AttachEventArgs e) {
    magSensorAttachedChk.Checked = true;
    magSensor.SensorType = VoltageRatioSensorType.PN_1108;
    magSensor.DataInterval = 16;
}

private void Bottom_Attach(object sender, Phidget22.Events.AttachEventArgs e) {
    bottomAttachedChk.Checked = true;
    bottom.CurrentLimit = bottomCurrentLimit;
    bottom.Engaged = true;
    bottom.VelocityLimit = bottomVelocityLimit;
    bottom.Acceleration = bottomAccel;
    bottom.DataInterval = 100;
}

private void Top_Attach(object sender, Phidget22.Events.AttachEventArgs e) {
    topAttachedChk.Checked = true;
    top.CurrentLimit = topCurrentLimit;
    top.Engaged = true;
    top.RescaleFactor = -1;
    top.VelocityLimit = -topVelocityLimit;
    top.Acceleration = -topAccel;
    top.DataInterval = 100;
}
We also read in any saved colour information during initialization, so a previous run can be continued.
Motor Positioning
The motor handling code consists of convenience functions for moving the motors. The motors I used are 3,200 1/16th steps per revolution, so I created a constant for this.
For the top motor, there are 3 positions we want to be able to send to motor to: the webcam, the hole, and the positioning magnet. There is a function for travelling to each of these positions:
private void nextMagnet(Boolean wait = false) {

    double posn = top.Position % stepsPerRev;
    top.TargetPosition += (stepsPerRev - posn);

    if (wait)
        while (top.IsMoving)
            Thread.Sleep(50);
}

private void nextCamera(Boolean wait = false) {
    double posn = top.Position % stepsPerRev;
    if (posn < Properties.Settings.Default.cameraOffset)
        top.TargetPosition += (Properties.Settings.Default.cameraOffset - posn);
    else
        top.TargetPosition += ((Properties.Settings.Default.cameraOffset - posn) + stepsPerRev);

    if (wait)
        while (top.IsMoving)
            Thread.Sleep(50);
}

private void nextHole(Boolean wait = false) {
    double posn = top.Position % stepsPerRev;
    if (posn < Properties.Settings.Default.holeOffset)
        top.TargetPosition += (Properties.Settings.Default.holeOffset - posn);
    else
        top.TargetPosition += ((Properties.Settings.Default.holeOffset - posn) + stepsPerRev);

    if (wait)
        while (top.IsMoving)
            Thread.Sleep(50);
}
Before starting a run, the top plate is aligned using the magnetic sensor. The alignMotor function can be called at any time to align the top plate.
This function first quickly turns the plate up to 1 full revolution until it sees magnet data above a threshold. It then backs up a little bit and
moves forward again slowly, capturing sensor data as it goes. Finally, it sets the position to the maximum magnet data location, and resets the position
offset to 0. Thus, the max magnet position should always be at (top.Position % stepsPerRev)
Thread alignMotorThread;
Boolean sawMagnet;
double magSensorMax = 0;
private void alignMotor() {

    //Find the magnet
    top.DataInterval = top.MinDataInterval;

    sawMagnet = false;
    magSensor.SensorChange += magSensorStopMotor;
    top.VelocityLimit = -1000;

    int tryCount = 0;

    tryagain:

    top.TargetPosition += stepsPerRev;
    while (top.IsMoving && !sawMagnet)
        Thread.Sleep(25);

    if (!sawMagnet) {
        if (tryCount > 3) {
            Console.WriteLine("Align failed");
            top.Engaged = false;
            bottom.Engaged = false;
            runtest = false;
            return;
        }

        tryCount++;
        Console.WriteLine("Are we stuck? Trying a backup...");
        top.TargetPosition -= 600;
        while (top.IsMoving)
            Thread.Sleep(100);

        goto tryagain;

    }

    top.VelocityLimit = -100;
    magData = new List<KeyValuePair<double, double>>();
    magSensor.SensorChange += magSensorCollectPositionData;
    top.TargetPosition += 300;
    while (top.IsMoving)
        Thread.Sleep(100);

    magSensor.SensorChange -= magSensorCollectPositionData;

    top.VelocityLimit = -topVelocityLimit;

    KeyValuePair<double, double> max = magData[0];
    foreach (KeyValuePair<double, double> pair in magData)
        if (pair.Value > max.Value)
            max = pair;

    top.AddPositionOffset(-max.Key);
    magSensorMax = max.Value;

    top.TargetPosition = 0;
    while (top.IsMoving)
        Thread.Sleep(100);

    Console.WriteLine("Align succeeded");
}

List<KeyValuePair<double, double>> magData;
private void magSensorCollectPositionData(object sender, Phidget22.Events.VoltageRatioInputSensorChangeEventArgs e) {
    magData.Add(new KeyValuePair<double, double>(top.Position, e.SensorValue));
}

private void magSensorStopMotor(object sender, Phidget22.Events.VoltageRatioInputSensorChangeEventArgs e) {
    if (top.IsMoving && e.SensorValue > 5) {
        top.TargetPosition = top.Position - 300;
        magSensor.SensorChange -= magSensorStopMotor;
        sawMagnet = true;
    }
}
Lastly, the bottom motor is controlled by sending it to one of the bead container positions. For this project, we have 19 positions. The algorithm is choosing a shortest path, and turns either clockwise or counterclockwise.
private int BottomPosition {
    get {
        int posn = (int)bottom.Position % stepsPerRev;
        if (posn < 0)
            posn += stepsPerRev;

        return (int)Math.Round(((posn * beadCompartments) / (double)stepsPerRev));
    }
}

private void SetBottomPosition(int posn, bool wait = false) {
    posn = posn % beadCompartments;
    double targetPosn = (posn * stepsPerRev) / beadCompartments;

    double currentPosn = bottom.Position % stepsPerRev;
    double posnDiff = targetPosn - currentPosn;

    // Keep it as full steps
    posnDiff = ((int)(posnDiff / 16)) * 16;

    if (posnDiff <= 1600)
        bottom.TargetPosition += posnDiff;
    else
        bottom.TargetPosition -= (stepsPerRev - posnDiff);

    if (wait)
        while (bottom.IsMoving)
            Thread.Sleep(50);
}
Camera
OpenCV is used to read images from the webcam. The camera thread is started before starting the main sorting thread. This thread continually reads in images, calculates an average colour for a specific region using Mean and updates a global colour variable. The thread also employs HoughCircles to try to detect either a bead, or the hole in the top plate, to refine the area it's looking at for the colour detection. The threshold and HoughCircles numbers were determined through trial and error, and depend heavily on the webcam, lighting, and spacing.
bool runVideo = true;
bool videoRunning = false;
VideoCapture capture;
Thread cvThread;
Color detectedColor;
Boolean detecting = false;
int detectCnt = 0;

private void cvThreadFunction() {

    videoRunning = false;
    capture = new VideoCapture(selectedCamera);

    using (Window window = new Window("capture")) {
        Mat image = new Mat();
        Mat image2 = new Mat();

        while (runVideo) {
            capture.Read(image);
            if (image.Empty())
                break;

            if (detecting)
                detectCnt++;
            else
                detectCnt = 0;

            if (detecting || circleDetectChecked || showDetectionImgChecked) {
                Cv2.CvtColor(image, image2, ColorConversionCodes.BGR2GRAY);
                Mat thres = image2.Threshold((double)Properties.Settings.Default.videoThresh, 255, ThresholdTypes.Binary);
                thres = thres.GaussianBlur(new OpenCvSharp.Size(9, 9), 10);

                if (showDetectionImgChecked)
                    image = thres;

                if (detecting || circleDetectChecked) {
                    CircleSegment[] bead = thres.HoughCircles(HoughMethods.Gradient, 2, /*thres.Rows/4*/ 20, 200, 100, 20, 65);
                    if (bead.Length >= 1) {
                        image.Circle(bead[0].Center, 3, new Scalar(0, 100, 0), -1);
                        image.Circle(bead[0].Center, (int)bead[0].Radius, new Scalar(0, 0, 255), 3);
                        if (bead[0].Radius >= 55) {
                            Properties.Settings.Default.x = (decimal)bead[0].Center.X + (decimal)(bead[0].Radius / 2);
                            Properties.Settings.Default.y = (decimal)bead[0].Center.Y - (decimal)(bead[0].Radius / 2);
                        } else {
                            Properties.Settings.Default.x = (decimal)bead[0].Center.X + (decimal)(bead[0].Radius);
                            Properties.Settings.Default.y = (decimal)bead[0].Center.Y - (decimal)(bead[0].Radius);
                        }
                        Properties.Settings.Default.size = 15;
                        Properties.Settings.Default.height = 15;
                    } else {

                        CircleSegment[] circles = thres.HoughCircles(HoughMethods.Gradient, 2, /*thres.Rows/4*/ 5, 200, 100, 60, 180);
                        if (circles.Length > 1) {
                            List<float> xs = circles.Select(c => c.Center.X).ToList();
                            xs.Sort();
                            List<float> ys = circles.Select(c => c.Center.Y).ToList();
                            ys.Sort();

                            int medianX = (int)xs[xs.Count / 2];
                            int medianY = (int)ys[ys.Count / 2];

                            if (medianX > image.Width - 15)
                                medianX = image.Width - 15;
                            if (medianY > image.Height - 15)
                                medianY = image.Height - 15;

                            image.Circle(medianX, medianY, 100, new Scalar(0, 0, 150), 3);

                            if (detecting) {
                                Properties.Settings.Default.x = medianX - 7;
                                Properties.Settings.Default.y = medianY - 7;
                                Properties.Settings.Default.size = 15;
                                Properties.Settings.Default.height = 15;
                            }
                        }
                    }
                }
            }

            Rect r = new Rect((int)Properties.Settings.Default.x,
                (int)Properties.Settings.Default.y,
                (int)Properties.Settings.Default.size,
                (int)Properties.Settings.Default.height);

            Mat beadSample = new Mat(image, r);
            Scalar avgColor = Cv2.Mean(beadSample);
            detectedColor = Color.FromArgb((int)avgColor[2], (int)avgColor[1], (int)avgColor[0]);

            image.Rectangle(r, new Scalar(0, 150, 0));

            window.ShowImage(image);
            Cv2.WaitKey(1);
            videoRunning = true;
        }

        videoRunning = false;
    }
}

private void cameraStartBtn_Click(object sender, EventArgs e) {

    if (cameraStartBtn.Text == "start") {
        cvThread = new Thread(new ThreadStart(cvThreadFunction));
        runVideo = true;
        cvThread.Start();
        cameraStartBtn.Text = "stop";
        while (!videoRunning)
            Thread.Sleep(100);

        updateColorTimer.Start();

    } else {
        runVideo = false;
        cvThread.Join();
        cameraStartBtn.Text = "start";
    }
}
Colour
Now, we are able to determine the colour of a bead, and decide based on that colour which container to drop it into.
This step relies on colour comparison. We want to be able to tell colours apart to limit false positive, but also allow enough threshold to limit false negatives. Comparing colours is actually surprisingly complex, because the way computers store colours as RGB, and the way humans perceive colours don't correlate linearly. To make matters worse, the colour of the light a colour is being viewed under also has to be taken into consideration.
There are complicated algorithm for calculating colour difference. We use CIE2000, which outputs a number near 1 if 2 colours would be indistinguishable to a human. We are using the ColorMine C# library to do these complicated calculations. A DeltaE value of 5 has been found to offer a good compromise between false positive and false negative.
As there are often more colours then containers, the last position is reserved as a catchall bin. I generally set these aside to run though the machine on a second pass.
List<Color> colors = new List<Color>();
List<Panel> colorPanels = new List<Panel>();
List<TextBox> colorsTxts = new List<TextBox>();
List<int> colorCnts = new List<int>();

const int numColorSpots = 18;
const int unknownColorIndex = 18;
int findColorPosition(Color c) {

    Console.WriteLine("Finding color...");

    var cRGB = new Rgb();
    cRGB.R = c.R;
    cRGB.G = c.G;
    cRGB.B = c.B;

    int bestMatch = -1;
    double matchDelta = 100;

    for (int i = 0; i < colors.Count; i++) {

        var RGB = new Rgb();
        RGB.R = colors[i].R;
        RGB.G = colors[i].G;
        RGB.B = colors[i].B;

        double delta = cRGB.Compare(RGB, new CieDe2000Comparison());
        //double delta = deltaE(c, colors[i]);
        Console.WriteLine("DeltaE (" + i.ToString() + "): " + delta.ToString());
        if (delta < matchDelta) {
            matchDelta = delta;
            bestMatch = i;
        }
    }

    if (matchDelta < 5) {
        Console.WriteLine("Found! (Posn: " + bestMatch + " Delta: " + matchDelta + ")");
        return bestMatch;
    }

    if (colors.Count < numColorSpots) {
        Console.WriteLine("New Color!");
        colors.Add(c);
        this.BeginInvoke(new Action<int>(setBackColor), new object[] { colors.Count - 1 });
        writeOutColors();
        return (colors.Count - 1);
    } else {
        Console.WriteLine("Unknown Color!");
        return unknownColorIndex;
    }
}
Sorting Logic
The sorting function brings together all the pieces to actually sort beads. This function runs in a dedicated thread; moving the top plate, detecting the bead colour, placing it in a bin, making sure the top plate stays aligned, counting the beads, etc. It also stops running when the catchall bin becomes full - Otherwise we just end up with overflowing beads.
Thread colourTestThread;
Boolean runtest = false;
void colourTest() {

    if (!top.Engaged)
        top.Engaged = true;

    if (!bottom.Engaged)
        bottom.Engaged = true;

    while (runtest) {

        nextMagnet(true);
        Thread.Sleep(100);
        try {
            if (magSensor.SensorValue < (magSensorMax - 4))
                alignMotor();
        } catch { alignMotor(); }

        nextCamera(true);

        detecting = true;
        while (detectCnt < 5)
            Thread.Sleep(25);
        Console.WriteLine("Detect Count: " + detectCnt);
        detecting = false;

        Color c = detectedColor;
        this.BeginInvoke(new Action<Color>(setColorDet), new object[] { c });
        int i = findColorPosition(c);

        SetBottomPosition(i, true);
        nextHole(true);
        colorCnts[i]++;
        this.BeginInvoke(new Action<int>(setColorTxt), new object[] { i });
        Thread.Sleep(250);

        if (colorCnts[unknownColorIndex] > 500) {
            top.Engaged = false;
            bottom.Engaged = false;
            runtest = false;
            this.BeginInvoke(new Action(setGoGreen), null);
            return;
        }
    }
}

private void colourTestBtn_Click(object sender, EventArgs e) {
    if (colourTestThread == null || !colourTestThread.IsAlive) {
        colourTestThread = new Thread(new ThreadStart(colourTest));
        runtest = true;
        colourTestThread.Start();
        colourTestBtn.Text = "STOP";
        colourTestBtn.BackColor = Color.Red;
    } else {
        runtest = false;
        colourTestBtn.Text = "GO";
        colourTestBtn.BackColor = Color.Green;
    }
}
At this point, we have a working program. Some bits of code were left out of the article, so have a look at the source to actually run it.
Here is a video of the program running:
Results