Two or More VINT Hubs
In this lesson, you'll learn how to use multiple VINT Hubs in your projects!
Setup
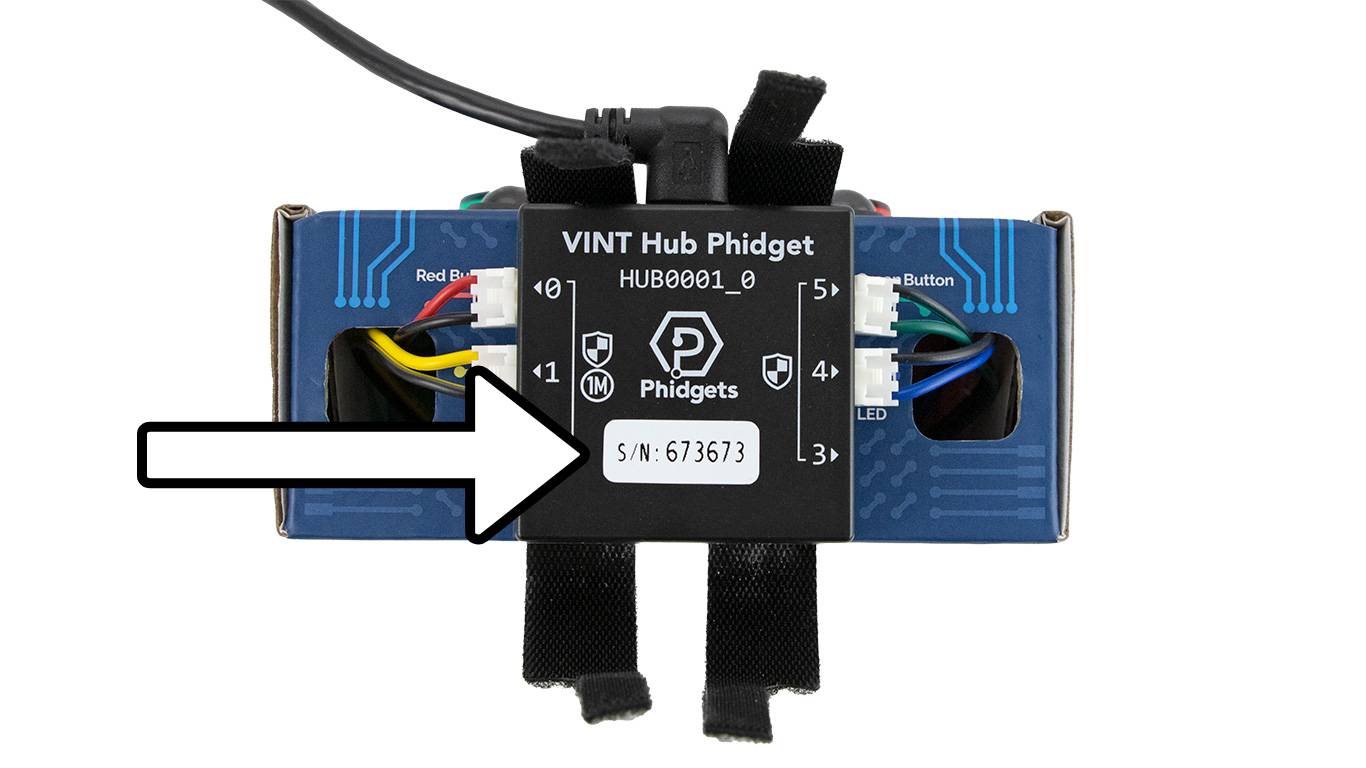
For this lesson, you will need to plug two Getting Started Kits into your computer. Each kit has a VINT Hub attached to it. Find the serial number by removing the velcro.
Write Code (Java)
Copy the code below into the project you created. If you don't have a project or forgot how to create one, revisit the Configure section.
Not your programming language? Set your preferences so we can display relevant code examples
package gettingstarted;

//Add Phidgets Library
import com.phidget22.*;

public class GettingStarted {
    //Handle Exceptions
    public static void main(String[] args) throws Exception{

        //Create
        DigitalOutput redLED0 = new DigitalOutput();
        DigitalOutput redLED1 = new DigitalOutput();

        //Set VINT Hub | In addition to addressing your Phidgets, you will have to tell your program which VINT Hub the Phidget is connected to by setting the serial number located on the back of the VINT Hub.
        redLED0.setDeviceSerialNumber(/*INSERT  SERIAL NUMBER OF KIT 1*/);
        redLED1.setDeviceSerialNumber(/*INSERT  SERIAL NUMBER OF KIT 2*/);

        //Address
        redLED0.setHubPort(1);
        redLED0.setIsHubPortDevice(true);
        redLED1.setHubPort(1);
        redLED1.setIsHubPortDevice(true);

        //Open
        redLED0.open(1000);
        redLED1.open(1000);

        //Use your Phidgets
        redLED0.setState(true);
        redLED1.setState(true);
        Thread.sleep(1000);
        redLED0.setState(false);
        redLED1.setState(false);
    }
}
//Add Phidgets Library
import com.phidget22.*;

//Define
DigitalOutput redLED0;
DigitalOutput redLED1;

void setup(){
  try{

    //Create
    redLED0 = new DigitalOutput();
    redLED1 = new DigitalOutput();

    //Set VINT Hub | In addition to addressing your Phidgets, you will have to tell your program which VINT Hub the Phidget is connected to by setting the serial number located on the back of the VINT Hub.
    redLED0.setDeviceSerialNumber(/*INSERT  SERIAL NUMBER OF KIT 1*/);
    redLED1.setDeviceSerialNumber(/*INSERT  SERIAL NUMBER OF KIT 2*/);

    //Address
    redLED0.setHubPort(1);
    redLED0.setIsHubPortDevice(true);
    redLED1.setHubPort(1);
    redLED1.setIsHubPortDevice(true);

    //Open
    redLED0.open(1000);
    redLED1.open(1000);

  }catch(Exception e){
    e.printStackTrace();
  }
}

void draw(){
  try{
    //Use your Phidgets
    redLED0.setState(true);
    redLED1.setState(true);
    delay(1000);
    redLED0.setState(false);
    redLED1.setState(false);
    delay(1000);

  }catch(Exception e){
   e.printStackTrace();
  }
}
Write Code (Python)
Copy the code below into the project you created. If you don't have a project or forgot how to create one, revisit the Configure section.
Not your programming language? Set your preferences so we can display relevant code examples
#Add Phidgets Library
from Phidget22.Phidget import *
from Phidget22.Devices.DigitalOutput import *
#Required for sleep statement
import time

#Create
redLED0 = DigitalOutput()
redLED1 = DigitalOutput()

#Set VINT Hub | In addition to addressing your Phidgets, you will have to tell your program which VINT Hub the Phidget is connected to by setting the serial number located on the back of the VINT Hub.
redLED0.setDeviceSerialNumber(INSERT SERIAL NUMBER OF KIT 1)
redLED1.setDeviceSerialNumber(INSERT SERIAL NUMBER OF KIT 2)

#Address
redLED0.setHubPort(1)
redLED0.setIsHubPortDevice(True)
redLED1.setHubPort(1)
redLED1.setIsHubPortDevice(True)

#Open
redLED0.openWaitForAttachment(1000)
redLED1.openWaitForAttachment(1000)

#Use your Phidgets
redLED0.setState(True)
redLED1.setState(True)
time.sleep(1)
redLED0.setState(False)
redLED1.setState(False)
Write Code (C#)
Copy the code below into the project you created. If you don't have a project or forgot how to create one, revisit the Configure section.
Not your programming language? Set your preferences so we can display relevant code examples
//Add Phidgets Library
using Phidget22;

namespace GettingStarted{
    class Program{
        static void Main(string[] args)
        {
            //Create
            DigitalOutput redLED0 = new DigitalOutput();
            DigitalOutput redLED1 = new DigitalOutput();

            //Set VINT Hub | In addition to addressing your Phidgets, you will have to tell your program which VINT Hub the Phidget is connected to by setting the serial number located on the back of the VINT Hub.
            redLED0.DeviceSerialNumber = INSERT SERIAL NUMBER FROM KIT 1;
            redLED1.DeviceSerialNumber = INSERT SERIAL NUMBER FROM KIT 2;

            //Address
            redLED0.HubPort = 1;
            redLED0.IsHubPortDevice = true;
            redLED1.HubPort = 1;
            redLED1.IsHubPortDevice = true;

            //Open
            redLED0.Open(1000);
            redLED1.Open(1000);

            //Use your Phidgets
            redLED0.State = true;
            redLED1.State = true;
            System.Threading.Thread.Sleep(1000);
            redLED0.State = false;
            redLED1.State = false;
        }
    }
}
Write Code (Swift)
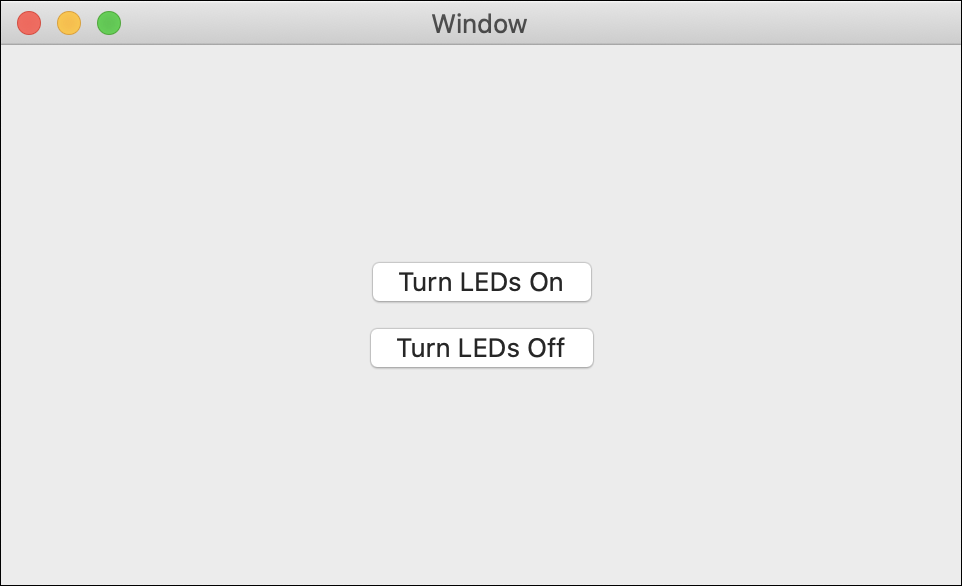
Create two buttons in your window and copy the code below into the project you created. If you don't have a project or forgot how to create one, revisit the Configure section.
Not your programming language? Set your preferences so we can display relevant code examples
Create two buttons
import Cocoa
//Add Phidgets Library | You used cocoapods to install the Phidget library. The statement below give your program access to that code.
import Phidget22Swift

class ViewController: NSViewController {

    //Create | Here you have created a TemperatureSensor object. TemperatureSensor is a class in your Phidgets library that gathers temperature data from your Phidget.
    let redLED0 = DigitalOutput()
    let redLED1 = DigitalOutput()

    override func viewDidLoad() {
        super.viewDidLoad()
        do{
            //Address
            try redLED0.setDeviceSerialNumber(INSERT SERIAL NUMBER HERE)
            try redLED0.setHubPort(1)
            try redLED0.setIsHubPortDevice(true)

            try redLED1.setDeviceSerialNumber(INSERT SERIAL NUMBER HERE)
            try redLED1.setHubPort(1)
            try redLED1.setIsHubPortDevice(true)

            //Open | Open establishes a connection between your object and your physical Phidget.
            try redLED0.open()
            try redLED1.open()

        }catch{
            print(error)
        }
    }

    @IBAction func turnLEDsOn(_ sender: Any) {
        do{
            //Use your Phidgets
            try redLED0.setState(true)
            try redLED1.setState(true)
        }catch{
            print(error)
        }
    }

    @IBAction func turnLEDsOff(_ sender: Any) {
        do{
            //Use your Phidgets
            try redLED0.setState(false)
            try redLED1.setState(false)
        }catch{
            print(error)
        }
    }
}
Run Your Program
You will see the red LED blink on each kit.
Practice
- Modify your code so the red button on one kit controls the red LED on the other kit.
- Create a game using your two Getting Started Kits.
Applications
Most computers can have over 100 USB devices connected at any given time (127 to be exact). Certain applications can require the use of multiple Phidgets. For example, engineers at TestView conduct research and testing for a variety of applications and often require multiple sensors and controllers to collect data. In the example shown, the engineers are using 4 VINT Hubs connected to several sensors to monitor their application.

Troubleshoot
I am getting a "Timed Out" exception.
- Make sure the USB cable from your VINT Hub to your computer is attached properly.
- Make the Phidget cable (the black, red and white one) is connected to your VINT Hub and to your Humidity Phidget properly).
- Make sure no other program is running that uses Phidgets. If a Phidget is already in use in another program, it will be busy and won't respond to this one.
Still having issues?
Visit the Advanced Troubleshooting Page or contact us (education@phidgets.com).