Setup
Before getting started, make sure you have the following parts.

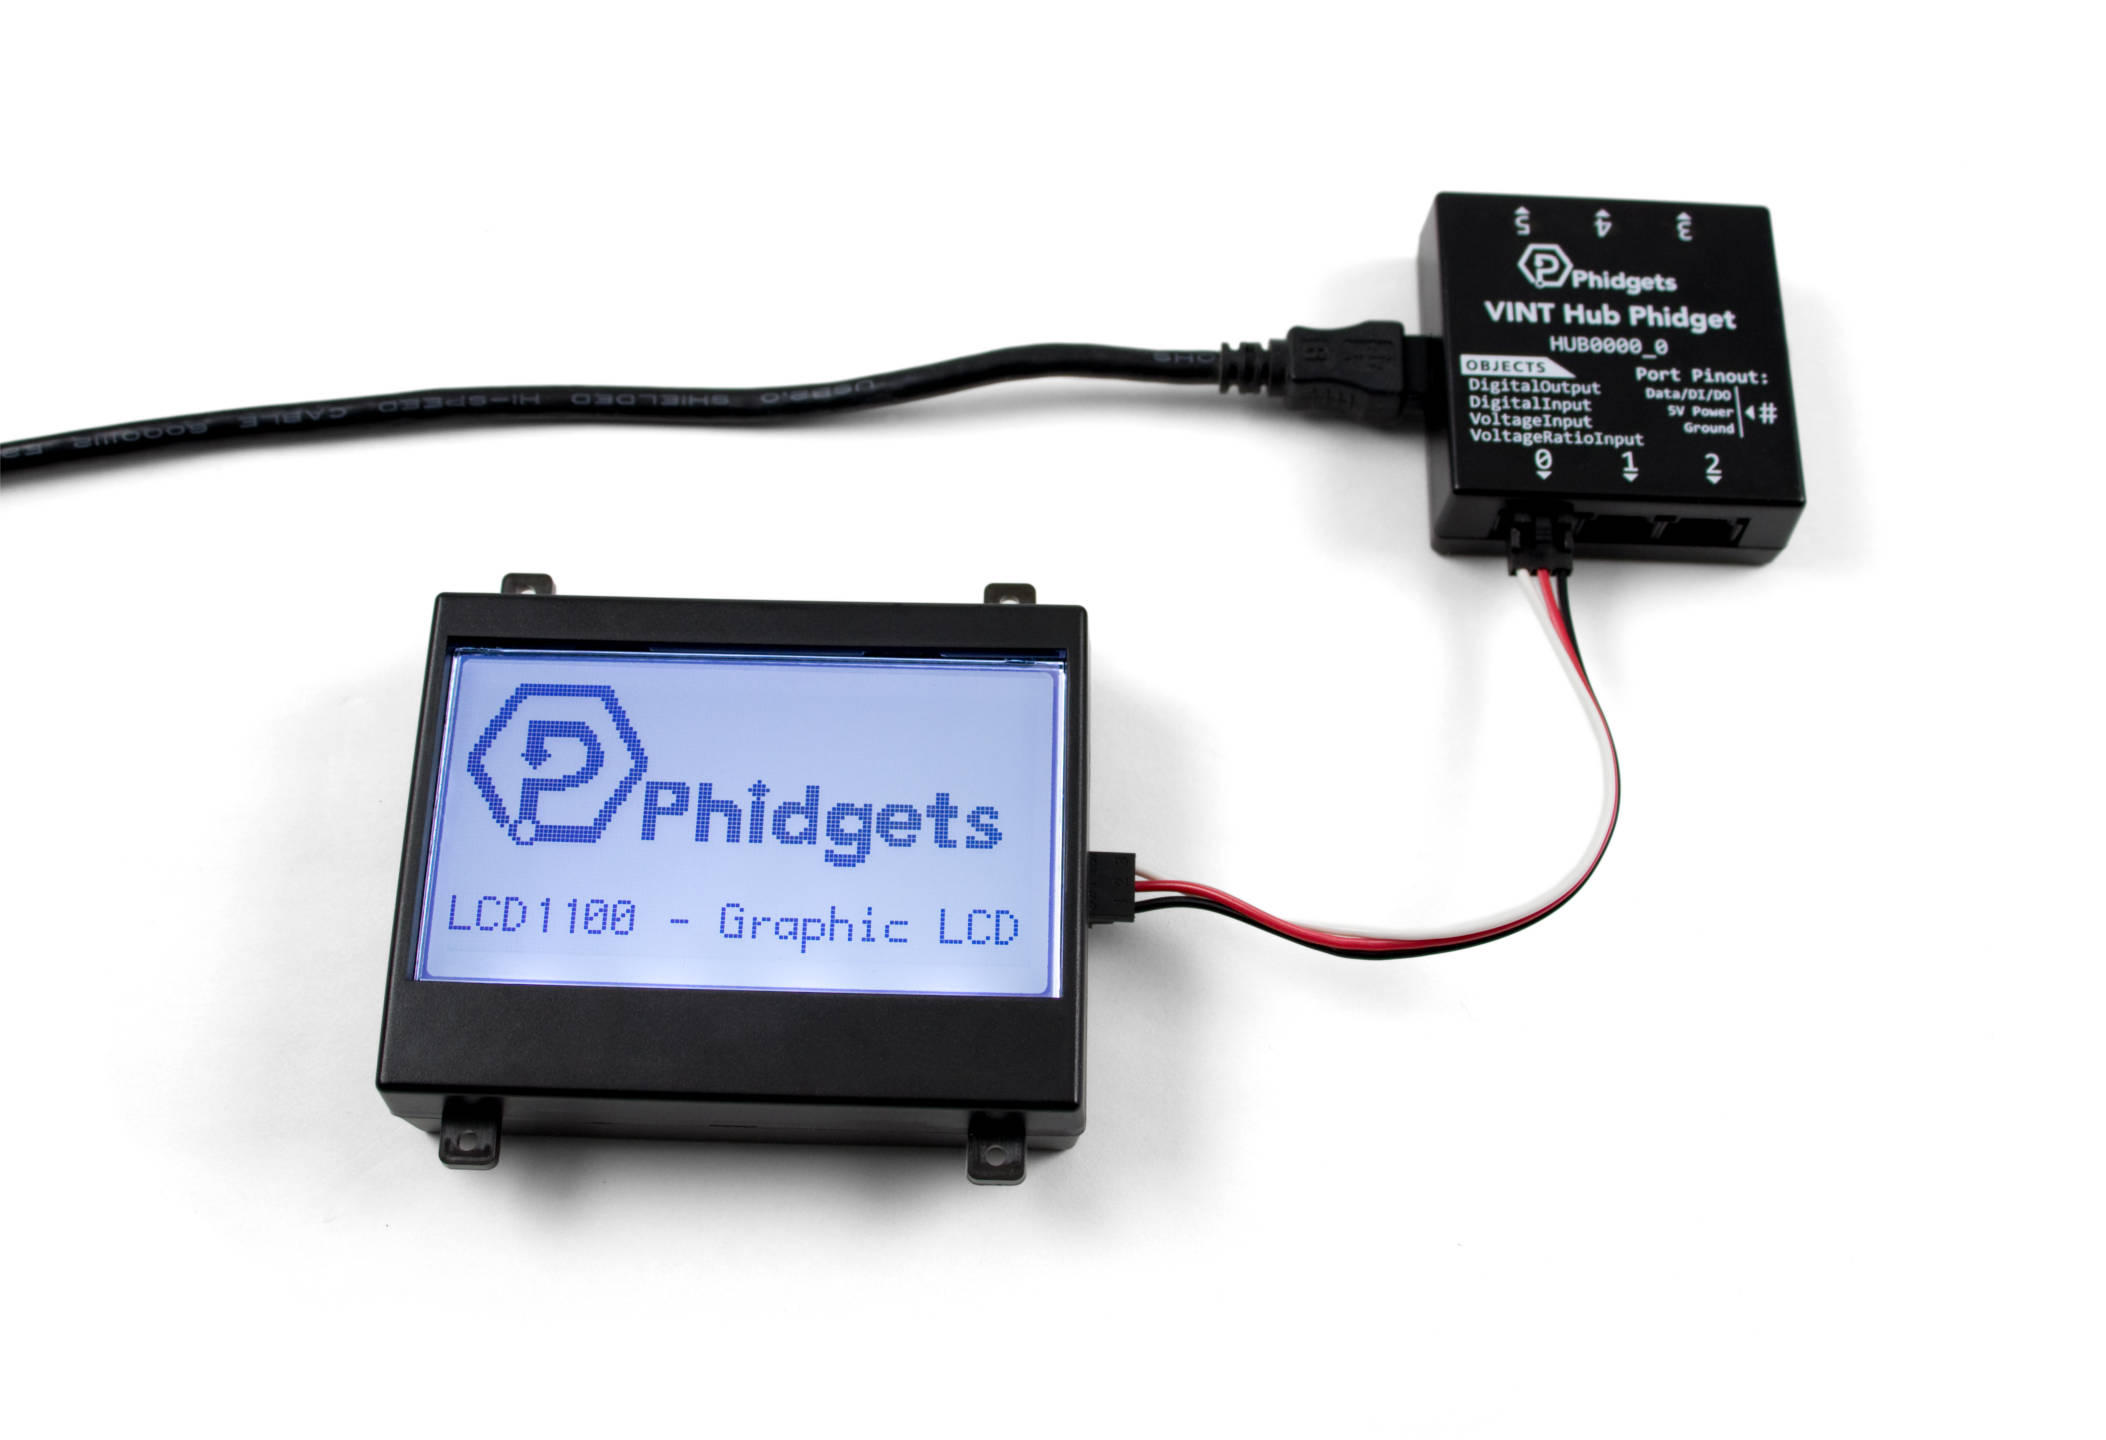
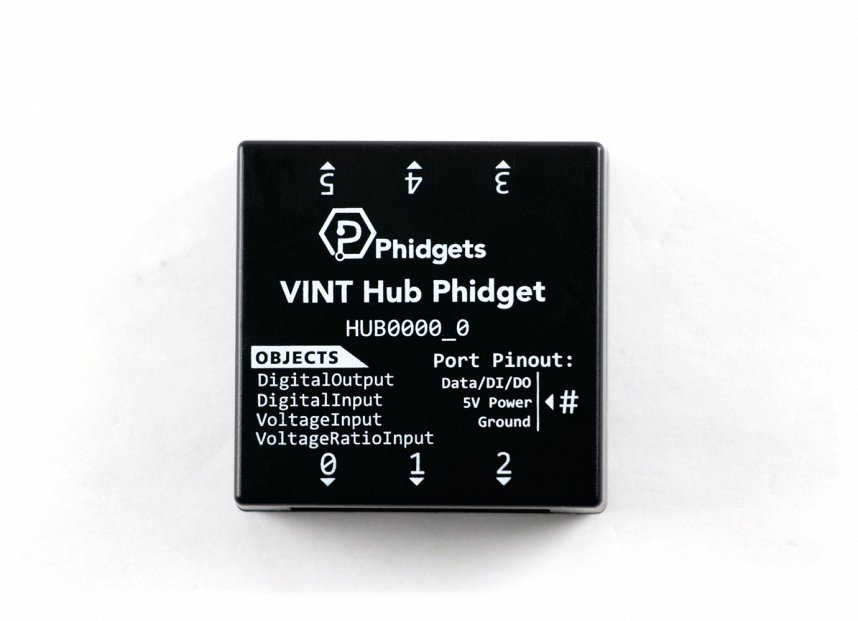
VINT Hub
Graphic LCD Basics
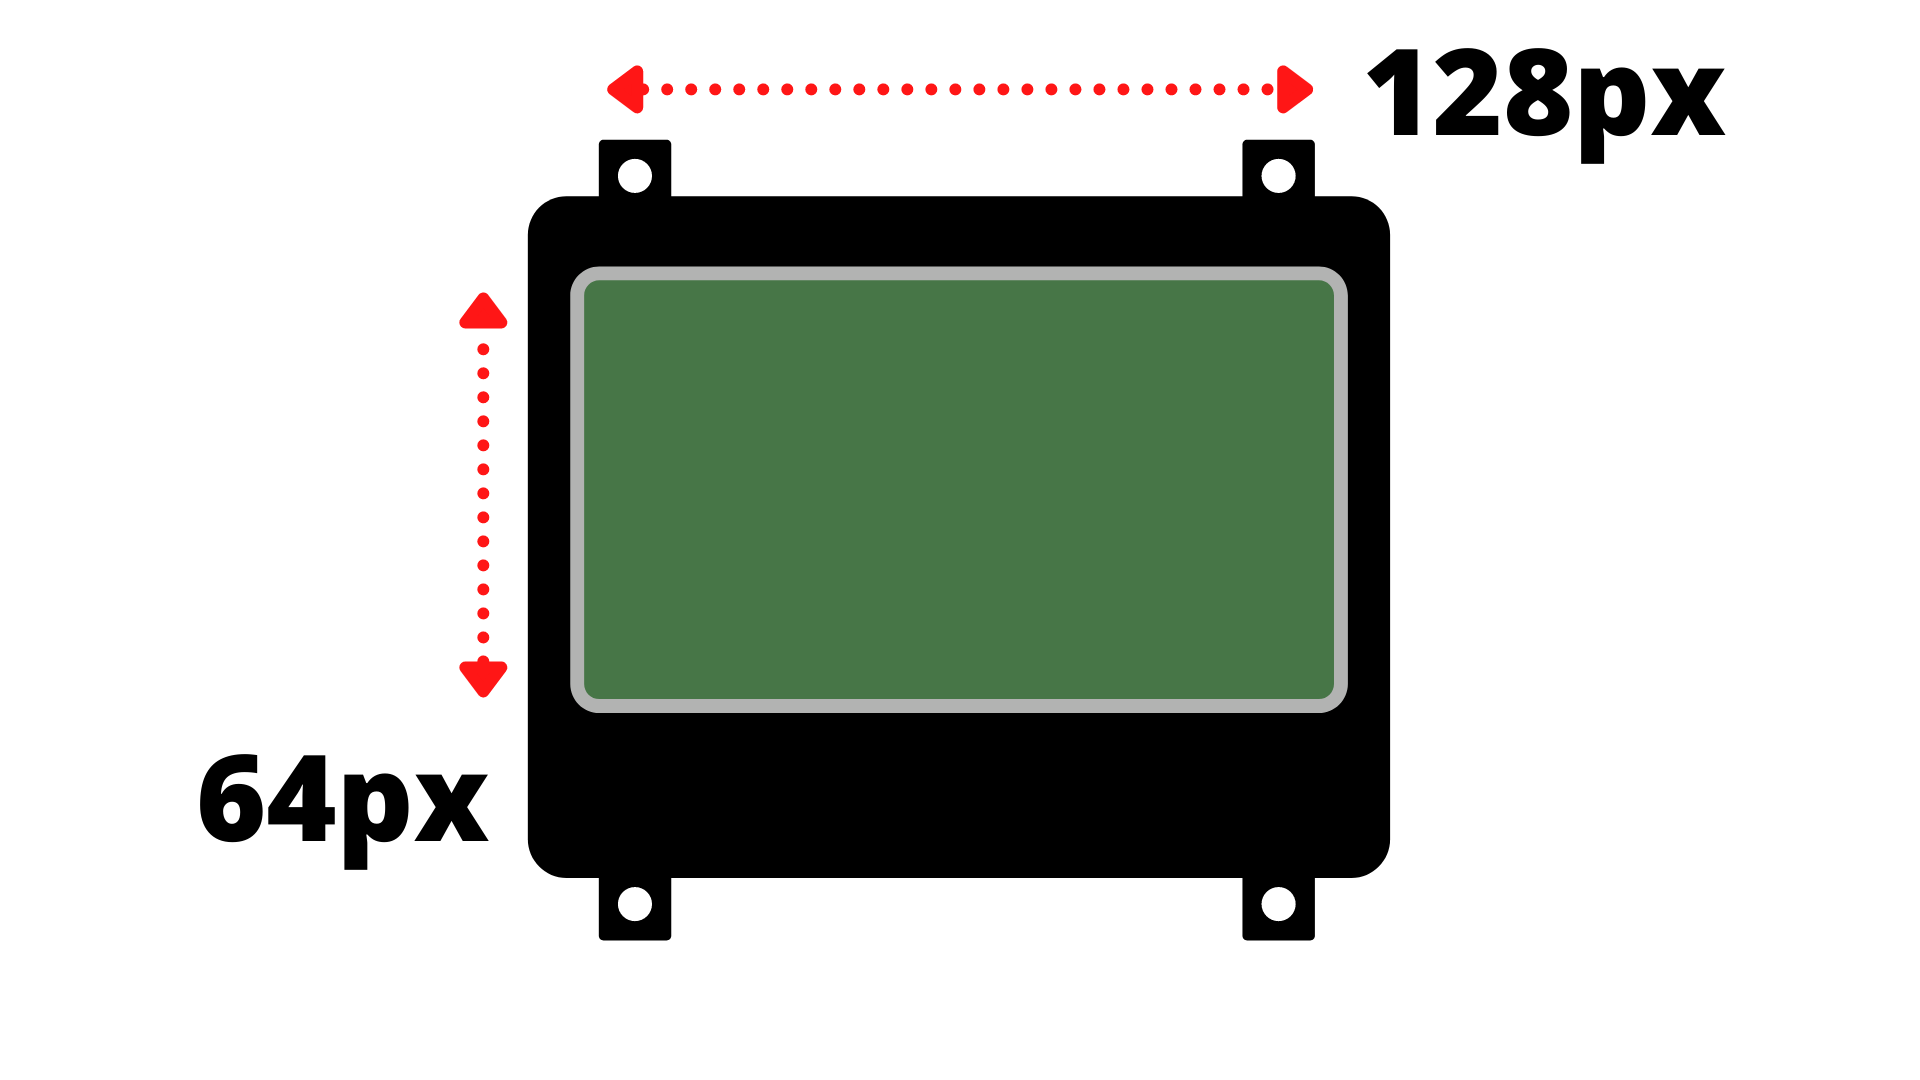
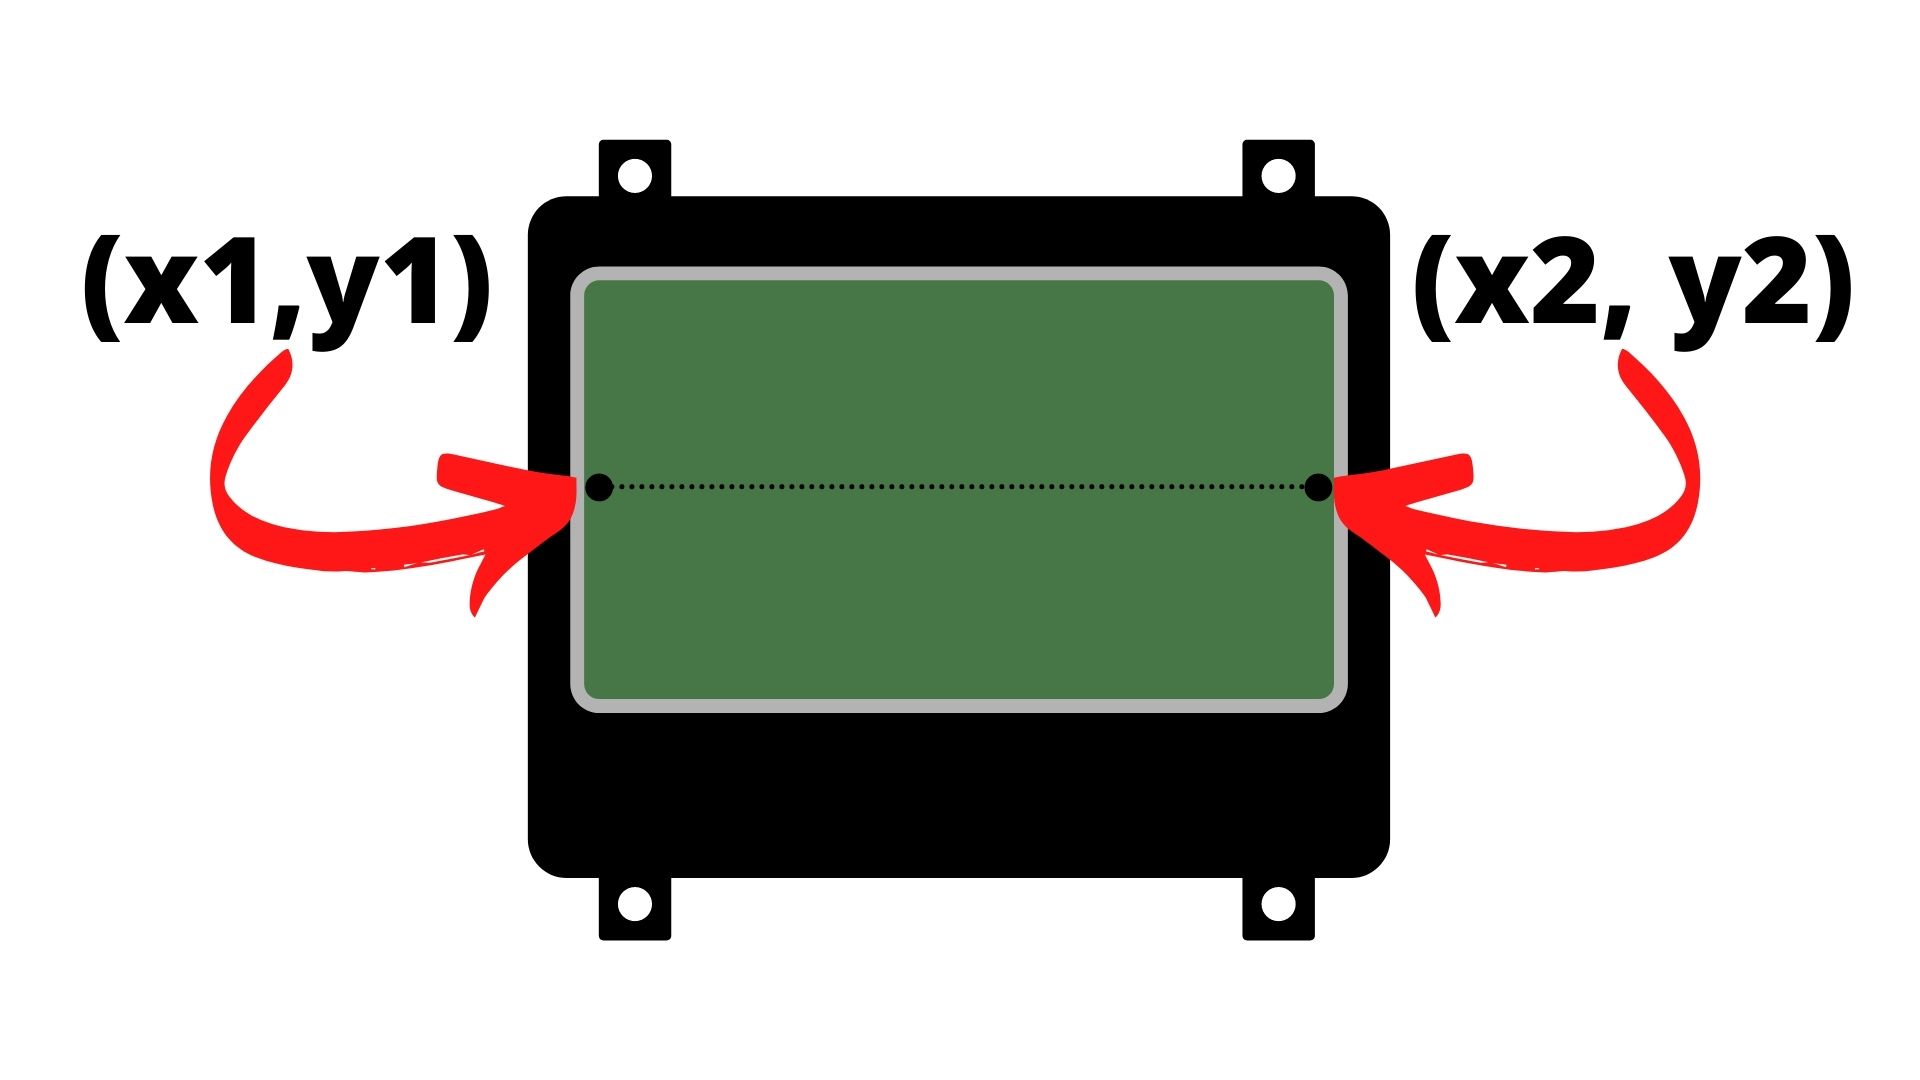
Before you begin drawing with the Graphic LCD, it is important to understand a few things about the device. To start, the LCD is 64 x 128 pixels.
When drawing, the origin is in the top left corner.
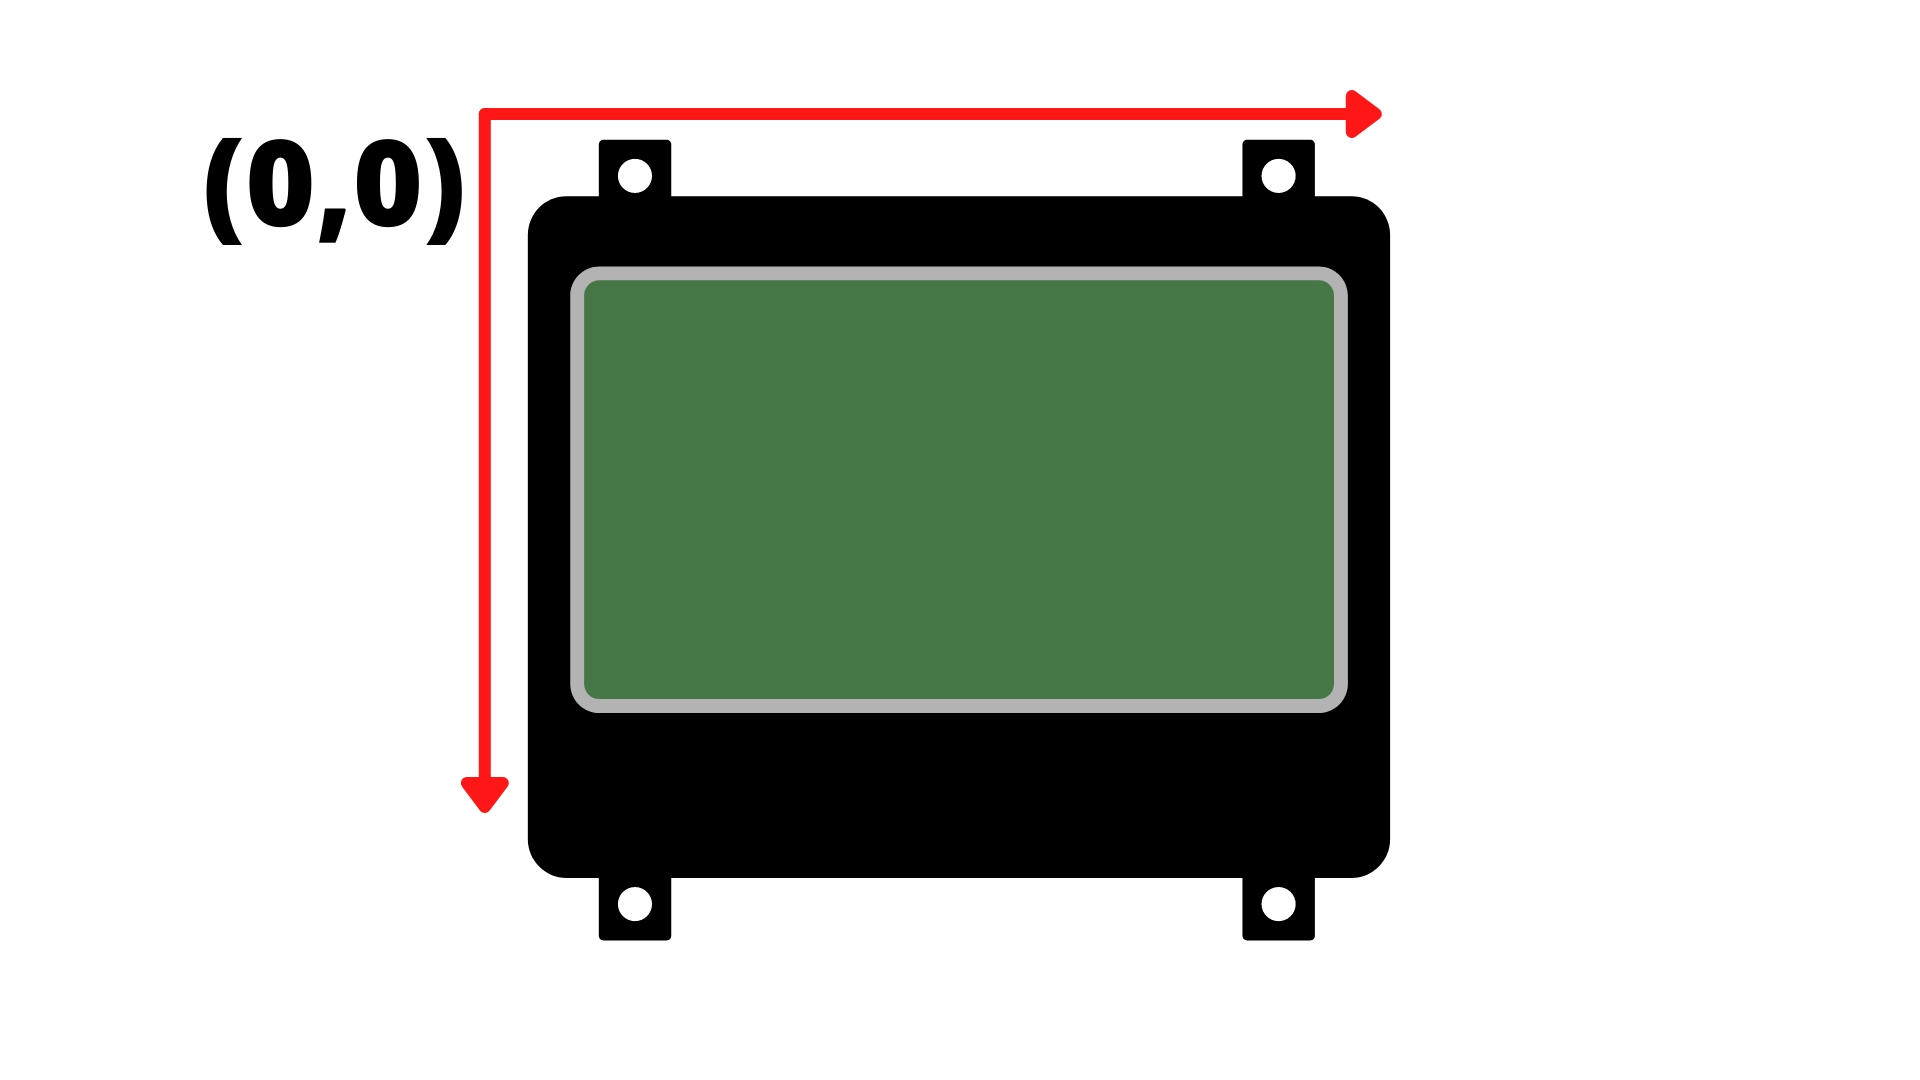
So, for example, if you wanted to draw a pixel right in the middle, it would have the following coordinates.
The x coordinate is 64 (half of 128) and y coordinate is 32 (half of 64).
Graphic LCD Lines
Now that you have a basic understanding of the layout, let’s start by drawing a straight line.
Write code (Java)
Copy the code below into a new Java project. If you need a reminder of how to do this, revisit the Getting Started Course.
Not your programming language? Set your preferences so we can display relevant code examples
//Add Phidgets Library
import com.phidget22.*;

public class GraphicLCD{
    public static void main(String[] args) throws Exception{

        //Create
        LCD lcd = new LCD();

        //Open
        lcd.open(1000);

        //Use your Phidgets
        lcd.drawLine(0, 32, 128, 32); //Divide screen in half
        lcd.flush();
    }
}
package graphiclcd;

//Add Phidgets Library
import com.phidget22.*;

public class GraphicLCD{
    public static void main(String[] args) throws Exception{

        //Create
        LCD lcd = new LCD();

        //Open
        lcd.open(1000);

        //Use your Phidgets
        lcd.drawLine(0, 32, 128, 32); //Divide screen in half
        lcd.flush();
    }
}
Write code (Python)
Copy the code below into a new Python project. If you need a reminder of how to do this, revisit the Getting Started Course.
Not your programming language? Set your preferences so we can display relevant code examples
#Add Phidgets Library
from Phidget22.Phidget import *
from Phidget22.Devices.LCD import *
import time

#Create
lcd = LCD()

#Open
lcd.openWaitForAttachment(1000)

#Use your Phidgets
lcd.drawLine(0,32,128,32) #Divide screen in half
lcd.flush()
Write code (C#)
Copy the code below into a new C# project. If you need a reminder of how to do this, revisit the Getting Started Course.
Not your programming language? Set your preferences so we can display relevant code examples
//Add Phidgets Library
using Phidget22;

namespace GraphicLCD
{
    class Program
    {
        static void Main(string[] args)
        {

            //Create
            LCD lcd = new LCD();

            //Open
            lcd.Open(1000);

            //Use your Phidgets
            lcd.DrawLine(0, 32, 128, 32); //Divide screen in half
            lcd.Flush();

            //Prevent console from closing immediately
            System.Threading.Thread.Sleep(5000);
        }
    }
}
Write code (Swift)
Copy the code below into a new Swift project. If you need a reminder of how to do this, revisit the Getting Started Course.
Not your programming language? Set your preferences so we can display relevant code examples
import Cocoa
//Add Phidgets Library
import Phidget22Swift

class ViewController: NSViewController {

    @IBOutlet weak var sensorLabel: NSTextField!

    //Create
    let lcd = LCD()

    override func viewDidLoad() {
        super.viewDidLoad()
        do{
            //Open
            try lcd.open()
        }catch{
            print(error)
        }
    }
    @IBAction func draw(_ sender: Any) {
        do{
            try lcd.drawLine(x1: 0, y1: 32, x2: 128, y2: 32)
            try lcd.flush()
        }catch{
            print(error)
        }
    }
}
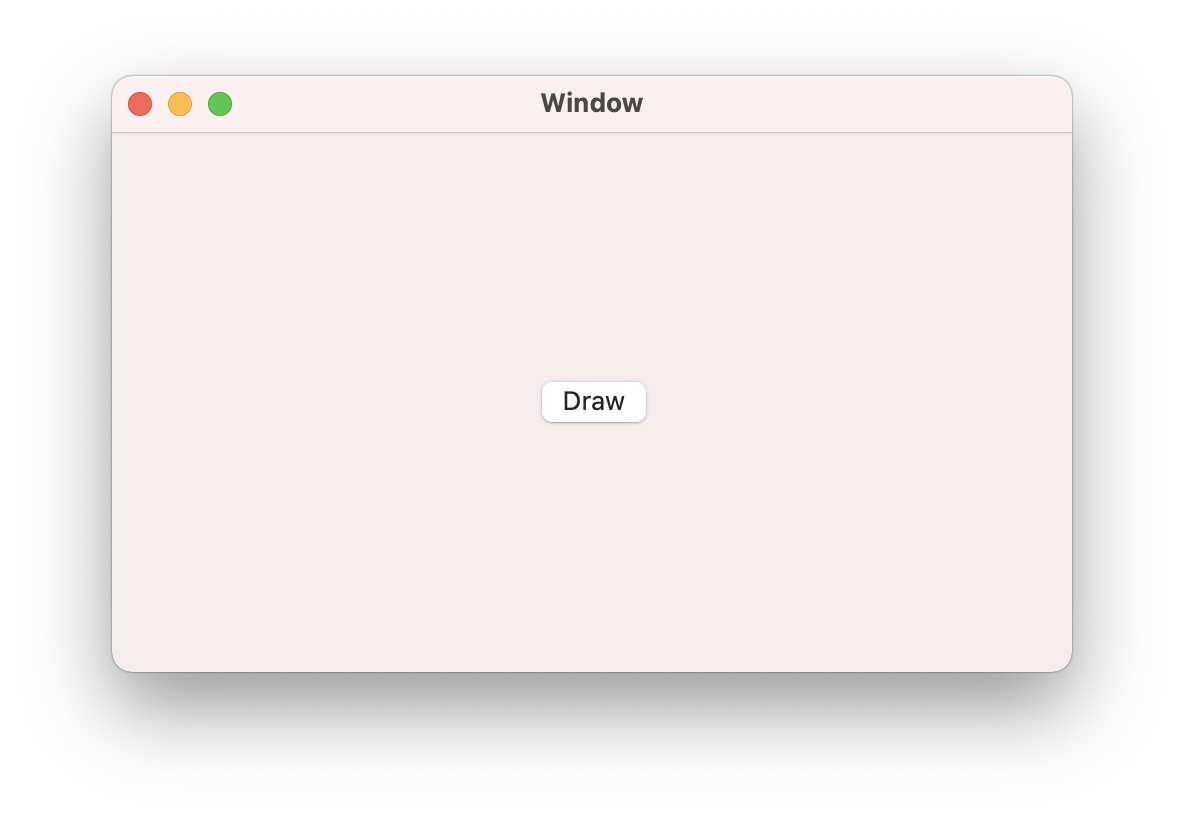
Run your code, you will see a straight line in the middle of your screen.
Code Review
When drawing lines with the Graphic LCD Phidget, you have to pass four values:
- x1: the x-coordinate of the first point
- y1: the y-coordinate of the first point
- x2: the x-coordinate of the second point
- y2: the y-coordinate of the second point
Graphic LCD Rectangles
Now that you know how to draw a straight line, try drawing a rectangle.
Write code (Java)
Copy the code below into a new Java project. If you need a reminder of how to do this, revisit the Getting Started Course. Insert the code below.
Not your programming language? Set your preferences so we can display relevant code examples
//Add Phidgets Library
import com.phidget22.*;

public class GraphicLCD{
    public static void main(String[] args) throws Exception{

        //Create
        LCD lcd = new LCD();

        //Open
        lcd.open(1000);

        //Use your Phidgets
        lcd.drawRect(25, 5, 35, 50, false, false);
        lcd.flush();
    }
}
package graphiclcd;

//Add Phidgets Library
import com.phidget22.*;

public class GraphicLCD{
    public static void main(String[] args) throws Exception{

        //Create
        LCD lcd = new LCD();

        //Open
        lcd.open(1000);

        //Use your Phidgets
        lcd.drawRect(25, 5, 35, 50, false, false);
        lcd.flush();
    }
}
Write code (Python)
Copy the code below into a new Python project. If you need a reminder of how to do this, revisit the Getting Started Course. Insert the code below.
Not your programming language? Set your preferences so we can display relevant code examples
#Add Phidgets Library
from Phidget22.Phidget import *
from Phidget22.Devices.LCD import *
import time

#Create
lcd = LCD()

#Open
lcd.openWaitForAttachment(1000)

#Use your Phidgets
lcd.drawRect(25,5,35,50,False,False)
lcd.flush()
Write code (C#)
Copy the code below into a new C# project. If you need a reminder of how to do this, revisit the Getting Started Course. Insert the code below.
Not your programming language? Set your preferences so we can display relevant code examples
//Add Phidgets Library
using Phidget22;

namespace GraphicLCD
{
    class Program
    {
        static void Main(string[] args)
        {

            //Create
            LCD lcd = new LCD();

            //Open
            lcd.Open(1000);

            //Use your Phidgets
            lcd.DrawRectangle(25, 5, 35, 50, false, false);
            lcd.Flush();

            //Prevent console from closing immediately
            System.Threading.Thread.Sleep(5000);
        }
    }
}
Write code (Swift)
Copy the code below into a new Swift project. If you need a reminder of how to do this, revisit the Getting Started Course. Insert the code below.
Not your programming language? Set your preferences so we can display relevant code examples
import Cocoa
//Add Phidgets Library
import Phidget22Swift

class ViewController: NSViewController {

    @IBOutlet weak var sensorLabel: NSTextField!

    //Create
    let lcd = LCD()

    override func viewDidLoad() {
        super.viewDidLoad()
        do{
            //Open
            try lcd.open()
        }catch{
            print(error)
        }
    }
    @IBAction func draw(_ sender: Any) {
        do{
            try lcd.drawRect(x1: 25, y1: 5, x2: 35, y2: 50, filled: false, inverted: false)
            try lcd.flush()
        }catch{
            print(error)
        }
    }
}
Run your code, you will see a rectangle on the left side of your screen.
Code Review
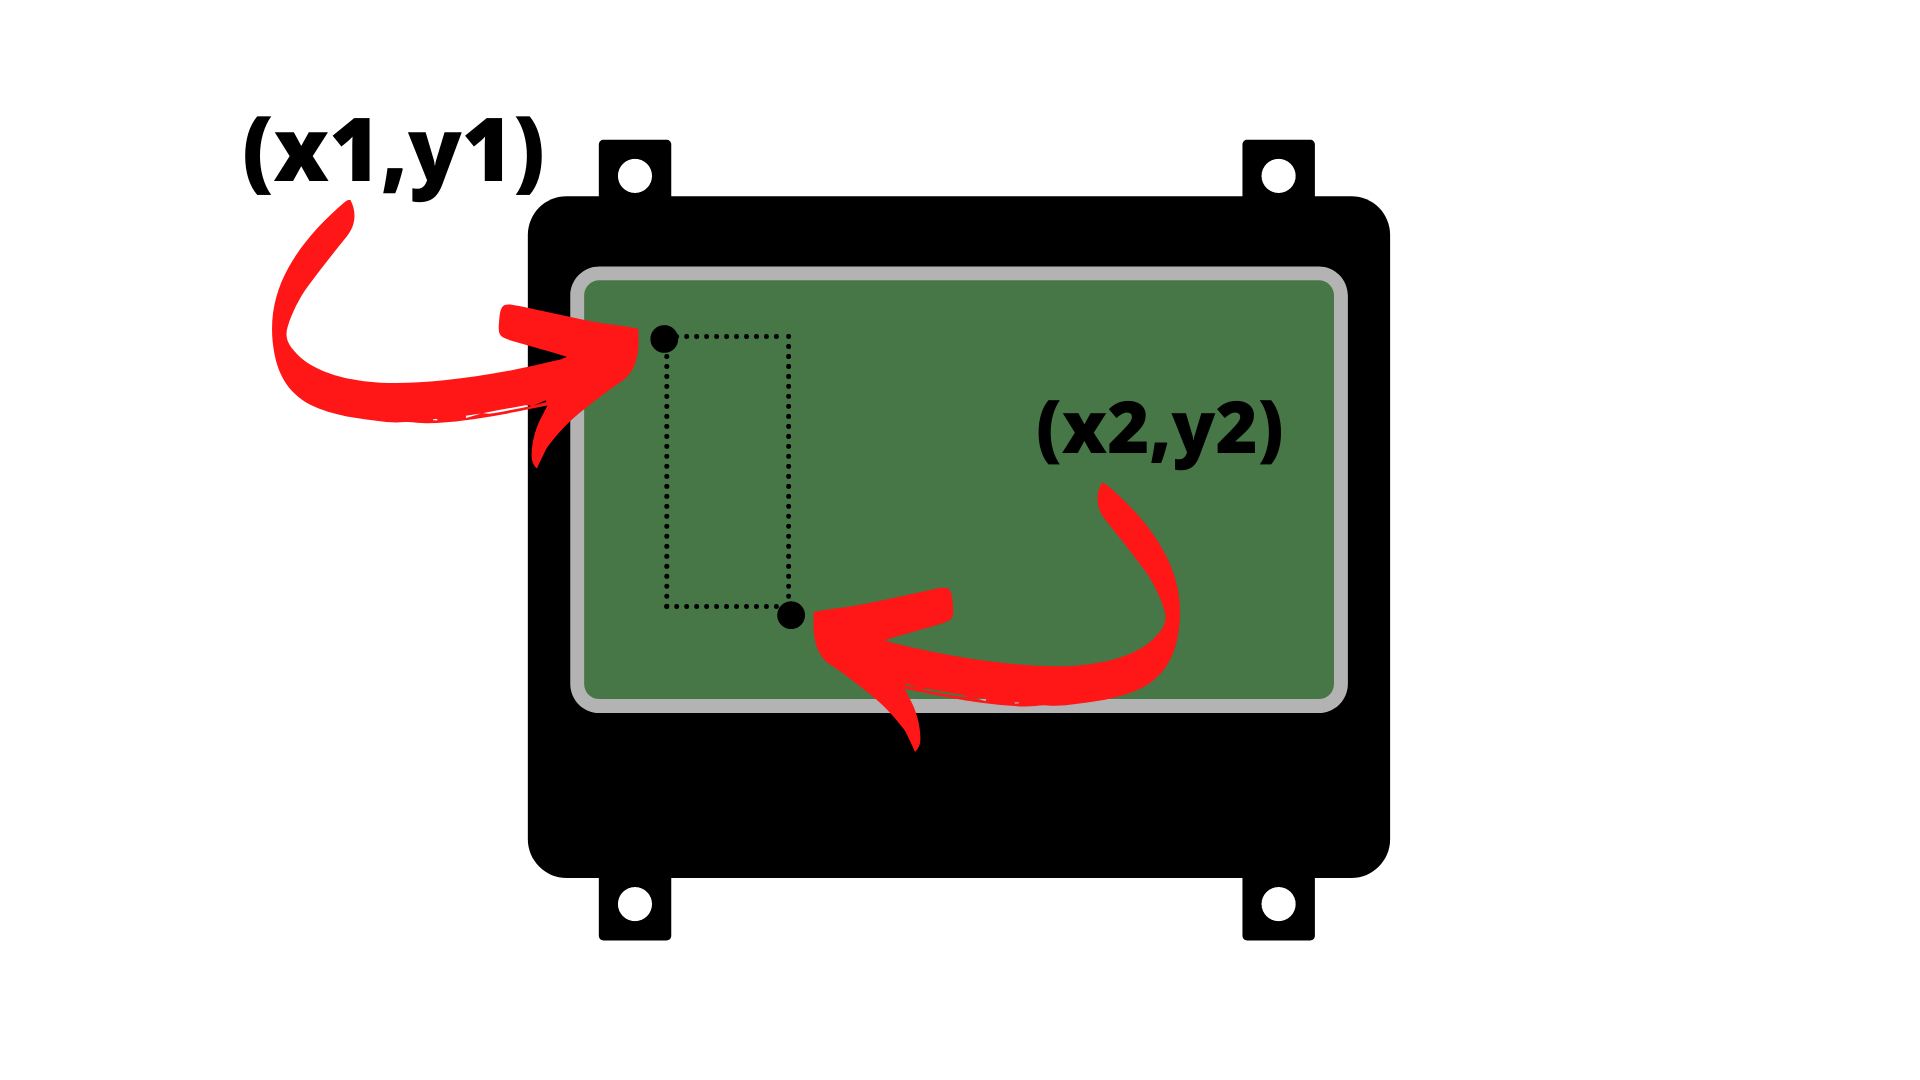
When drawing rectangles with the Graphic LCD Phidget, you have to pass six values:
- x1: the x-coordinate of the top left corner of the rectangle
- y1: the y-coordinate of the top left corner of the rectangle
- x2: the x-coordinate of the bottom right corner of the rectangle
- y2: the y-coordinate of the bottom right corner of the rectangle
- Filled: set to true to fill in the rectangle, otherwise a single pixel oiutline
- Inverted: Set true to clear the region instead of drawing
Graphic LCD Pixels
Next, learn how to draw individual pixels.
Write code (Java)
Copy the code below into a new Java project. If you need a reminder of how to do this, revisit the Getting Started Course. Insert the code below.
Not your programming language? Set your preferences so we can display relevant code examples
//Add Phidgets Library
import com.phidget22.*;

public class GraphicLCD{
    public static void main(String[] args) throws Exception{

        //Create
        LCD lcd = new LCD();

        //Open
        lcd.open(1000);

        //Use your Phidgets
        lcd.drawPixel(64, 32, LCDPixelState.ON);
        lcd.flush();
    }
}
package graphiclcd;

//Add Phidgets Library
import com.phidget22.*;

public class GraphicLCD{
    public static void main(String[] args) throws Exception{

        //Create
        LCD lcd = new LCD();

        //Open
        lcd.open(1000);

        //Use your Phidgets
        lcd.drawPixel(64, 32, LCDPixelState.ON);
        lcd.flush();
    }
}
Write code (Python)
Copy the code below into a new Python project. If you need a reminder of how to do this, revisit the Getting Started Course. Insert the code below.
Not your programming language? Set your preferences so we can display relevant code examples
#Add Phidgets Library
from Phidget22.Phidget import *
from Phidget22.Devices.LCD import *
import time

#Create
lcd = LCD()

#Open
lcd.openWaitForAttachment(1000)

#Use your Phidgets
lcd.drawPixel(64,32,True)
lcd.flush()
Write code (C#)
Copy the code below into a new C# project. If you need a reminder of how to do this, revisit the Getting Started Course. Insert the code below.
Not your programming language? Set your preferences so we can display relevant code examples
//Add Phidgets Library
using Phidget22;

namespace GraphicLCD
{
    class Program
    {
        static void Main(string[] args)
        {

            //Create
            LCD lcd = new LCD();

            //Open
            lcd.Open(1000);

            //Use your Phidgets
            lcd.DrawPixel(64, 32, LCDPixelState.On);
            lcd.Flush();

            //Prevent console from closing immediately
            System.Threading.Thread.Sleep(5000);
        }
    }
}
Write code (Swift)
Copy the code below into a new Swift project. If you need a reminder of how to do this, revisit the Getting Started Course. Insert the code below.
Not your programming language? Set your preferences so we can display relevant code examples
import Cocoa
//Add Phidgets Library
import Phidget22Swift

class ViewController: NSViewController {

    @IBOutlet weak var sensorLabel: NSTextField!

    //Create
    let lcd = LCD()

    override func viewDidLoad() {
        super.viewDidLoad()
        do{
            //Open
            try lcd.open()
        }catch{
            print(error)
        }
    }
    @IBAction func draw(_ sender: Any) {
        do{
            try lcd.drawPixel(x: 64, y: 32, pixelState: LCDPixelState.on)
            try lcd.flush()
        }catch{
            print(error)
        }
    }
}
Run your code, you will see a single pixel in the center of your screen.
Code Review
When drawing pixels with the Graphic LCD Phidget, you have to pass three values:
- x: the x-coordinate of the top left corner of the rectangle
- y: the y-coordinate of the top left corner of the rectangle
- Pixel State:set whether the pixel is filled in or not.
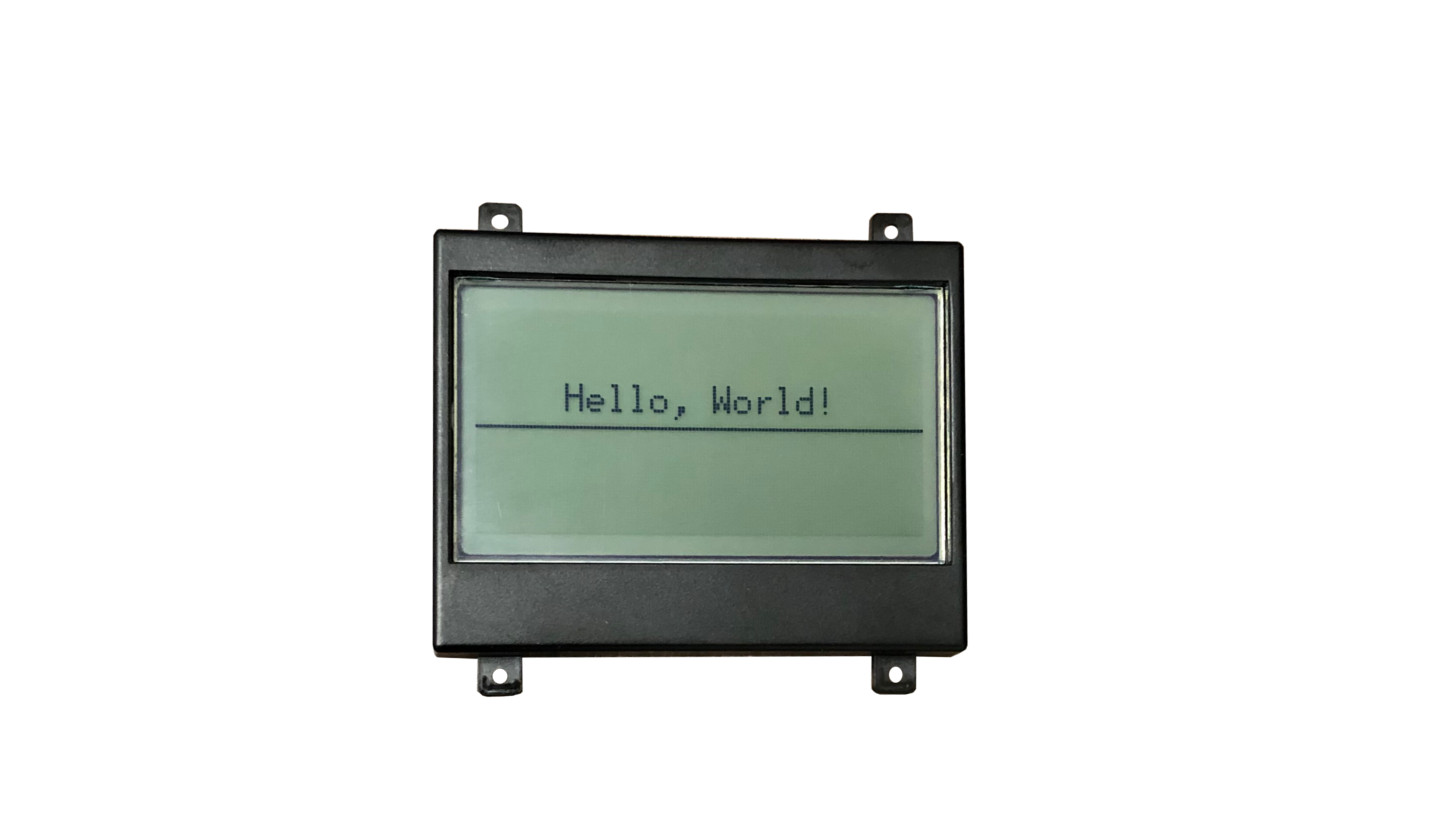
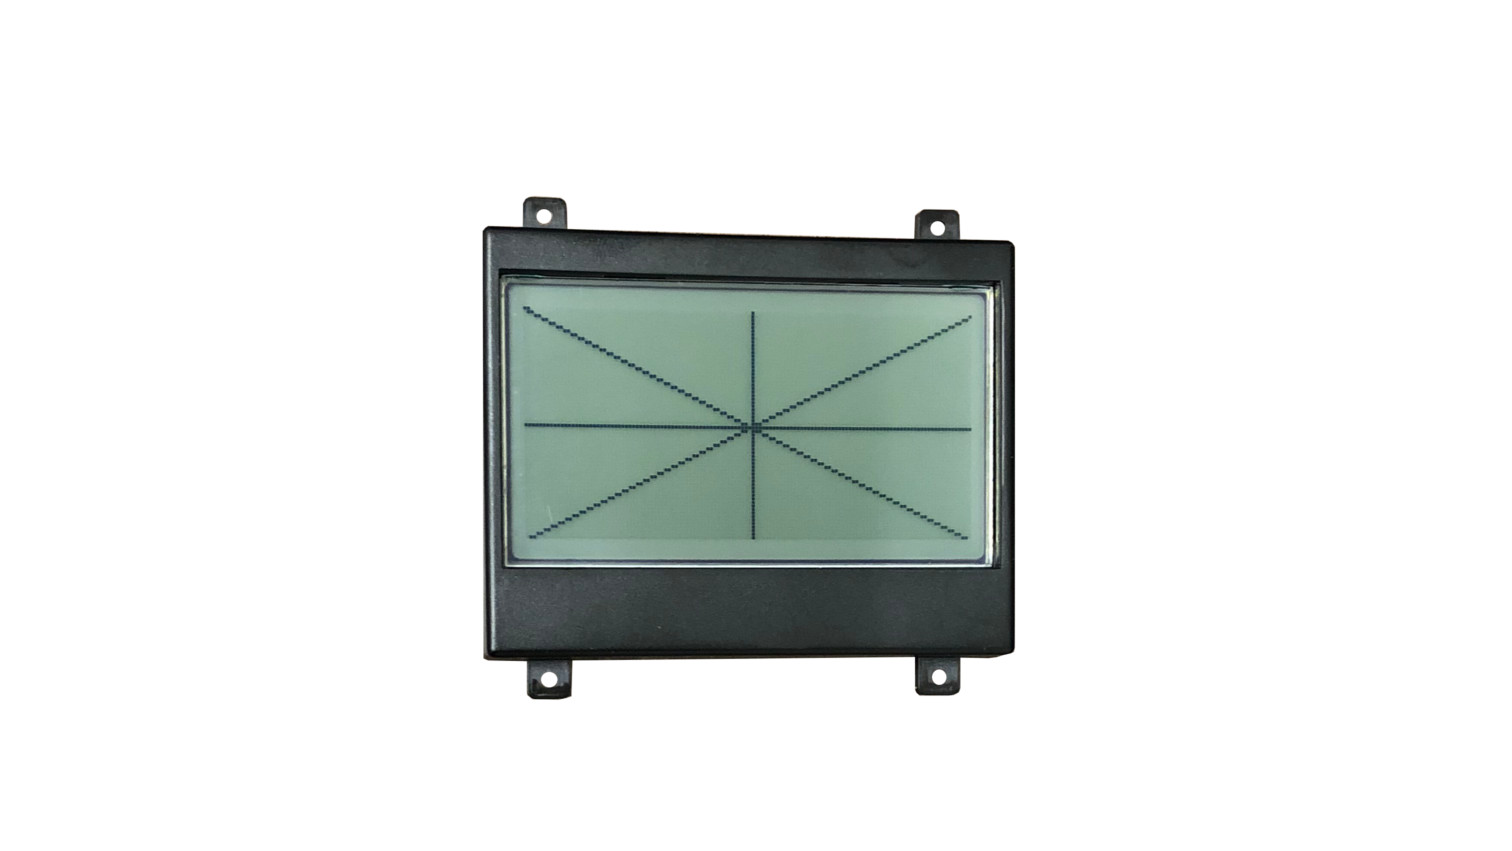
Practice
- Replicate the screen shown here:
- Replicate the screen shown here: