Spatial Phidget
The Spatial Phidget contains a 3-axis accelerometer, 3-axis gyroscope and a 3-axis magnetometer.
The accelerometer measures acceleration in units of g-force. A stationary object experiences 1 g of acceleration due to the Earth's gravitational field. A high-speed roller coaster typically develops 4 g to 6 g.
The gyroscope measures rotational motion. Rotational motion (also known as angular velocity) is measured in degrees per second (°/s). The gyroscope will provide angular velocity between -2000 and 2000°/s in the x, y and z-axis. This allows you to track the orientation of an object in 3D space.
The magnetometer measures magnetic fields. The magnetometer will report magnetic field strength along the x, y, and z axes. Magnetic field strength is measured in units of Gauss (G).
See tutorial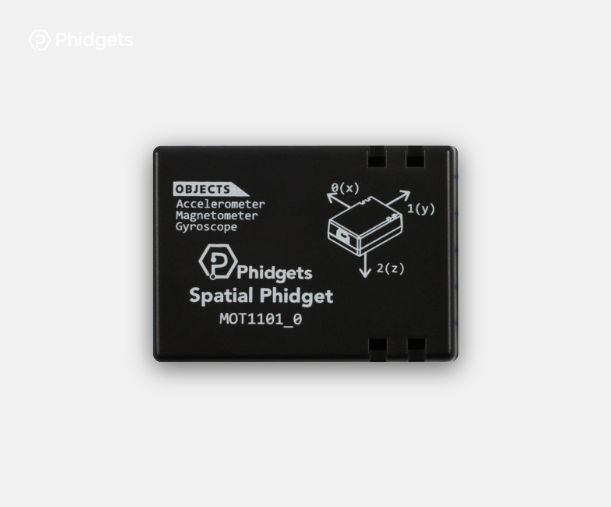
Setup
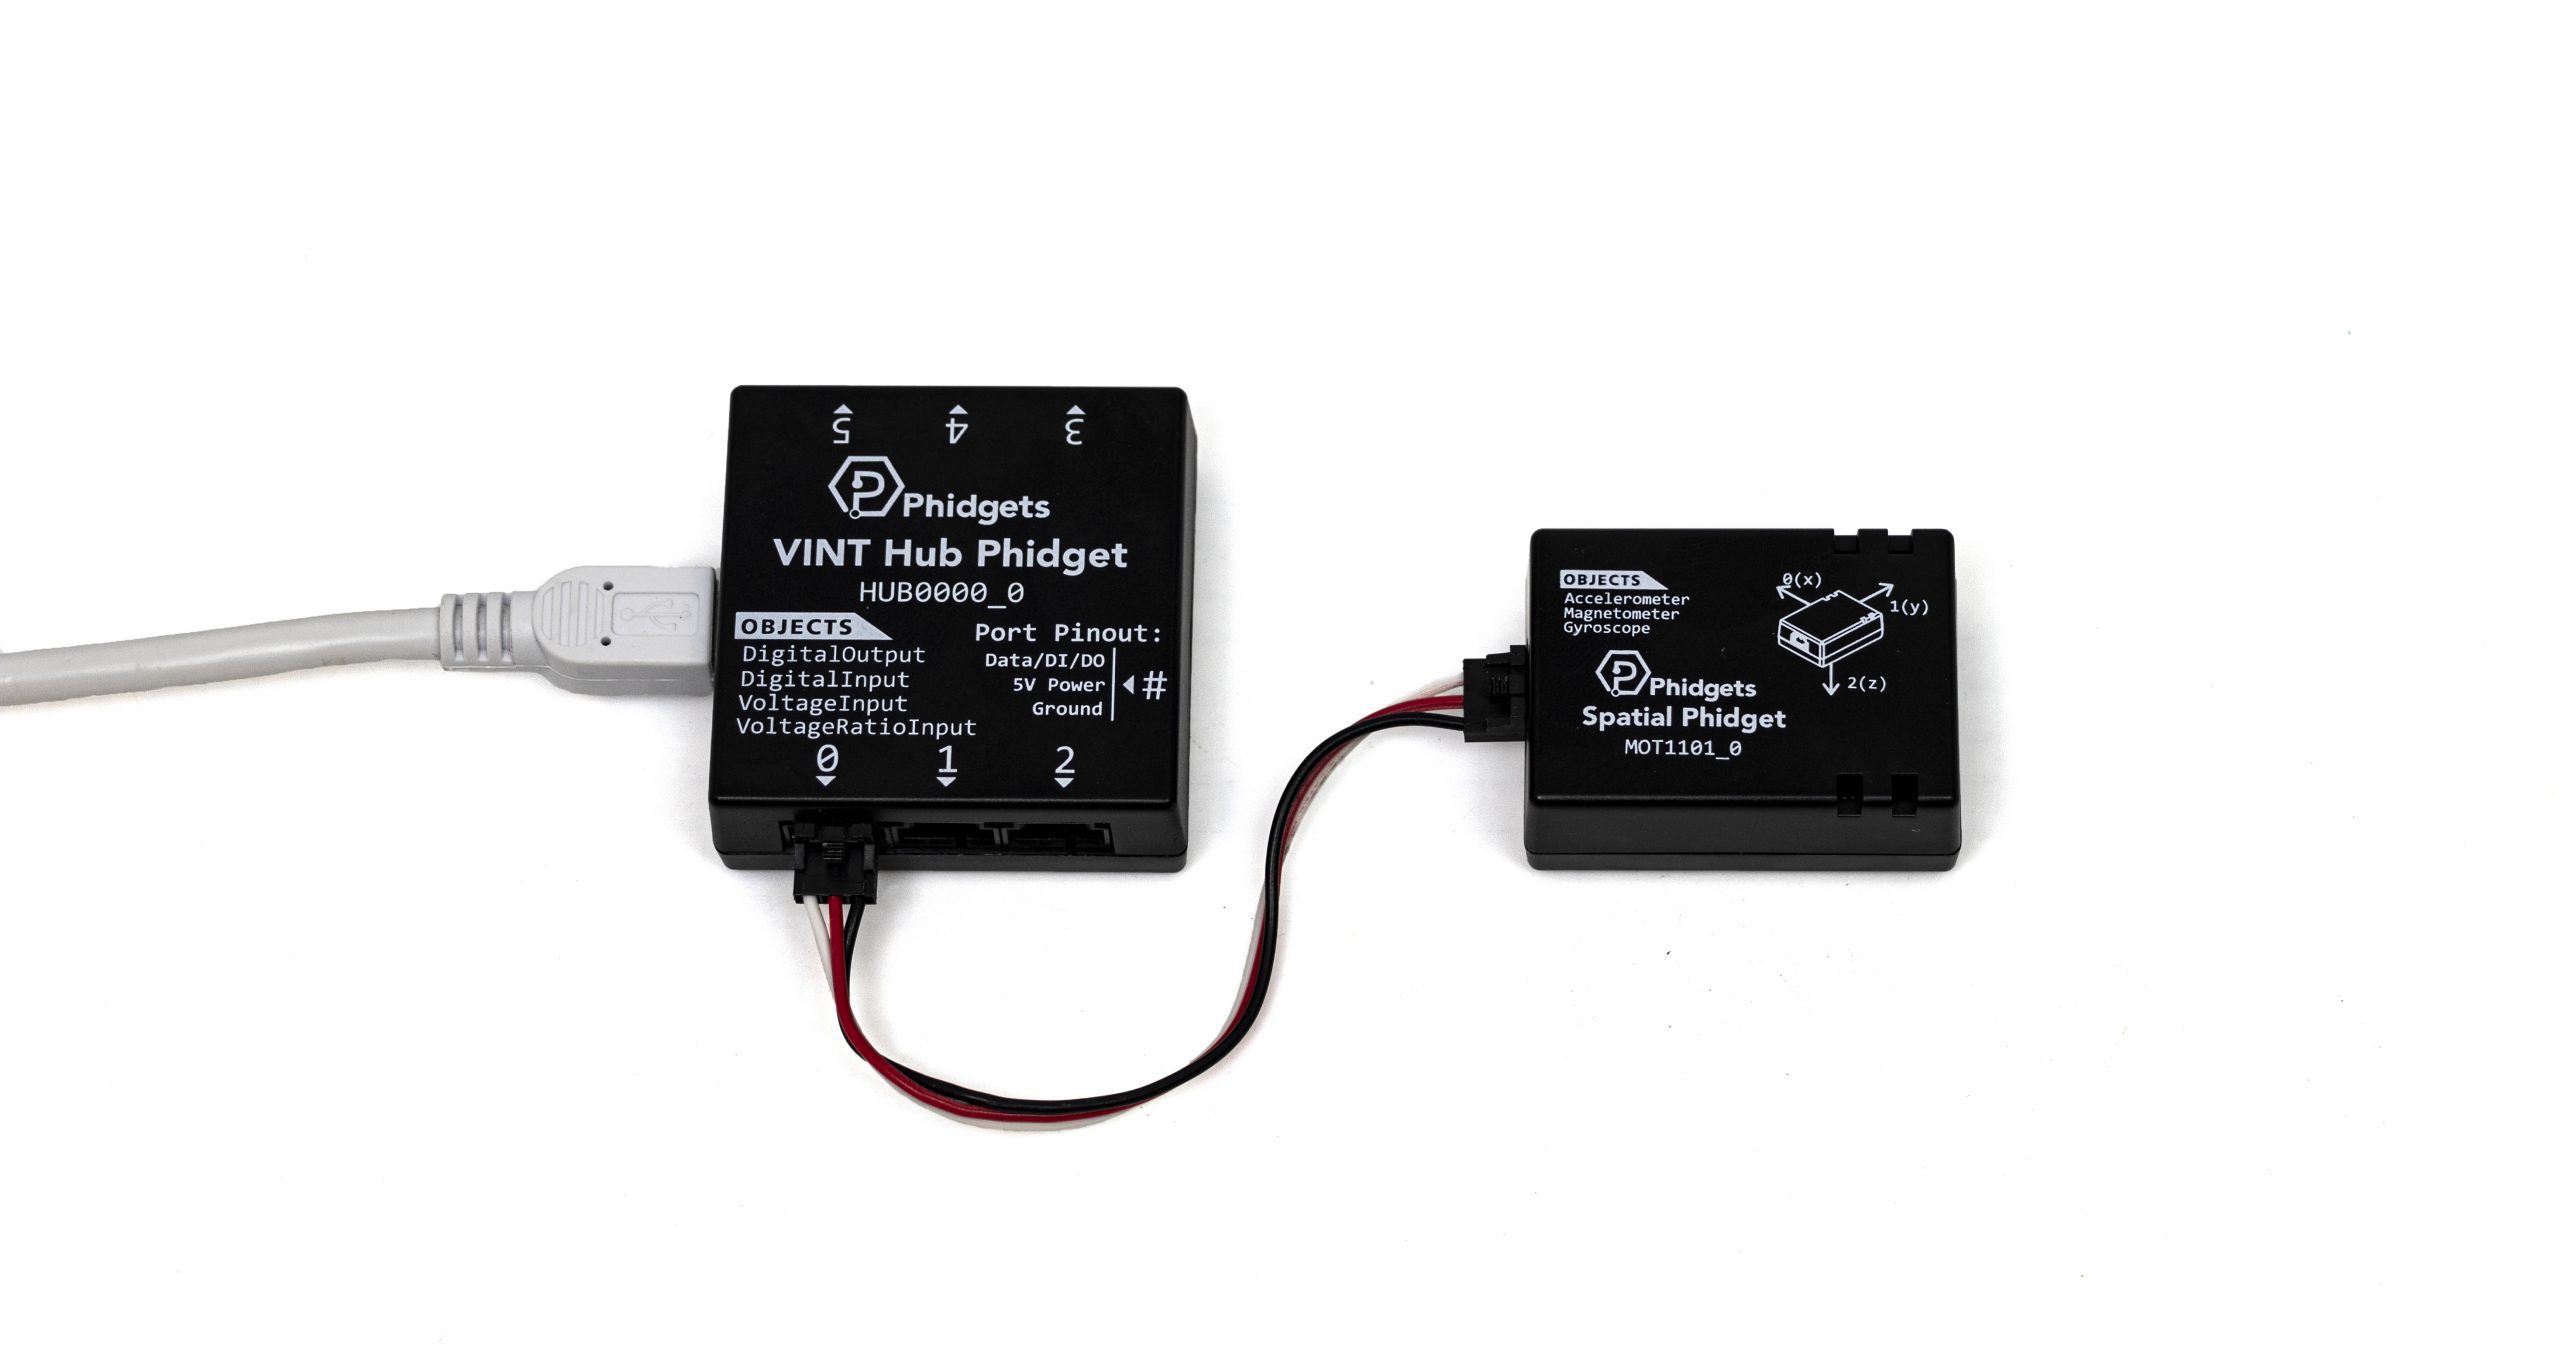
Before you do any coding you will have to attach your Spatial Phidget to your VINT Hub as shown:
Code (Java) - Accelerometer
Create a file called Spatial and insert the following code. Run your code. Move your Spatial Phidget to see the output change.
Not your programming language? Set my language and IDE.
package spatial;

//Add Phidgets Library
import com.phidget22.*;

public class Spatial{
    public static void main(String[] args) throws Exception {

        //Create
        Accelerometer accelerometer = new Accelerometer();

        //Open
        accelerometer.open(1000);

        //Use your Phidgets
        while (true) {
            System.out.println("Acceleration: x = " + accelerometer.getAcceleration()[0] + " g | y = " + accelerometer.getAcceleration()[1] + " g | z = " + accelerometer.getAcceleration()[2]+ " g");
            Thread.sleep(250);
        }
    }
}
//Add Phidgets Library
import com.phidget22.*;

//Define
Accelerometer accelerometer;

void setup(){
  try{

    //Create
     accelerometer = new Accelerometer();

    //Open
    accelerometer.open(1000);

  }catch(Exception e){
    e.printStackTrace();
  }
}

void draw(){
  try{

    //Use your Phidgets
    println("Acceleration: x = " + accelerometer.getAcceleration()[0] + " g | y = " + accelerometer.getAcceleration()[1] + " g | z = " + accelerometer.getAcceleration()[2]+ " g");
    delay(250);

  }catch(Exception e){
    e.printStackTrace();
  }
}
Code (Python) - Accelerometer
Create a file called Spatial and insert the following code. Run your code. Move your Spatial Phidget to see the output change.
Not your programming language? Set my language and IDE.
#Add Phidgets Library
from Phidget22.Phidget import *
from Phidget22.Devices.Accelerometer import *
#Required for sleep statement
import time

#Create
accelerometer = Accelerometer()

#Open
accelerometer.openWaitForAttachment(1000)

#Use your Phidgets
while (True):
    print("Acceleration: x = " + str(accelerometer.getAcceleration()[0]) + " g | y = " + str(accelerometer.getAcceleration()[1]) +" g | z = " + str(accelerometer.getAcceleration()[2]))
    time.sleep(0.25)
Code (C#) - Accelerometer
Create a file called Spatial and insert the following code. Run your code. Move your Spatial Phidget to see the output change.
Not your programming language? Set my language and IDE.
//Add Phidgets Library
using Phidget22;

namespace Spatial{
    class Program{
        static void Main(string[] args){

            //Create
            Accelerometer accelerometer = new Accelerometer();

            //Open
            accelerometer.Open(1000);

            //Use your Phidgets
            while (true)
            {
                System.Console.WriteLine("Acceleration: x = " + accelerometer.Acceleration[0] + "g | y = " + accelerometer.Acceleration[1] + "g | z = " + accelerometer.Acceleration[2] + "g");
                System.Threading.Thread.Sleep(250);
            }
        }
    }
}
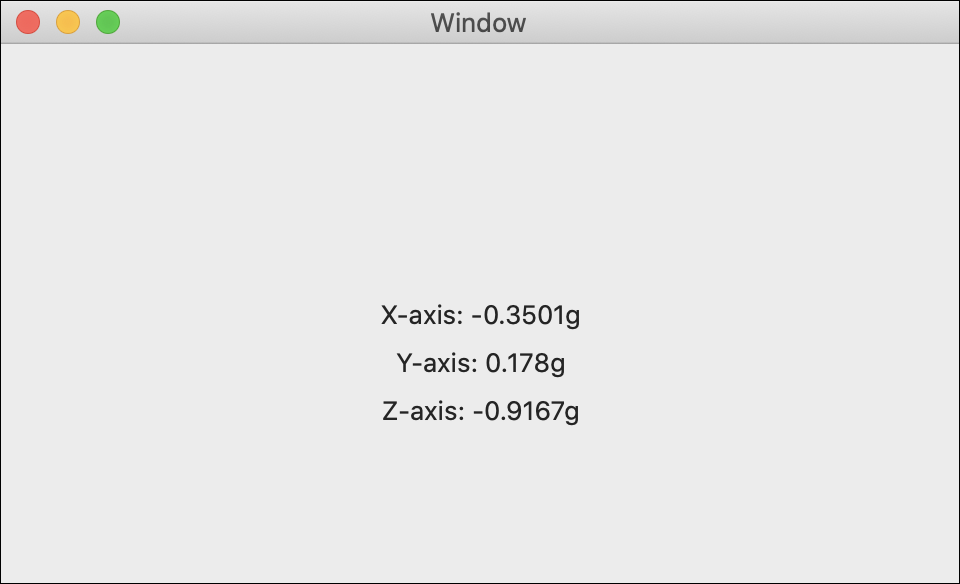
Code (Swift) - Accelerometer
Create a file called Spatial and insert the following code. Run your code. Move your Spatial Phidget to see the output change.
Not your programming language? Set my language and IDE.
You will need to add three Labels.
import Cocoa
//Add Phidget Library
import Phidget22Swift

class ViewController: NSViewController {

    @IBOutlet weak var xLabel: NSTextField!
    @IBOutlet weak var yLabel: NSTextField!
    @IBOutlet weak var zLabel: NSTextField!

    //Create
    let accelerometer = Accelerometer()

    override func viewDidLoad() {
        super.viewDidLoad()
        do{
            //Subscribe to event
            let _ = accelerometer.accelerationChange.addHandler(onAccelerationChange)

            //Open
            try accelerometer.open()
        }catch{
            print(error)
        }
    }

    func onAccelerationChange(sender:Accelerometer, data: (acceleration:[Double], timestamp: Double)){
        DispatchQueue.main.async {
	    //Use information from your Phidget to change label
            self.xLabel.stringValue = "X-axis: " + String(data.acceleration[0]) + "g"
            self.yLabel.stringValue = "Y-axis: " + String(data.acceleration[1]) + "g"
            self.zLabel.stringValue = "Z-axis: " + String(data.acceleration[2]) + "g"
        }
    }
}
Accelerometer Applications
Accelerometers measure vibrations in audio applications (noise monitoring), mechanical (car tires), and buildings (seismic activity monitoring). Accelerometers monitor speed and g-force (for example, on a roller coaster). Accelerometers are also used in fall detection systems or in your Phone to rotate the screen from portrait to landscape view.


Accelerometer Practice
Create the beginning fall detection system using your Spatial Phidget and Getting Started Kit.
- When the Phidget is sitting flat on your desk, turn on the green LED.
- When the Spatial Phidget moves, turn on the Red LED.
Code (Java) - Gyroscope
Create a file called Spatial and insert the following code. Run your code. Move your Spatial Phidget to see the output change.
Not your programming language? Set my language and IDE.
package spatial;

//Add Phidgets Library
import com.phidget22.*;

public class Spatial{
    public static void main(String[] args) throws Exception {

        //Create
        Gyroscope gyroscope = new Gyroscope();

        //Open
       gyroscope.open(1000);

        //Use your Phidgets
        while (true) {
            System.out.println("Gyroscope: x = " + gyroscope.getAngularRate()[0] + " °/s | y = " + gyroscope.getAngularRate()[1] + " °/s | z = " + gyroscope.getAngularRate()[2]+ " °/s");
            Thread.sleep(250);
        }
    }
}
//Add Phidgets Library
import com.phidget22.*;

//Define
Gyroscope gyroscope;

void setup(){
  try{

    //Create
    gyroscope = new Gyroscope();

    //Open
    gyroscope.open(1000);

  }catch(Exception e){
    e.printStackTrace();
  }
}

void draw(){
  try{

    //Use your Phidgets
    println("Gyroscope: x = " + gyroscope.getAngularRate()[0] + " °/s | y = " + gyroscope.getAngularRate()[1] + " °/s | z = " + gyroscope.getAngularRate()[2]+ " °/s");
    delay(250);

  }catch(Exception e){
    e.printStackTrace();
  }
}
Code (Python) - Gyroscope
Create a file called Spatial and insert the following code. Run your code. Move your Spatial Phidget to see the output change.
Not your programming language? Set my language and IDE.
#Add Phidgets Library
from Phidget22.Phidget import *
from Phidget22.Devices.Gyroscope import *
#Required for sleep statement
import time

#Create
gyroscope = Gyroscope()

#Open
gyroscope.openWaitForAttachment(1000)

#Use your Phidgets
while (True):
    print("Gyroscope: x = " + str(gyroscope.getAngularRate()[0]) + "°/s | y = " + str(gyroscope.getAngularRate()[1]) + "°/s | z = " + str(gyroscope.getAngularRate()[2]) + "°/s")
    time.sleep(0.25)
Code (C#) - Gyroscope
Create a file called Spatial and insert the following code. Run your code. Move your Spatial Phidget to see the output change.
Not your programming language? Set my language and IDE.
//Add Phidgets Library
using Phidget22;

namespace Spatial
{
    class Program
    {
        static void Main(string[] args)
        {

            //Create
            Gyroscope gyroscope = new Gyroscope();

            //Open
            gyroscope.Open(1000);

            //Use your Phidgets
            while (true)
            {
                System.Console.WriteLine("Gyroscope: x = " + gyroscope.AngularRate[0] + "°/s | y = " + gyroscope.AngularRate[1] + "°/s | z = " + gyroscope.AngularRate[2] + " °/s");
                System.Threading.Thread.Sleep(250);
            }
        }
    }
}
Gyroscope Applications
Gyroscopes are used in guidance systems in aircrafts, drones and autonomous vehicles. Smartphones can use gyroscopes to change the orientation of the screen depending on phone position. Gyroscopes are also used for camera stabilization and in virtual reality headsets.


Gyroscope Practice
Create the beginning fall detection system using your Spatial Phidget and Getting Started Kit.
- Replace the Humidity Phidget in your Getting Started Kit with the Spatial Phidget.
- Using the Z-Axis gyroscope data turn the Green LED on when the angular velocity is positive. When you spin the Spatial clockwise the Green LED should turn on.
- Using the Z-Axis gyroscope data turn the Red LED on then the angular velocity is negative. When you turn the Spatial counterclockwise the Red LED should turn on.
- If the angular velocity is between -2 and positive 2, both LEDs should turn off.
Code (Java) - Magnetometer
Create a file called Spatial and insert the following code. Run your code. Move your Spatial Phidget to see the output change.
Not your programming language? Set my language and IDE.
package spatial;

//Add Phidgets Library
import com.phidget22.*;

public class Spatial{
    public static void main(String[] args) throws Exception {

        //Create
       Magnetometer magnetometer = new Magnetometer();

        //Open
       magnetometer.open(1000);

        //Use your Phidgets
        while (true) {
            System.out.println("Magnetic Field: x = " + magnetometer.getMagneticField()[0] + " G | y = " + magnetometer.getMagneticField()[1] + " G | z = " + magnetometer.getMagneticField()[2]+ " G");
            Thread.sleep(250);
        }
    }
}
//Add Phidgets Library
import com.phidget22.*;

//Define
Magnetometer magnetometer;

void setup(){
  try{

    //Create
    magnetometer = new Magnetometer();

    //Open
    magnetometer.open(1000);

  }catch(Exception e){
    e.printStackTrace();
  }
}

void draw(){
  try{

    //Use your Phidgets
    println("Magnetic Field: x = " + magnetometer.getMagneticField()[0] + " G | y = " + magnetometer.getMagneticField()[1] + " G | z = " + magnetometer.getMagneticField()[2]+ " G");
    delay(250);

  }catch(Exception e){
    e.printStackTrace();
  }
}
Code (Python) - Magnetometer
Create a file called Spatial and insert the following code. Run your code. Move your Spatial Phidget to see the output change.
Not your programming language? Set my language and IDE.
#Add Phidgets Library
from Phidget22.Phidget import *
from Phidget22.Devices.Magnetometer import *
#Required for sleep statement
import time

#Create
magnetometer = Magnetometer()

#Open
magnetometer.openWaitForAttachment(1000)

#Use your Phidgets
while (True):
    print("Magnetic Field: x = " + str(magnetometer.getMagneticField()[0]) + " G | y = " + str(magnetometer.getMagneticField()[1]) + " G | z = " + str(magnetometer.getMagneticField()[2]) + " G")
    time.sleep(0.25)
Code (C#) - Magnetometer
Create a file called Spatial and insert the following code. Run your code. Move your Spatial Phidget to see the output change.
Not your programming language? Set my language and IDE.
//Add Phidgets Library
using Phidget22;

namespace Spatial
{
    class Program
    {
        static void Main(string[] args)
        {

            //Create
            Magnetometer magnetometer = new Magnetometer();

            //Open
            magnetometer.Open(1000);

            //Use your Phidgets
            while (true)
            {
                System.Console.WriteLine("Magnetic field: x = " + magnetometer.MagneticField[0] + " G | y = " + magnetometer.MagneticField[1] + " G | z = " + magnetometer.MagneticField[2] + " G");
                System.Threading.Thread.Sleep(250);
            }
        }
    }
}
Code (Swift) - Magnetometer
Create a file called Spatial and insert the following code. Run your code. Move your Spatial Phidget to see the output change.
Not your programming language? Set my language and IDE.
You will need to add three Labels.
import Cocoa
//Add Phidget Library
import Phidget22Swift

class ViewController: NSViewController {

    @IBOutlet weak var xLabel: NSTextField!
    @IBOutlet weak var yLabel: NSTextField!
    @IBOutlet weak var zLabel: NSTextField!

    //Create
    let magnetometer = Magnetometer()

    override func viewDidLoad() {
        super.viewDidLoad()
        do{
            //Subscribe to event
            let _ = magnetometer.setOnMagneticFieldChangeHandler(onMagneticFieldChange)

            //Open
            try magnetometer.open()
        }catch{
            print(error)
        }
    }

func onMagneticFieldChange(sender: Magnetometer, data: (magneticField: [Double], timestamp: Double)) {
        DispatchQueue.main.async {
	    //Use information from your Phidget to change label
            self.xLabel.stringValue = "X-axis: " + String(data.magneticField[0]) + " G"
            self.yLabel.stringValue = "Y-axis: " + String(data.magneticField[1]) + " "G”
            self.zLabel.stringValue = "Z-axis: " + String(data.magneticField[2]) + " G"
        }
    }
}
Magnetometer Applications
Magnetometers are sometimes referred to as “electronic compasses”. Electronic compasses work in exactly the same way as any other compass: They detect the Earth's magnetic field and respond to it. The difference is that an electronic compass uses a magnetometer to detect the field as opposed to a small magnet. This allows them to be much more accurate and allows them to respond more quickly to changes in direction than a traditional compass ever could. Magnetometers are also found in health care monitoring applications, land surveying, aircrafts and in land surveying applications to detect buried and submerged objects.


Magnetometer Practice
Coming soon!
Check out the advanced lesson Using the Sensor API before you use the API for the first time.
API
Troubleshoot
- Make sure everything is plugged in properly and your VINT Hub is connected to your computer
- Stop running other programs that are using your Phidgets before running a program.
If these do not solve your issue visit the Advanced Troubleshooting Page.