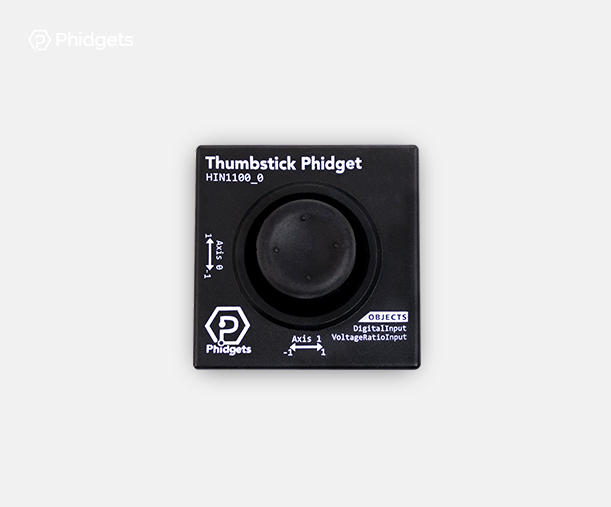
Thumbstick Phidget
The Thumbstick Phidget measures the position of the thumbstick. There are two axes, one for horizontal movement and one for vertical movement. The Thumbstick Phidget returns a value between -1 and 1 for each axis. You can think of the vertical and horizontal position values as x and y coordinates on a graph.
The Thumbstick Phidget also has a button. The button operates similarly to the buttons on your Getting Started Kit. It returns true when pushed, and false when released.
Setup
Before you do any coding you will have to attach your Thumbstick to your VINT hub as shown:

Code (Java)
Create a file called Thumbstick and insert the following code. Run your code. Move the thumbstick to see the output change.
NOTE: The Thumbstick uses Channels to distinguish the vertical and horizontal directions. We set Channels to access different sensors of the same type in a Phidget.
Not your programming language? Set my language and IDE.
package thumbstick;

 //Add Phidgets Library
import com.phidget22.*;

public class Thumbstick {
    public static void main(String[] args) throws Exception {

        //Create
        DigitalInput button = new DigitalInput();
        VoltageRatioInput horizontal = new VoltageRatioInput();
        VoltageRatioInput vertical = new VoltageRatioInput();

        //Address
        vertical.setChannel(0);
        horizontal.setChannel(1);

        //Open
        button.open(1000);
        vertical.open(1000);
        horizontal.open(1000);

        //Use your Phidget
        while (true) {
            System.out.println("Button Press: " + button.getState());
            System.out.println("Horizontal Position: " + horizontal.getVoltageRatio());
            System.out.println("Vertical Position: " + vertical.getVoltageRatio() +"\n");
            Thread.sleep(100);
        }
    }
}
//Add Phidgets Library
import com.phidget22.*;

//Define
DigitalInput button;
VoltageRatioInput horizontal;
VoltageRatioInput vertical;

void setup(){
  try{

    //Create
    button = new DigitalInput();
    horizontal = new VoltageRatioInput();
    vertical = new VoltageRatioInput();

    //Address
    vertical.setChannel(0);
    horizontal.setChannel(1);

    //Open
    button.open(1000);
    vertical.open(1000);
    horizontal.open(1000);

  }catch(Exception e){
    e.printStackTrace();
  }
}

void draw(){
  try{

    //Use your Phidgets
    System.out.println("Button Press: " + button.getState());
    System.out.println("Horizontal Position: " + horizontal.getVoltageRatio());
    System.out.println("Vertical Position: " + vertical.getVoltageRatio() +"\n");
    delay(250);

  }catch(Exception e){
    e.printStackTrace();
  }
}
Code (Python)
Create a file called Thumbstick and insert the following code. Run your code. Move the thumbstick to see the output change.
NOTE: The Thumbstick uses Channels to distinguish the vertical and horizontal directions. We set Channels to access different sensors of the same type in a Phidget.
Not your programming language? Set my language and IDE.
#Add Phidgets Library
from Phidget22.Phidget import *
from Phidget22.Devices.DigitalInput import *
from Phidget22.Devices.VoltageRatioInput import *
#Required for sleep statement
import time

#Create
button = DigitalInput()
vertical = VoltageRatioInput()
horizontal = VoltageRatioInput()

#Address
vertical.setChannel(0)
horizontal.setChannel(1)

#Open
button.openWaitForAttachment(1000)
vertical.openWaitForAttachment(1000)
horizontal.openWaitForAttachment(1000)

#Use your Phidgets
while (True):
    print("State: " + str(button.getState()))
    print("Vertical Position: " + str(vertical.getVoltageRatio()))
    print("Horizontal Position: " + str(horizontal.getVoltageRatio())+ "\n")
    time.sleep(0.10)
Code (C#)
Create a file called Thumbstick and insert the following code. Run your code. Move the thumbstick to see the output change.
NOTE: The Thumbstick uses Channels to distinguish the vertical and horizontal directions. We set Channels to access different sensors of the same type in a Phidget.
Not your programming language? Set my language and IDE.
//Add Phidgets Library
using Phidget22;

namespace Thumbstick{
    class Program{
        static void Main(string[] args){

            //Create
            DigitalInput button = new DigitalInput();
            VoltageRatioInput vertical = new VoltageRatioInput();
            VoltageRatioInput horizontal = new VoltageRatioInput();

            //Address
            vertical.Channel = 0;
            horizontal.Channel = 1;

            //Open
            button.Open(1000);
            vertical.Open(1000);
            horizontal.Open(1000);

            //Use your Phidgets
            while (true)
            {
                System.Console.WriteLine("Button Press: " + button.State + ", Horizontal Position: " + horizontal.VoltageRatio + ", Vertical Position: " + vertical.VoltageRatio);
                System.Threading.Thread.Sleep(100);
            }
        }
    }
}
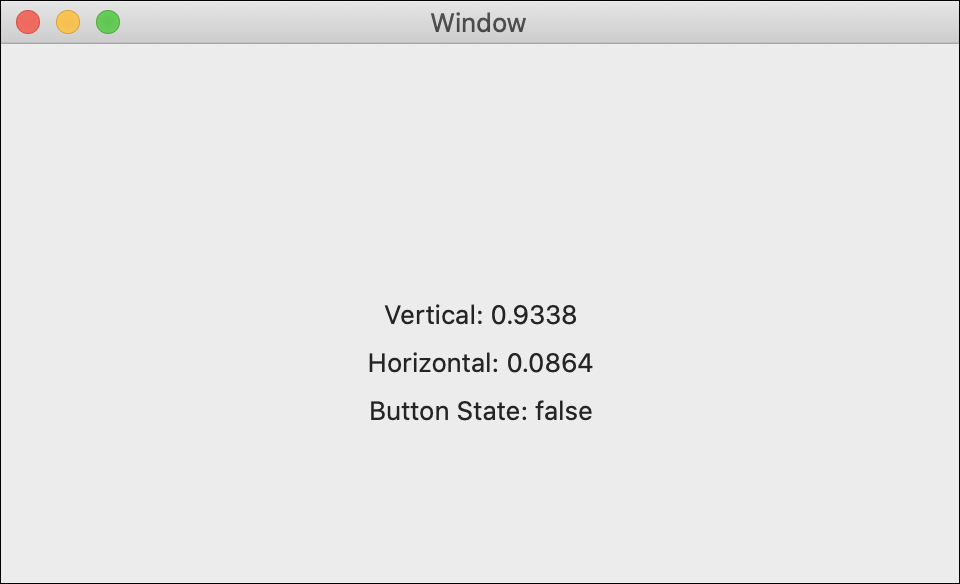
Code (Swift)
Create a file called Thumbstick and insert the following code. Run your code. Move the thumbstick to see the output change.
NOTE: The Thumbstick uses Channels to distinguish the vertical and horizontal directions. We set Channels to access different sensors of the same type in a Phidget.
Not your programming language? Set my language and IDE.
You will need to add three Labels.
import Cocoa
//Add Phidgets Library
import Phidget22Swift

class ViewController: NSViewController {

    @IBOutlet weak var vAxisLabel: NSTextField!
    @IBOutlet weak var hAxisLabel: NSTextField!
    @IBOutlet weak var buttonStateLabel: NSTextField!

    //Create
    let verticalAxis = VoltageRatioInput()
    let horizontalAxis = VoltageRatioInput()
    let button = DigitalInput()

    override func viewDidLoad() {
        super.viewDidLoad()
        do{
            //Subscribe to events
            let _ = verticalAxis.voltageRatioChange.addHandler(onVerticalAxisChange)
            let _ = horizontalAxis.voltageRatioChange.addHandler(onHorizontalAxisChange)
            let _ = button.stateChange.addHandler(onStateChange)

            //Address
	    try verticalAxis.setChannel(0)
            try horizontalAxis.setChannel(1)

            //Open
            try verticalAxis.open()
            try horizontalAxis.open()
            try button.open()

        }catch{
            print(error)
        }
    }

    func onVerticalAxisChange(sender:VoltageRatioInput, voltageRatio: Double){
        DispatchQueue.main.async {
	    //Use information from your Phidget to change label
            self.vAxisLabel.stringValue = "Vertical: " + String(voltageRatio)
        }
    }

    func onHorizontalAxisChange(sender:VoltageRatioInput, voltageRatio: Double){
        DispatchQueue.main.async {
	    //Use information from your Phidget to change label
            self.hAxisLabel.stringValue = "Horizontal: " + String(voltageRatio)
        }
    }

    func onStateChange(sender:DigitalInput, state: Bool){
        DispatchQueue.main.async {
	    //Use information from your Phidget to change label
            self.buttonStateLabel.stringValue = "Button State: " + String(state)
        }
    }
}
Applications
The most recognized application for the thumbstick is game control. The thumbstick is an almost universal feature in personal game controllers. A thumbstick can act as an alternative to a mouse or a control system for those with limited mobility. Medical, construction, and agricultural applications all use thumbsticks as a control mechanism.


Practice
Use the thumbstick's direction information to turn on your LEDs. Attach your Thumbstick Phidget to your VINT Hub in your Getting Started Kit. Write a program to turn on the green LED when the thumbstick is in a forward direction and turn on the red LED when the thumbstick is in the other direction.
Check out the advanced lesson Using the Sensor API before you use the API for the first time.