Language - JavaScript
Javascript is a high-level object-oriented programming language ideal for use in web applications.
Introduction
If this is your first time working with a Phidget, we suggest starting with the Getting Started page for your specific device. This can be found in the user guide for your device. That page will walk you through installing drivers and libraries for your operating system, and will then bring you back here to use Javascript specifically.
Javascript is capable of using the complete Phidget22 API, including events. We also provide example code in Javascript for all Phidget objects.
Javascript does not require any special programming environment to write. Just use your favourite text editor to write .html and .js files.
Quick Downloads
List of download links, to be added once files are available
Documentation
Example Code
Libraries and Drivers
Getting Started with Javascript
If you are new to writing code for Phidgets, we recommend starting by running, then modifying existing examples. This will allow you to:
- Make sure your libraries are properly linked
- Go from source code to a test application as quickly as possible
- Ensure your Phidget is hooked up properly
Instructions are divided up by operating system. Choose:
- Windows XP / Vista / 7
- OS X
- Linux (including PhidgetSBC)
Windows
Description of Library Files
Javascript programs depend on the following files, which the installers above put onto your system:
- jphidgets22.x.x.x.min.js is the Javascript library for Phidget22. The x's in the filename denote the version of the library.
Browser Example (Visual Studio Code)
This section will outline how to get a Javascript example running in an internet browser. Javascript can be written in any text editor. If you don't have one yet, Visual Studio Code is recommended because it's free and simple.
Use Our Examples
The Javascript examples that we provide are designed to work with node.js, but you can easily modify them to work in a browser. Follow the steps in the next section below, and once you get the HTML page working, copy the contents of the runExample() function into the function in your code that is called after connecting. Then, change any instance of jPhidget22 with jPhidgets. When you visit the page, open up the developer's console (F12 is the hotkey for Chrome) and you'll be able to see the normal output for the examples in the console window.
Write Your Own Code
We'll be using the Javascript library jQuery in these examples. While it's not required in order to use Phidgets, jQuery will make it easier for us to access elements on an html page.
Let's start by writing a simple html page that makes a dynamic list of attached Phidgets visible to the user. Create a new folder and put the required library files inside. Then create a new HTML file and fill it with the following code:
<!DOCTYPE html>

<html>
<head>
<title>Javascript Test Program</title>
<script src="jquery-2.1.4.min.js"></script>
<script src="sha256.js"></script>
<script src="jphidgets22.1.0.0.min.js"></script>

<script>

	$(document).ready(function () {
		var conn = new jPhidgets.Connection('ws://' + window.location.host + '/phidgets', { name: window.location.host });

		conn.connect().then(function () {
			console.log('connected');
		}).catch(function (err) {
			alert('failed to connect to server:' + err);
		});;

		conn.onattach = function(dev) {
			$('#list').append(new Option(dev.name,dev.phid));
		}

		conn.ondetach = function(dev) {
			$("#list option[value='" + dev.phid + "']").remove();
		}
	});

</script>
</head>

<body>
	<label> Attached Phidgets: </label>
	<div>
		<select multiple id="list" style="width: 500px;"></select>
	</div>
</body>
</html>
Pages that employ the use of Javascript are divided into two parts: HTML and Javascript. Code in <script> tags is Javascript, and everything else is HTML. HTML will handle the parts of our program that will be visible to the user, and the Javascript will handle all of the behind-the-scenes processing. First, we list all of the Javascript libraries we're including. Next, we have our main script which makes a Phidget connection as soon as the page is ready and loaded. It also sets an attach handler and detach handler which will trigger any time a Phidget is connected or disconnected to the computer. Below this, we have a tiny bit of HTML which will display a select list that our Javascript code will interact with.
Now, in order to test our new program we have to run it on a server.
Setting up the Phidget Network Server
The easiest way to get our code up and running is to host it using the Phidget Network Server. Go to C:\Program Files\Phidgets\Phidget22 and open networkserver.cfg.
000000000000000000000000000 Confirm paths later
Find the [webserver] section and change the docroot to the path of the HTML file you just wrote.
Save, and then run NetworkServer.exe.
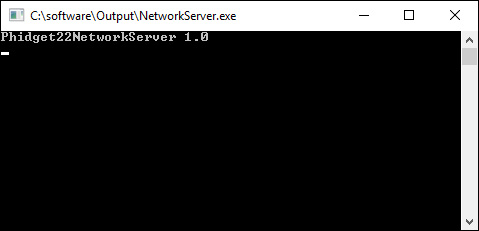
A window like the one pictured should open.
Running the Program
Now, open a web browser and type localhost:8080 in the address bar. You should see the HTML of the page we just wrote:
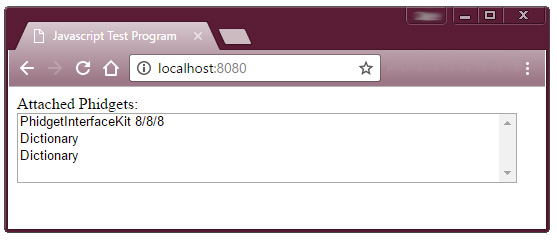
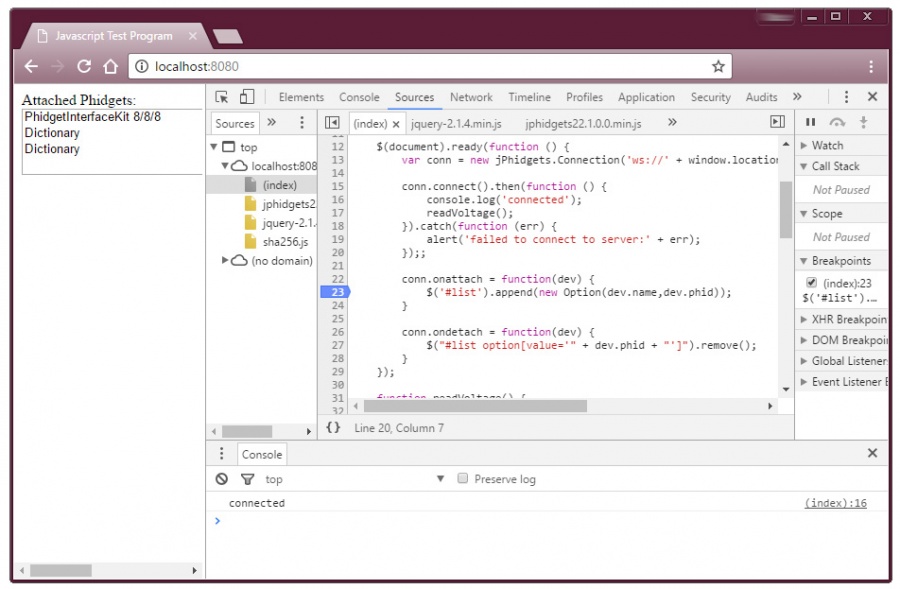
Plugging in any Phidget should result in having an entry appear in the list. You will also see any Phidget dictionaries that are running on this network server. Unplugging the Phidgets should cause them to disappear from the list. You can open the browser's developer console to see the various messages we've been printing out and to set breakpoints in our Javascript code. In Chrome, for example, you can open the developer console with F12:
Now, let's change the program so that we can access a specific channel on a Phidget. In this example we'll read the voltage of a VoltageInput channel on the Phidget 1018_2. Insert a new function to run when the Phidget connection is made:
		conn.connect().then(function () {
			console.log('connected');
			readVoltage();
		}).catch(function (err) {
			alert('failed to connect to server:' + err);
		});;
Then, define the function just below this one, but still inside the <script> tags.
function readVoltage() {

		var ch = new jPhidgets.VoltageInput();

		ch.onVoltageChange = function (voltage) {
			$('#res').text(this.getVoltage());
		};

		ch.open();
	}
This function sets up a change handler which will update a piece of text every time the voltage changes. It will match to the first VoltageInput object that it finds.
Lastly, add a line in the HTML section that adds an element where we can change the text to match the present voltage value:
<body>
	<label> Attached Phidgets: </label>
	<div>
		<select multiple id="list" style="width: 500px;"></select>
	</div>
	<label> Voltage Input Value: </label> <label id="res"></label>
</body>
Now save your HTML file and refresh your browser. When you plug in a device with a VoltageInput channel, you should see the voltage value constantly update on the page.
If you wanted to open the VoltageInput object on a VINT Hub port, you would have to add the following two lines just before the open() call:
		ch.setHubPort(0); // open hub port 0
		ch.setIsHubPort(true);
node.js
Use Our Examples
Write Your Own Code
OS X
Linux
Edit the Examples
By following the instructions for your operating system and compiler above, you probably now have a working example and want to understand it better so you can change it to do what you want. This teaching section has resources for you to learn from the examples and write your own. Your main reference for writing C# code will be the Phidget22 API Manual.
Example Flow
Code Snippets
Step One: Connect
In Javascript, you must first connect to the Phidget server using the Connection object.
function main() {

	...

	var conn = new jPhidget22.Connection(url, { name: n, passwd: p });
	conn.connect()
	  .then(runCode);
}
Where url, n, and p are variables defined elsewhere in the program. If the connection is successful, we call another function that contains the rest of our code.
Step Two: Create and Open
After connecting, the Open() function opens the software object, and once it has successfully opened we can interact with it and start receiving data from it. We can also set up event handlers just before opening.
For example, if we were using an Digital Input as our device, it would look like this:
function runCode() {
	var ch = new jPhidget22.DigitalInput();

	ch.onAttach = digitalInput_attach;
	ch.onStateChange = digitalInput_change;

	ch.open().then(function() {
		// code to execute after open succeeds
	}).catch(function (err) {
		// code to execute if open fails
	});

}
Once the object successfully opens, you can access it and you will start to get events from it. We can define the event handler functions :
function digitalInput_attach(ch) {
	console.log(ch + ' attached');
}

function digitalInput_change(state) {
	console.log('state changed:' + state);
}
Now that they've been registered in the runCode() function and the device has been opened, these event handlers will be able to trigger. The first one triggers when the DigitalInput channel attaches, and the second one will trigger whenever the state of the attached DigitalInput changes.
Step Three: Do Things with the Phidget
Some values can be directly read and set on the Phidget. These functions can be used inside a polling loop as an alternative to event driven programming. The lines inside the loop would be something like this, after which you could do something with the value:
var di_state = ch.getState(); // get the state of the digital input

ch.setState(1); // set the state of the digital input
Step Four: Close
At the end of your program (or at least, at the end of the part that uses the Phidget), it is advisable to close your device. This ensures that the Phidget will be available to other programs that want to use it, since a channel can only be in use by one program at a time unless it's opened remotely. It's not necessary to delete the object after closing in Javascript.
ch.close();
Further Reading
Phidget Programming Basics - Here you can find the basic concepts to help you get started with making your own programs that use Phidgets.
Data Interval/Change Trigger - Learn about these two properties that control how much data comes in from your sensors.
Using Multiple Phidgets - It can be difficult to figure out how to use more than one Phidget in your program. This page will guide you through the steps.
Polling vs. Events - Your program can gather data in either a polling-driven or event-driven manner. Learn the difference to determine which is best for your application.
Logging, Exceptions, and Errors - Learn about all the tools you can use to debug your program.
Phidget Network Service - Phidgets can be controlled and communicated with over your network- either wirelessly or over ethernet.