Language - C Windows CodeBlocks: Difference between revisions
No edit summary |
No edit summary |
||
| (3 intermediate revisions by the same user not shown) | |||
| Line 1: | Line 1: | ||
{{NoTitle}} | {{NoTitle}} | ||
{| | {| | ||
|style="vertical-align:middle; width: 60%;"| | |style="vertical-align:middle; width: 60%;"| | ||
| Line 15: | Line 13: | ||
{{Language_-_C_Intro|Windows|Code::Blocks}} | {{Language_-_C_Intro|Windows|Code::Blocks}} | ||
{{Finding Code Samples|C}} | |||
==Setting up a New Project== | ==Setting up a New Project== | ||
| Line 127: | Line 60: | ||
Your project now has access to the Phidget libraries. | Your project now has access to the Phidget libraries. | ||
{{ | ==Using the Code Samples== | ||
Now that you have configured a project to use Phidgets, you can copy the code sample from the [{{server}}/?view=code_samples&lang=C Code Samples] page into your project, and run it. | |||
{{Language Page What's Next}} | |||
Revision as of 21:10, 16 October 2019
|
Language - C Windows with Code::Blocks Welcome to using Phidgets with C! By using C, you will have access to the complete Phidget22 API, including events. Code::Blocks is a free, open source cross-platform IDE that can be used for C and C++. |
Install Phidget Drivers for Windows
Before getting started with the guides below, ensure you have the following components installed on your machine:
- You will need the Phidgets Windows Drivers
Finding Code Samples
To find the code sample to use for your Phidget, navigate to the Code Samples page and select your device from the drop-down menu.
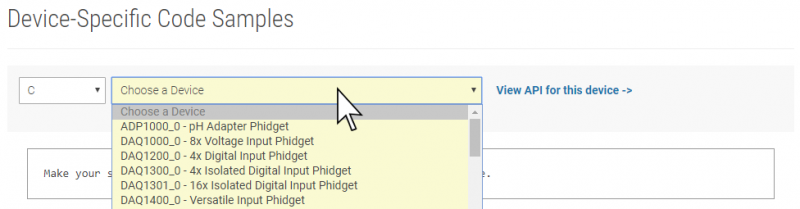
Once you select your device, the code sample generator will give you a working code sample, and a selection of options to customize it to your needs.
Setting up a New Project
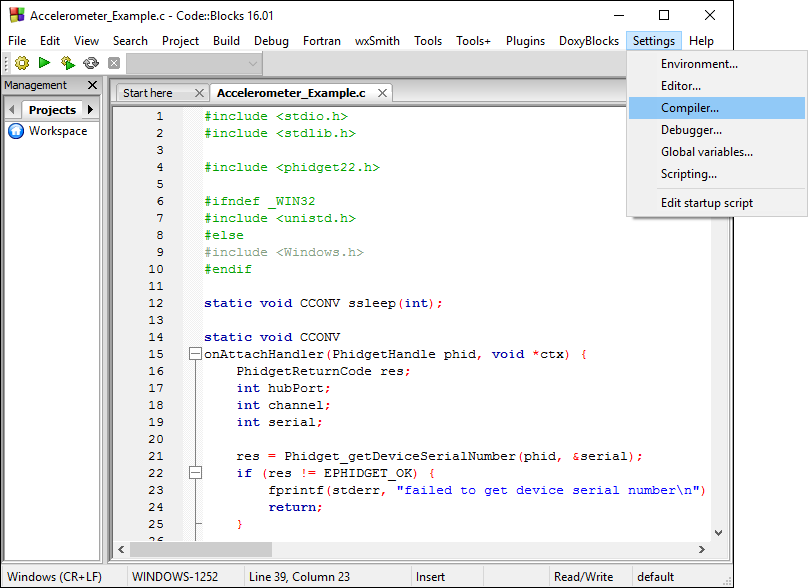
When you are building a project from scratch, or adding Phidget functionality to an existing project, you'll need to configure your development environment to properly link the Phidget C library.
To start, open Code::Blocks, and navigate to Settings -> Compiler... as shown in the image below:
From the Global compiler settings screen, navigate to Search directories -> Compiler and add the following directory:
- C:\Program Files\Phidgets\Phidget22
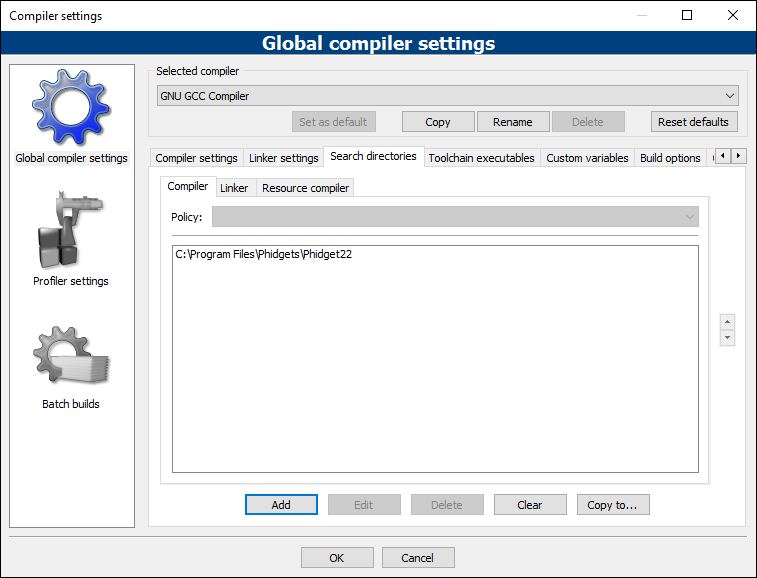
Next, select Search directories -> Linker and add the following directory:
- C:\Program Files\Phidgets\Phidget22\x86

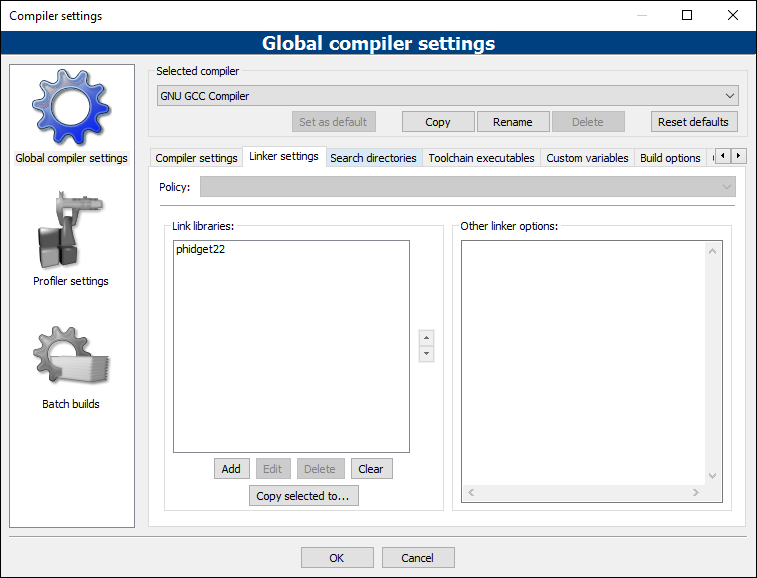
From the Global compiler settings screen, navigate to Linker settings and add the following line:
- phidget22
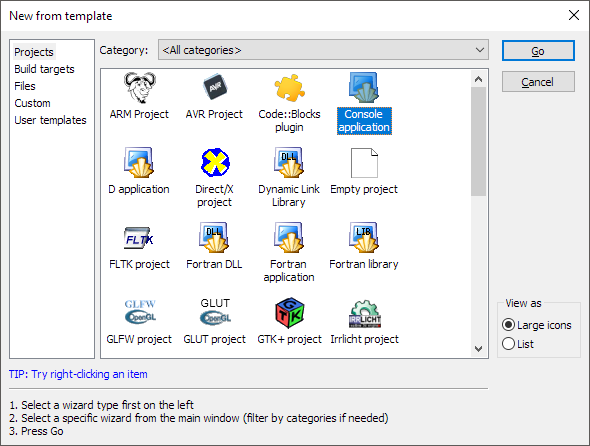
Next, create a new Console Application project, as follows:
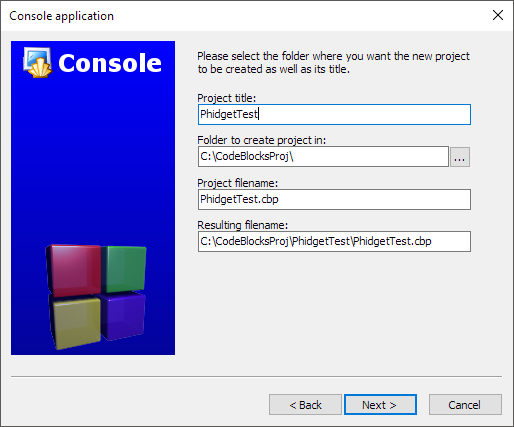
Name your project, and finish creating the project.
Now your project is created, and you can open the generated main.c to begin coding.
To include the Phidget C library, add the following line to your code:
#include <phidget22.h>
Your project now has access to the Phidget libraries.
Using the Code Samples
Now that you have configured a project to use Phidgets, you can copy the code sample from the Code Samples page into your project, and run it.
What's Next?
Now that you have set up Phidgets to work with your programming environment, we recommend you read our guide on Phidget Programming Basics to learn the fundamentals of programming with Phidgets.![]()