|
Notice: This page contains information for the legacy Phidget21 Library. Phidget21 is out of support. Bugfixes may be considered on a case by case basis. Phidget21 does not support VINT Phidgets, or new USB Phidgets released after 2020. We maintain a selection of legacy devices for sale that are supported in Phidget21. We recommend that new projects be developed against the Phidget22 Library.
|
Enclosure Guide
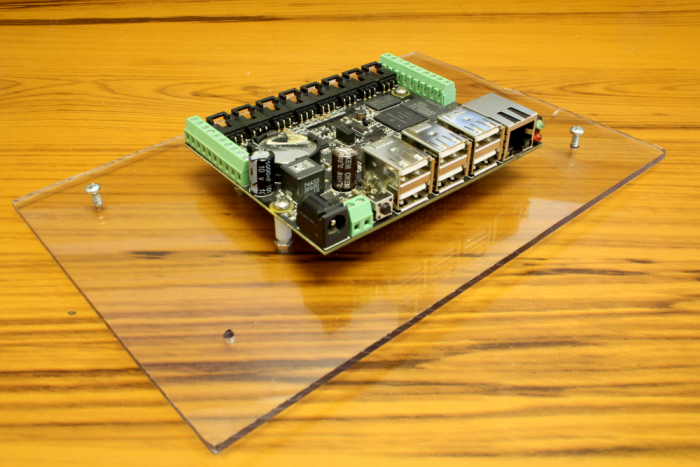
To set up one of our project boxes in a useful fashion you will need to do a few things. First is obviously to select an enclosure size that is large enough for everything you intend to put in it. Once you have your enclosure you will want to mount all of your equipment inside of it. You don't want to mount directly to the enclosure since this would entail drilling many holes in the base of the enclosure and thereby ruining the watertight seal. Instead you will want to cut a plate of something stiff that can be mounted to the mounting points inside the enclosure which you will then put all your electronics on. For example, we used polycarbonate but steel/aluminum plate, acrylic, wood, even cardboard would do the trick. Here, we have just mounted an SBC to our polycarbonate plate which will then be put in the enclosure:
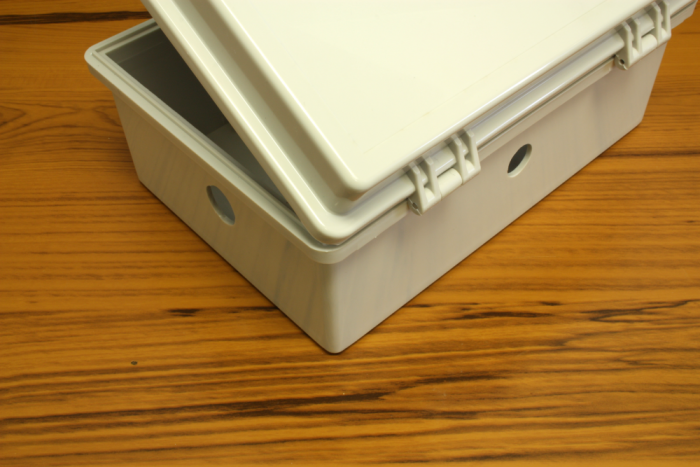
Next you will need to drill holes in your enclosure where you want to cables to come in. Presumably you want the equipment in the box to actually interact with things external to it so you will need at least 1 cable passing in/out. For this example I will have 2 cables, for the power line to my SBC and 1 for data. Theoretically with sufficient conductors you could do this with a single cable but for demonstration I will use 2. The cable glands and enclosure mount cable connectors we sell require relatively large holes (16 and 17mm respectively):
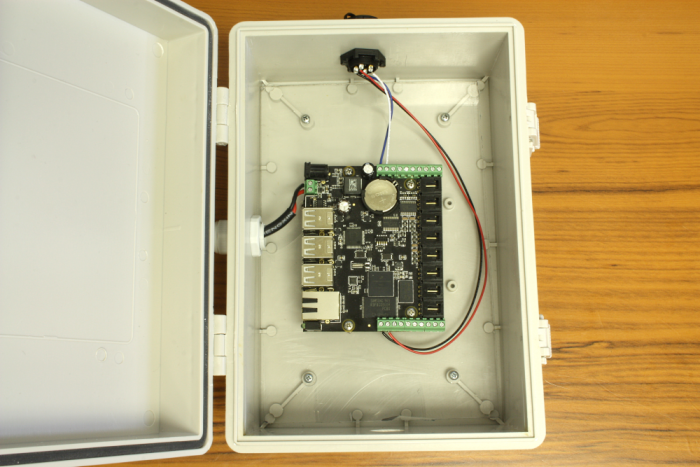
With these holes drilled, we can install the plate with our electronics on it and put the cable gland/connector through the holes we drilled. You may want to connect up all your wires before screwing the plate into the enclosure since it can be difficult to work when everything is crammed into the tight space.