|
Notice: This page contains information for the legacy Phidget21 Library. Phidget21 is out of support. Bugfixes may be considered on a case by case basis. Phidget21 does not support VINT Phidgets, or new USB Phidgets released after 2020. We maintain a selection of legacy devices for sale that are supported in Phidget21. We recommend that new projects be developed against the Phidget22 Library.
|
Language - Objective C
| Cocoa is Apple's native object-oriented application programming interface (API) for the Mac OS X operating system. |
Introduction
If this is your first time working with a Phidget, we suggest starting with the Getting Started page for your specific device. This can be found in the user guide for your device. That page will walk you through installing drivers and libraries for your operating system, and will then bring you back here to use Cocoa specifically.
Cocoa is capable of using the complete Phidget API, including events. We also provide example code in Cocoa for all Phidget devices.
Cocoa can be developed with XCode on OS X.
You can compare Cocoa with our other supported languages.
Quick Downloads
Just need the Cocoa documentation, drivers, libraries, and examples? Here they are:
Documentation
Example Code
Libraries and Drivers
Getting started with Cocoa
If you are new to writing code for Phidgets, we recommend starting by running, then modifying existing examples. This will allow you to:
- Make sure your libraries are properly linked
- Go from source code to a test application as quickly as possible
- Ensure your Phidget is hooked up properly
We offer support for developing Cocoa on OS X.
OS X
The Phidget examples were written in Objective-C and Xcode 3.2.4, and this tutorial assumes their use. Other versions of Xcode should work as well and would be set up in a similar manner.
Description of Files
Any files we think are worth knowing about specifically, or at the minimum a note that the OS X install puts things in their proper place.
XCode
Use Our Examples
If Xcode is not already installed on your system then you will need to get it. You can download it from the Mac app store free of charge.
Once that is done, you need to download our examples. If this is your first time working with Phidgets we recommend using the HelloWorld example as it will work with every Phidget device and it fairly easy to understand.
Open the HelloWorld example and before anything, run it. You should see a window that looks like this:
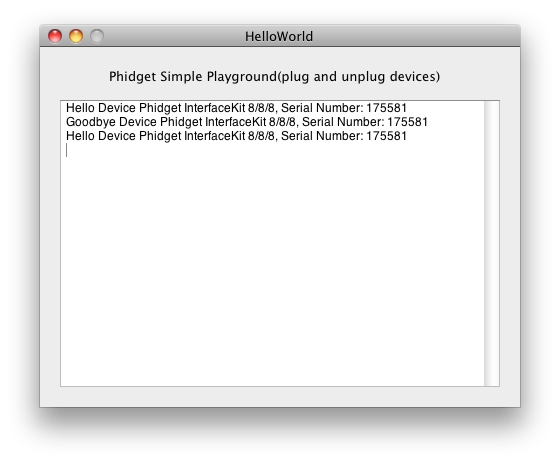
The window will list every Phidgets device connected to the system. In addition to this it will register when devices are connected or disconnected from the system. Now go and find the example project for your specific device. You can run this is the exact same way. After that you can take a look at the code and see how things work. While you are doing that you can refer to the Follow the Examples section to guide you through all the parts of the example project.
Write Your Own Code
First, generate a new Cocoa project with a descriptive name such as PhidgetTest.
Then, add the Phidget21 Framework (Groups & Files → Frameworks → Other Frameworks).
Then, create a new Objective-C class with a descriptive name. For the purpose of this guide, the class name will be PhidgetInterfaceKit.
At this point, a header file(.h) as well as an implementation file(.m) will automatically be created. Open the header file for editing, and add a reference to phidget21.h:
#import <Phidget21/phidget21.h>
Let's say you want to use a text field to capture output. Add a text field outlet in the header file:
  @interface PhidgetInterfaceKit : NSObject{
    IBOutlet NSTextField *sensorValueTxt;
  }
  @end
Then, in Groups & Files → Resources, open up MainMenu.nib to bring up the Interface Builder. Drag a text field from the Library to the Window.
Now, an instance of the PhidgetInterfaceKit class will need to be created:
- In the Library, drag an object to the MainMenu.nib Window.
- In the Identity tab of the Inspector for this object, add the PhidgetInterfaceKit class.
- Connect the PhidgetInterfaceKit class instance to the text field.
The project now has access to Phidgets and we are ready to begin coding.
Follow The Examples
By following the instructions above, you probably now have a working example and want to understand it better so you can change it to do what you want. This teaching section has resources for you to learn from the examples and write your own.
Your main reference for writing Cocoa code will be our C/C++ API information, with syntax for all of our functions:
- C/C++ API (This is the complete set of functions you have available for all Phidgets)
- Device Specific APIs - The one for your Phidget can be found in its user guide.
To learn the details behind opening, configuring, using, and closing your Phidget, try the General Phidget Programming page. That page also describes using the Phidget in an event-driven manner and in a traditional manner, both of which are available in AppleScript.
Code Snippets
Specific calls in Cocoa will differ in syntax from those on the General Phidget Programming page, but the concepts stay the same.
It may help to have the General Phidget Programming page and this section open at the same time, because they parallel each other and you can refer to the Cocoa syntax. However, many additional concepts are covered on the General Phidget Programming page on a high level, such as using multiple Phidgets, handling errors, and different styles of programming.
Step One: Initialize and Open
First, make sure you have given your program access to Phidgets as described in the Write Your Own Code section. Then, you will need to declare your Phidget variable in your code. For example, we can declare a Phidget Interface Kit in the .m implementation file with:
CPhidgetInterfaceKitHandle ifkit
The object name for any type of Phidget - Temperature Sensor, Spatial, Motor Controller, etc - is listed in the API manual. Every type of Phidget also inherits functionality from the Phidget base class.
Next, the Phidget object needs to be initialized and the program needs to try and connect to the Phidget through a call to open(). Open will tell the program to continuously try to connect to a Phidget, based on the parameters given, even trying to reconnect if it gets disconnected. For example, we can connect to a Phidget Interface Kit in the .m implementation file with:
  @implementation PhidgetInterfaceKit
  - (void)awakeFromNib
  {
    CPhidgetInterfaceKit_create(&ifkit);
    CPhidget_open((CPhidgetHandle)ifkit, -1);
  }
  @end
The different types of open can be used with parameters to try and get the first device it can find, open based on its serial number, or even open across the network. The API manual lists all of the available modes that open provides. One important thing to remember is that when working with Phidgets, a local connection will reserve the device until closed. This prevents any other instances from retrieving data from the Phidget, including other programs. The one connection per device limit does not apply when exclusively using the Phidget WebService.
Step Two: Wait for Attachment (plugging in) of the Phidget
Simply calling open does not guarantee you can use the Phidget immediately. To use the Phidget, it must be plugged in (attached). We can handle this by using event driven programming and tracking the AttachEvents and DetachEvents, or by calling waitForAttachment. WaitForAttachment will block indefinitely until a connection is made to the Phidget, or an optional timeout is exceeded.
To instead use events to handle attachment, first you declare the function that will be called when an Attach event is fired - in this case we call the function gotAttach:
int gotAttach(CPhidgetHandle phid, void *context) {
	[(id)context performSelectorOnMainThread:@selector(phidgetAdded:) withObject:nil waitUntilDone:NO];
	return 0;
}
Then, after our create call in the Step One code snippet, but before our open call, we hook our gotAttach event function into our Phidget software object with the CPhidget_set_OnAttach_Handler function:
CPhidget_set_OnAttach_Handler((CPhidgetHandle)ifkit, gotAttach, self);
Check our examples for putting these attachment calls into the context of your larger program.
Step Three: Do Things with the Phidget
We recommend the use of event driven programming when working with Phidgets. In a similar way to handling an attach event as described above, we can hook an event handler at loading with the following code:
CPhidgetInterfaceKit_set_OnSensorChange_Handler(ifkit, gotSensorChange, self);
A call like this connects a function and an event. In this case, the CPhidgetInterfaceKit_set_OnSensorChange_Handler hook connects the gotSensorChange function to the event of a sensor (black analog input port) changing value on a Phidget Interface Kit. Next, the callback method gotSensorChange needs to be set up before it can be used. For example,
int gotSensorChange(CPhidgetInterfaceKitHandle phid, void *context, int ind, int val)
  {
    NSAutoreleasePool *pool = [[NSAutoreleasePool alloc] init];
    [(id)context performSelectorOnMainThread:@selector(SensorChange:)
    withObject:[NSArray arrayWithObjects:[NSNumber numberWithInt:ind], [NSNumber numberWithInt:val], nil] waitUntilDone:NO];
    [pool release];
    return 0;
  }
Above, the SensorChange method is invoked on the main thread. Event data is stored in a NSArray, which in turn is sent as a single argument to the SensorChange method. The NSAutoreleasePool object is created to clean up released objects on the event thread, and is released at the end of the method.
The method calls selector on the SensorChange method, which is defined as follows:
  - (void)SensorChange:(NSArray *)sensorChangeData
  {
    int sensorIndex, sensorValue;
    sensorIndex = [[sensorChangeData objectAtIndex:0] intValue];
    sensorValue = [[sensorChangeData objectAtIndex:1] intValue];
    [sensorValueTxt setStringValue:[NSString stringWithFormat:@"Sensor: %d, Value:
    %d", sensorIndex, sensorValue]];
  }
With this series of declarations and functions, the code inside SensorChange will get executed every time the PhidgetInterfaceKit reports a change on one of its analog inputs. Some events such as Attach and Detach belong to the base Phidget object and thus are common to all types of Phidgets. Please refer to the API manual and the Cocoa examples for a list of events and their usage.
Some values can be read and sent directly to the Phidget, simply use the C API functions such as CPhidgetInterfaceKit_getSensorValue() for PhidgetInterfaceKits.
  int sensorValue;
  CPhidgetInterfaceKit_getSensorValue(ifkit, 0, &sensorValue);
  [sensorValueTxt setintValue: sensorValue];
These functions can be used inside a polling loop as an alternative to event driven programming.
Step Four: Close and Delete
At the end of your program, don’t forget to call close to free any locks on the Phidget:
  CPhidget_close((CPhidgetHandle)ifkit);
  CPhidget_delete((CPhidgetHandle)ifkit);
More How-To's
The General Phidget Programming page gives more information about:
- Using Multiple Phidgets (or a Phidget other than the Interface Kit)
- Catching exceptions and errors and using logging
- Event catching versus direct polling
- And more....
Common Problems and Solutions/Workarounds
None at this time.