Language - Java Windows Eclipse
Template:Language - Java Dev Environment Table
|
Language - Java Windows with Eclipse Welcome to using Phidgets with Java! By using Java, you will have access to the complete Phidget22 API, including events. Eclipse is an IDE used to write, compile, and run Java applications. |
Install Phidget Drivers for Windows
Before getting started with the guides below, ensure you have the following components installed on your machine:
- You will need the Phidgets Windows Drivers
- You will need the Java Development Kit from Oracle
Use Our Examples
One of the best ways to start programming with Phidgets is to use our example code as a guide. In order to run the examples, you will need to download and install Eclipse.
Now that you have Eclipse installed, select an example that will work with your Phidget:
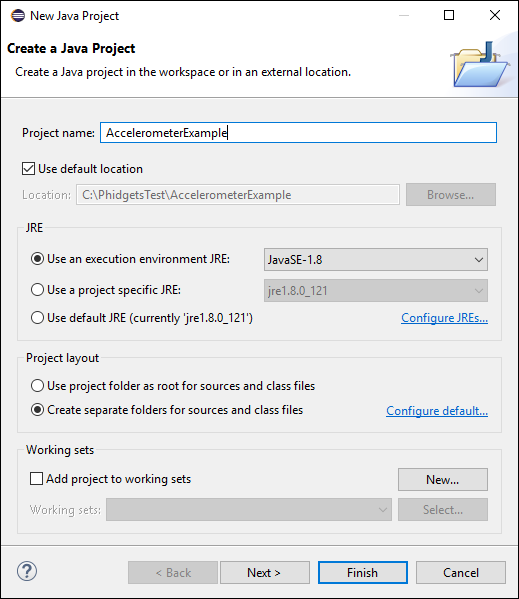
Next, create a new Java project. Give it the same name as the example you downloaded above, then click Next >:
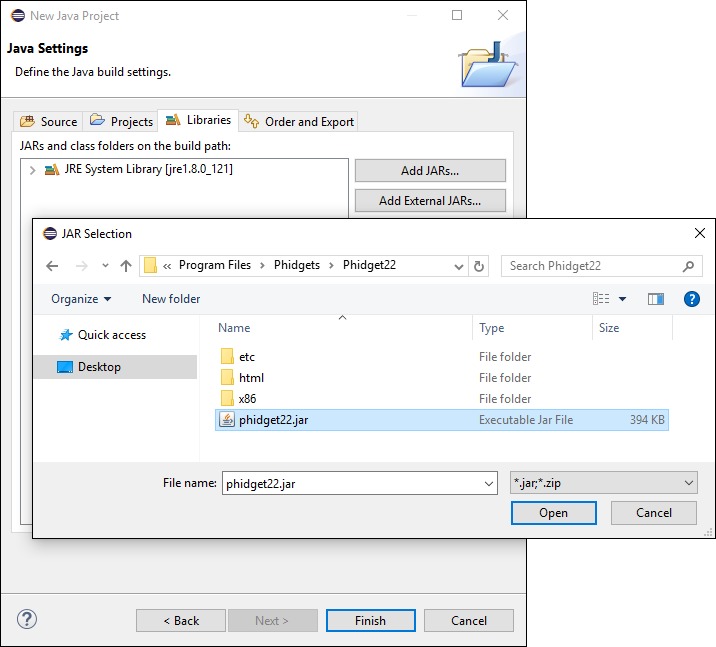
Go to the Libraries tab and click Add External JARs... and add phidget22.jar to your project as an external jar:
Finally, drag the example java files into the src folder that has been created for you and run the example:

You should now have the example up and running for your device. Your next step is to look at the Editing the Examples section below for information about the example and important concepts for programming Phidgets. This would be a good time to play around with the device and experiment with some of its functionality.
Editing the Examples
To get our example code to run in a custom application, simply remove the calls to AskForDeviceParameters and PrintEventDescriptions, as well as the ChannelInfo object, then hard-code the addressing parameters for your application.
If you are unsure what values to use for the addressing parameters, check the Finding The Addressing Information page.
For instance:
//You may remove these lines and hard-code the addressing parameters to fit your application
ChannelInfo channelInfo = new ChannelInfo();  //Information from AskForDeviceParameters(). May be removed when hard-coding parameters.
PhidgetHelperFunctions.AskForDeviceParameters(channelInfo, ch);

ch.setDeviceSerialNumber(channelInfo.deviceSerialNumber);
ch.setHubPort(channelInfo.hubPort);
ch.setIsHubPortDevice(channelInfo.isHubPortDevice);
ch.setChannel(channelInfo.channel);

if(channelInfo.netInfo.isRemote) {
    ch.setIsRemote(channelInfo.netInfo.isRemote);
    if(channelInfo.netInfo.serverDiscovery) {
        try {
            Net.enableServerDiscovery(ServerType.DEVICE_REMOTE);
        }
        catch (PhidgetException e) {
            PhidgetHelperFunctions.PrintEnableServerDiscoveryErrorMessage(e);
            throw new Exception("Program Terminated: EnableServerDiscovery Failed", e);
        }
    }
    else {
        Net.addServer("Server", channelInfo.netInfo.hostname,
            channelInfo.netInfo.port, channelInfo.netInfo.password, 0);
    }
}


//This call may be harmlessly removed
PrintEventDescriptions();
Might become:
ch.setDeviceSerialNumber(370114);
ch.setHubPort(2);
ch.setIsHubPortDevice(true);
Notice that you can leave out any parameter not relevant to your application for simplicity.
You can then manipulate the rest of the code as your application requires. A more in-depth description of programming with Phidgets can be found in our guide on Phidget Programming Basics.
For future Phidgets-based projects, you can leave out the PhidgetHelperFunctions.java and ChannelInfo.java classes entirely.
Setting up a New Project
When you are building a project from scratch, or adding Phidget functionality to an existing project, you'll need to configure your development environment to properly link the Phidget Java library.
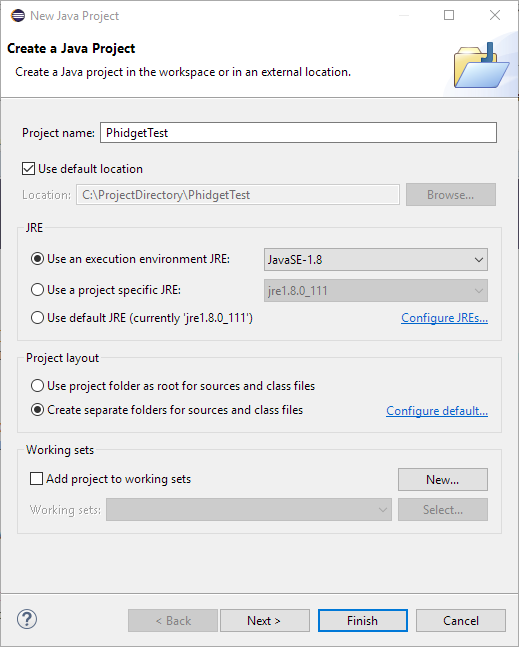
To begin, create a new Java project. Give it a name, then click Next >:
Go to the Libraries tab and click Add External JARs... and add phidget22.jar to your project as an external jar:
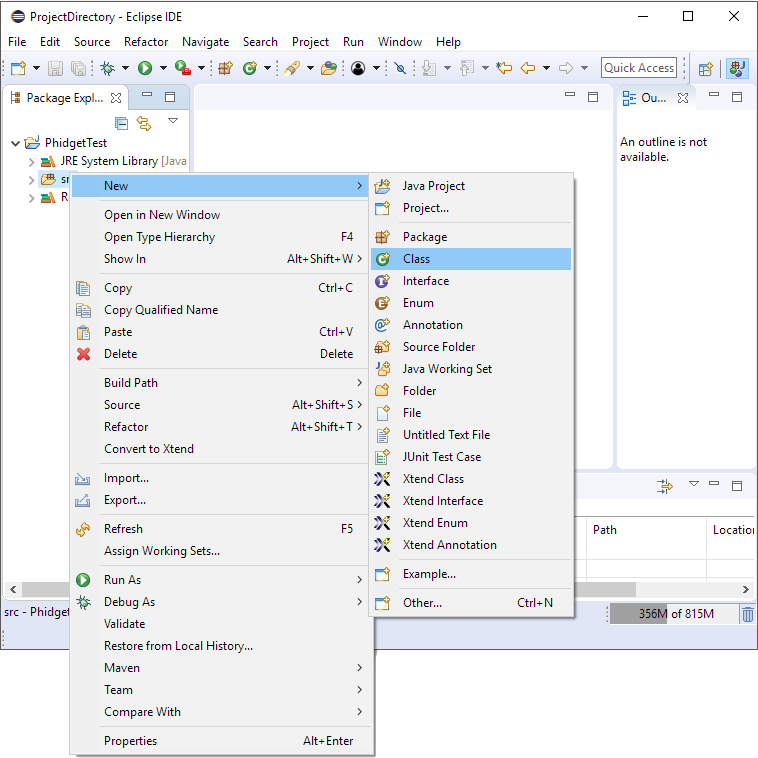
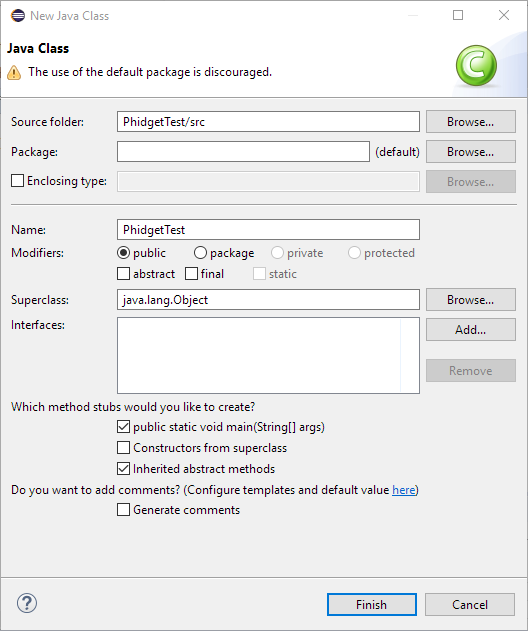
Create a new Class in your project:
Name the class, and be sure to check the public static void main box.
Finally, to use the Phidget Java library, add the following import to your code:
import com.phidget22.*;
The project now has access to Phidgets.
What's Next?
Now that you have set up Phidgets to work with your programming environment, we recommend you read our guide on Phidget Programming Basics to learn the fundamentals of programming with Phidgets.![]()