Language - Java SBC Linux Javac
|
Language - Java SBC Linux with javac Welcome to using Phidgets with Java! By using Java, you will have access to the complete Phidget22 API, including events. Javac is a command line-based compiler for java programs that compiles java code into bytecode class files. |
Getting Started With the Phidget SBC
Welcome to using the Phidget SBC. If you haven't already, check out the user guide in order to set up the following:
- Networking
- Administrator password
If you are ready to go, the first step will be deciding how you will use the SBC:
- Use a more powerful external computer to develop your code, and then simply copy the files to the SBC.
- Use the SBC like any other Linux computer, simply connect a monitor and a keyboard and begin your development.
This guide will cover development using an external machine. For development using the SBC itself, check the Javac (Linux) page.
To begin, this video will help you get started:
Developing with an External Computer
There are two main ways in which you can access your SBC from an external computer:
- SBC Web Interface
- Secure Shell (SSH)
The user guide covers the SBC Web Interface in detail, so we will review SSH below.
SSH
If you are unfamiliar with SSH, it is a simple yet powerful tool that allows you to log into a remote machine in order to execute commands. You can also transfer files using the associated SCP tool.
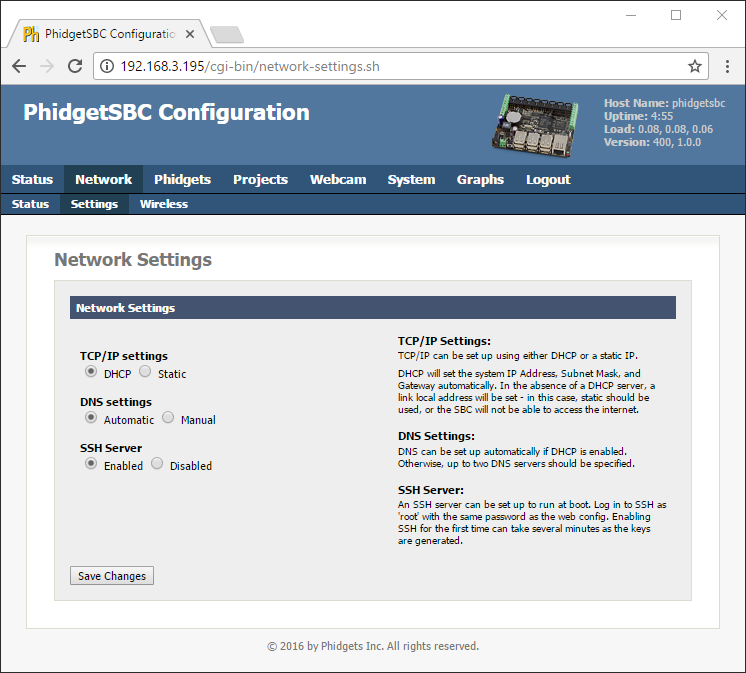
In order to use SSH, you need to know the following things about the SBC:
- IP address (e.g. 192.168.3.195) or the link local address (e.g. phidgetsbc.local)
- The administrator password
You must also enable SSH on the SBC. You can do this via the SBC Web Interface which is shown in the image below:
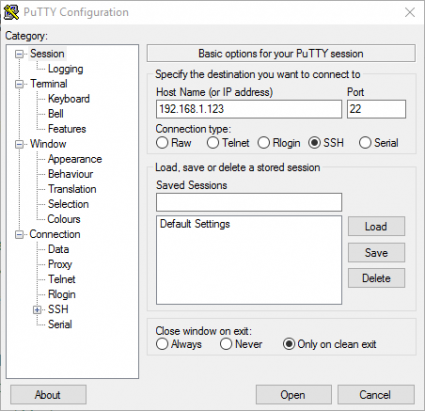
SSH on Windows
To use SSH on Windows, we recommend PuTTY. Use the images below as a guide for configuring PuTTY (use the IP address or the link local address interchangeably):

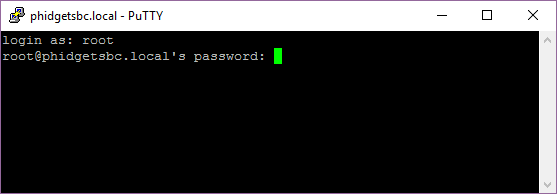
After clicking open, simply login as root and provide the administrator password:
To transfer files between your SBC and Windows machine, we recommend either of these programs:
You will follow a similar process to access the SBC as described for SSH.
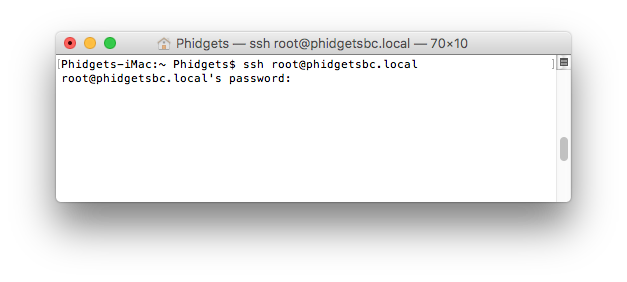
SSH on Linux and macOS
SSH is available on Linux and macOS by default. To run SSH, simply open the terminal and type the following:
ssh root@phidgetsbc.local
Or, something like this (you will need to know the IP address of your SBC):
ssh root@192.168.3.195
You will then be prompted for the password in order to gain access to the SBC:
To copy a file from the SBC to your development machine using SCP, simply open the terminal and type the following:
scp root@phidgetsbc.local:/path/to/source /path/to/destination
You can reverse this if you want to transfer a file from your development machine to your SBC:
scp /path/to/source root@phidgetsbc.local:/path/to/destination
Installing Packages for Development
At this point you have connected to the SBC through one or more these three options:
- SBC Web Interface
- SSH
- Directly via monitor and keyboard
Now that you are connected, you may want to start developing on/for the SBC. Before you do this, you need to install some packages.
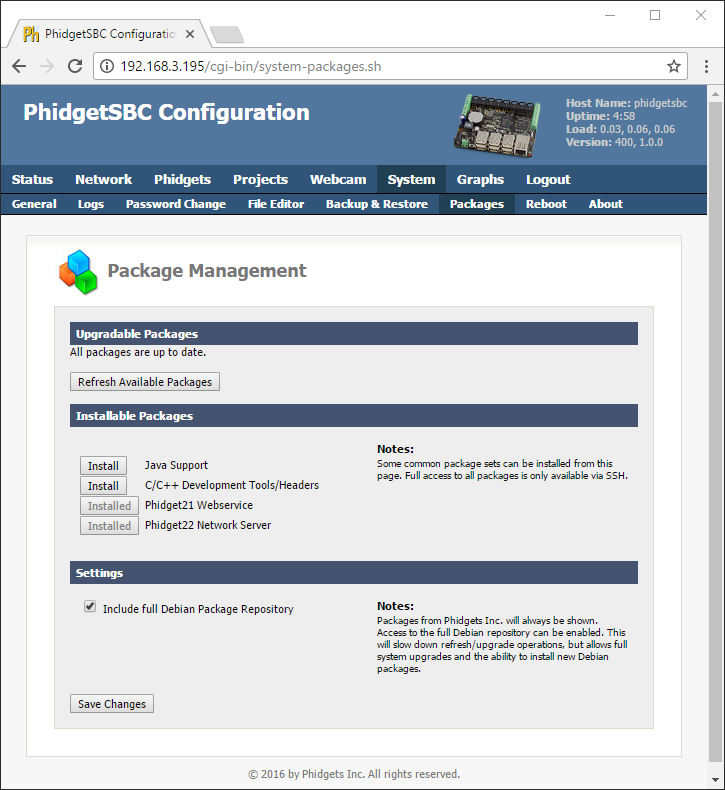
The simplest way to install Java support on the SBC is via the install buttons on located on the SBC Web Interface (System->Packages). Check Include full Debian Package Repository before installing.
When developing for Java, ensure your development machine and your SBC have the same version of Java. Check your Java version by entering this command:
java -version
If you need to update the version of Java on your SBC, use the following commands:
apt-get install default-jre-headless
su
update-alternatives --config java
You're now ready to begin programming! Continue through this guide for code examples and directions on where to go next.
Finding Code Samples
To find the code sample to use for your Phidget, navigate to the Code Samples page and select your device from the drop-down menu.
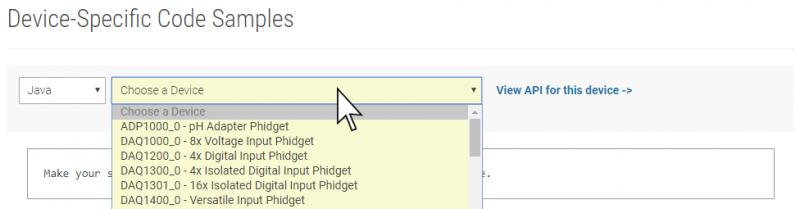
Once you select your device, the code sample generator will give you a working code sample, and a selection of options to customize it to your needs.
Setting up a New Project
For simplicity, if you have not used Phidgets before, we recommend first trying them out directly on an external development machine like a desktop computer. For Java development, check the Javac (Windows), Javac (MacOS), or Javac (Linux) page, depending on your operating system.
When you are building a project from scratch, or adding Phidget functionality to an existing project, you'll need to configure your development environment to properly link the Phidget Java library.
When developing on an external computer, you will write, compile, and test your programs on that machine. When you are ready, you will then upload your programs to the SBC to run them.
Once your code is written, follow these steps to get your program running on the SBC:
1. Place phidget22.jar on your development machine in a directory that you will use to compile your Java files.
2. Compile your ProgramName.java file. If you are using a Windows machine, type the following into the command prompt:
javac -classpath .;phidget22.jar ProgramName.java
If you are using a Linux or macOS machine, type the following into the terminal:
javac -classpath .:phidget22.jar ProgramName.java
You should now have a number of .class files in your project directory
4. Using the SBC Web Interface, create a new project:
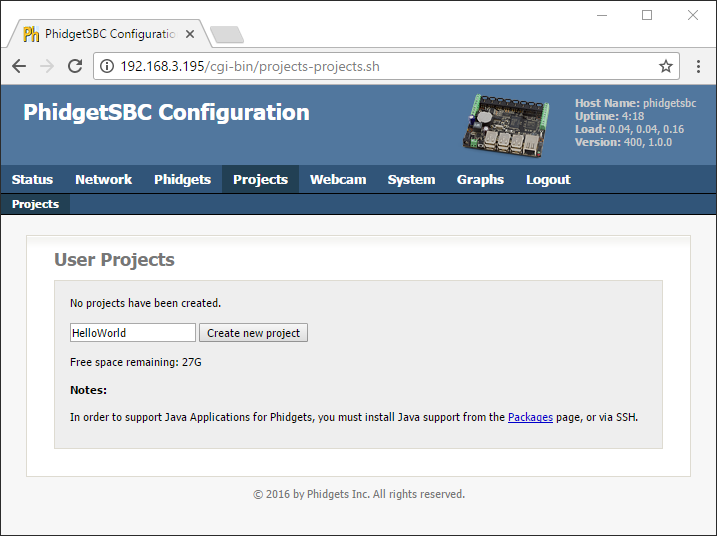
5. Transfer all the .class files from the development machine to the SBC, either using the SBC Web Interface or a tool like WinSCP. The project directory will be /usr/userapps/ProjectName
6. Use SSH to access the SBC terminal
7. Navigate to the project folder using the command:
cd /usr/userapps/ProjectName
8. You can now run the program with the command:
java ExampleName
Success! The program is running on your SBC. Next, you may want to learn about running a program automatically.
Running a Program Automatically
After testing your program, you will likely want it to run on boot, or on a schedule, without your input.
To quickly test whether a program can be run automatically, you can try starting it from the SBC Web Interface.
1. To start the program, navigate to Projects->ProjectName->Startup Settings in the SBC Web Interface.
2. Select your program in the drop-down menu labeled Executable/Class Name.
3. Click the Start button on the SBC web interface.
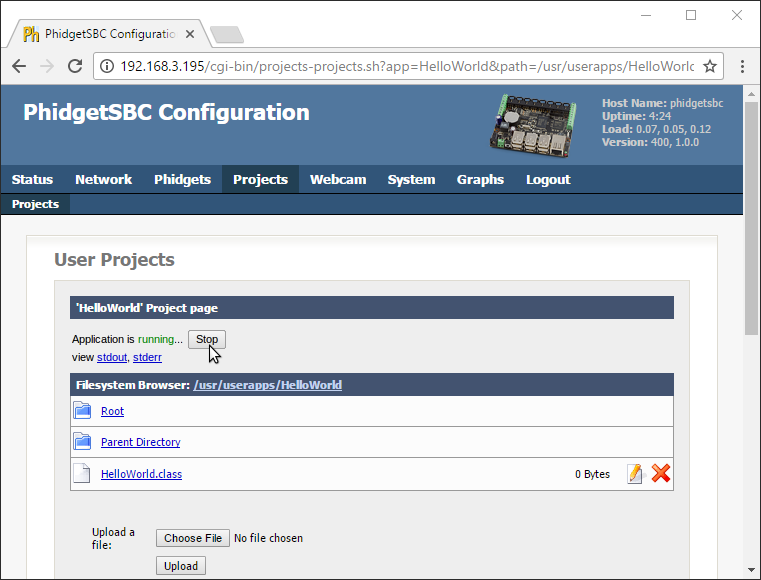
4. You'll note that as it runs, there are two links below the Stop button which can be used to view the program output:
- stdout: view the program output like you would in a terminal or command prompt
- stderr: view the program error output
Running on boot ensures that your program will never miss an event. As long as the SBC is running, your code will be running. This section assumes you have written and compiled your program on an external computer, and have uploaded it to the SBC Web Interface.
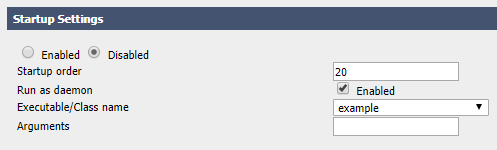
To have your program run on boot, navigate to Projects->ProjectName->Startup Settings in the SBC Web Interface. After selecting your project, copy the settings from the image below:
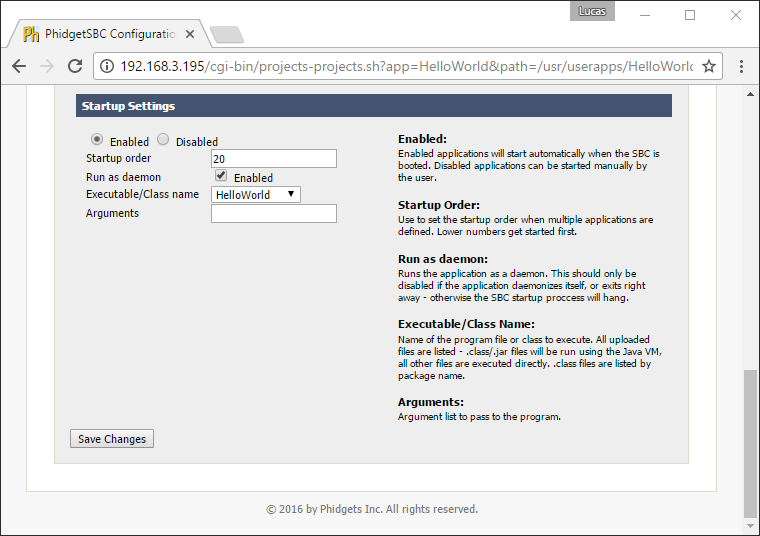
We will review some of the options that are shown in the image above:
- Startup Order: lower numbers boot first. Booting later means more programs are available for use, booting earlier means other programs can use your program.
- Run as a daemon: starts the program as a daemon. Unless you have explicitly written your program as a daemon, leave this checked, or else your SBC may hang on boot.
- Executable/Class name: your main Java class or C file.
- Arguments: any command line arguments the program needs.
After saving your changes, your program will run automatically whenever your SBC boots.
Running your program on a schedule allows you to perform your task once a week, or once a minute without worrying about memory management issues or instability problems that may arise. It executes, and then gets cleaned up. To run your program on a schedule, we recommend using Cron. Cron can automatically schedule programs (known as jobs, or cron jobs). Cron simply reads a crontab file and runs whatever programs are listed, with whatever timing they are listed with. Cron runs continuously in the background, but the cron jobs only run as long as they naturally would, and then they exit.
Let's set up your first cron job. We will use nano to edit the crontab file, but feel free to use whatever editor you prefer.
First, set your editor to nano:
export EDITOR=nano
Next, edit your crontab file:
crontab -e
Finally, schedule your cron job:
#cron job that will run at 5AM every week:
0 5 * * 1 /root/code/myprogram argument1
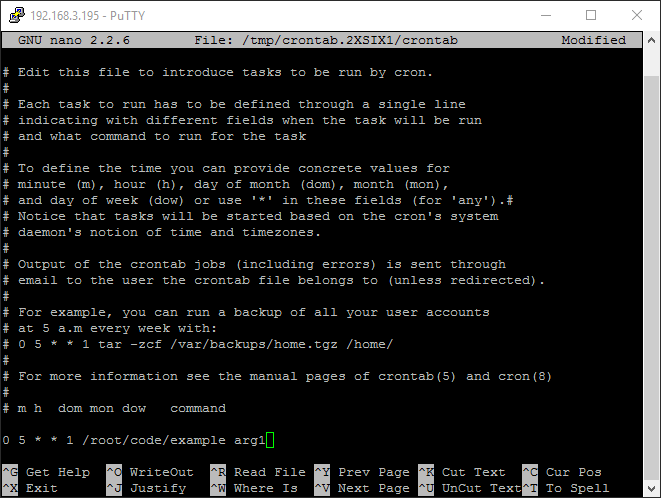
After entering your task, simply save and exit the file.
What's Next?
Now that you have set up Phidgets to work with your programming environment, we recommend you read our guide on Phidget Programming Basics to learn the fundamentals of programming with Phidgets.![]()