1203 User Guide: Difference between revisions
From Phidgets Support
| Line 36: | Line 36: | ||
{{UGrow2|1203_2|September 2010 |2|202|fixed bug in output set}} | {{UGrow2|1203_2|September 2010 |2|202|fixed bug in output set}} | ||
{{UGrow2|1203_2|May 2011 |2|203|getLabelString fixed for labels longer than 7 characters}} | {{UGrow2|1203_2|May 2011 |2|203|getLabelString fixed for labels longer than 7 characters}} | ||
{{UGrow2|1203_2|February 2013 |2|204|USB stack changes; was unstable with lots of set reports}} | |||
Revision as of 21:10, 20 April 2016
| |
| Go to this device's product page |
Getting Started
Checking the Contents
|
You should have received:
|
In order to test your new Phidget you will also need:
| |
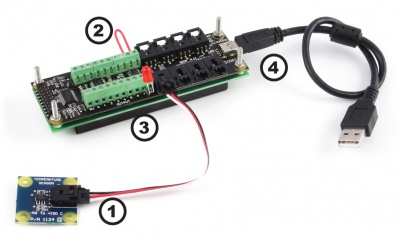
Connecting the Pieces
|
| |
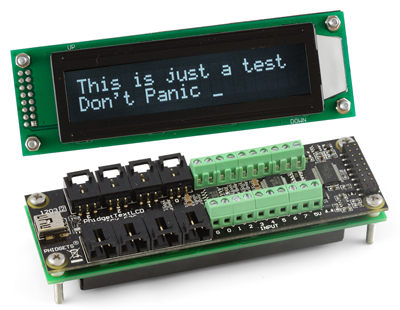
| This device shows up as just a combination of a 1018 and a single port 1204. Because of this we ask that you refer to the manuals for the 1018 and 1204 respectively for information on testing your device, technical details, and the API for each half of this device. | 
|
Product History
Template:UGhist Template:UGrow2 Template:UGrow2 Template:UGrow2 Template:UGrow2 Template:UGrow2 Template:UGrow2