Using xLights with Phidgets: Difference between revisions
(Created page with "Category: Project {{TOC limit|3}} {{#seo:|keywords=xLights, ws2812, christmas lights}} {{#seo:|description=Learn how to use a Phidgets addressable LED controller with xLights software.}} ==Introduction== 400px|thumb|link= xLights is a free and open-source comprehensive light control platform that helps create small or large light displays quickly, without the need for coding. This guide will walk you through how to add the Addressable LED Phidge...") |
m (Mparadis moved page Using XLights with Phidgets to Using xLights with Phidgets) |
(No difference)
| |
Latest revision as of 22:23, 10 June 2026
Introduction

xLights is a free and open-source comprehensive light control platform that helps create small or large light displays quickly, without the need for coding. This guide will walk you through how to add the Addressable LED Phidget as a controller in xLights.
Demonstration
Hardware
This project uses the following parts:
- PhidgetSBC4 (SBC3003_0)
- Addressable LED Phidget (LED0100_0)
- USB Cable
- 12V Power Supply for PhidgetSBC
- Ethernet cable
- 16x16 Addressable LED Array
- 5V 3.5A Power Supply for LEDs
- Windows, macOS or Linux computer
Assembly
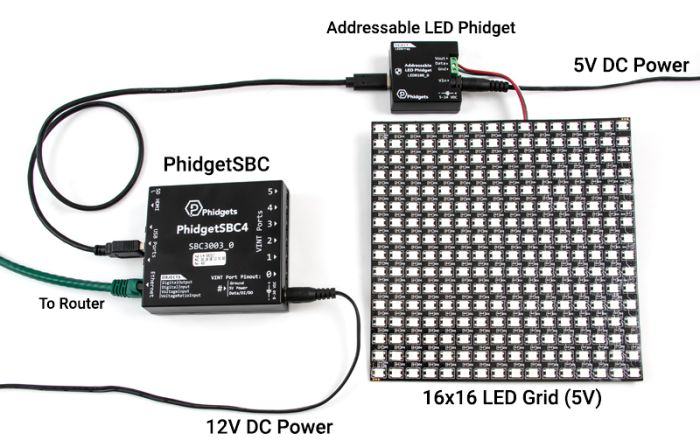
Assemble the system following these steps:
- Connect your LED array to the Addressable LED Phidget
- Connect the Addressable LED Phidget to the PhidgetSBC4 using a USB cable
- Connect the PhidgetSBC4 to your network router or switch with an ethernet cable
- Connect the 12V power supply to the PhidgetSBC
- Connect the LED power supply to the Addressable LED Phidget. Here, our LED array requires 5V.
Server Setup
SBC Web Configuration
In this project, we'll be using a client (our desktop computer) and a server (the PhidgetSBC4).
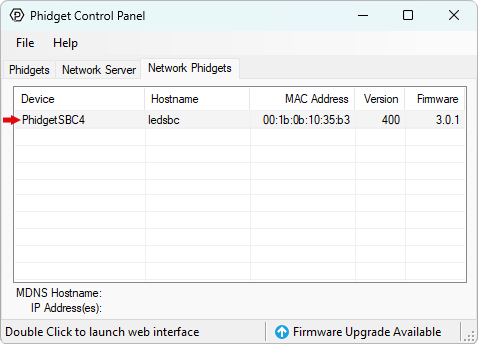
To start, we need prepare the PhidgetSBC4 with the required packages and configurations. Log into the SBC's web interface by double clicking on its control panel entry:
Next, follow these steps:
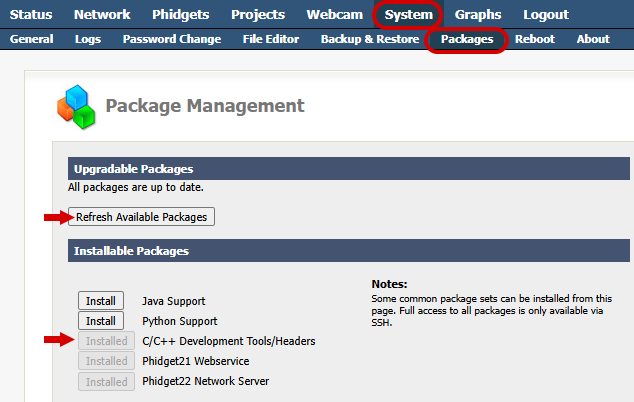
- Log in and navigate to System -> Packages.
- Install the C/C++ Development Tools/Headers.
- Refresh Available Packages and Upgrade All Packages
Finally, go to Network -> Settings and enable the SSH server if it isn't already enabled.
Installing the Server
Now that SSH is enabled, we can remote in with SSH software (we recommend PuTTY). Or, you can plug a monitor and keyboard into the SBC4 and complete the rest of this section in the terminal directly.
If you don't already have git installed, you can get it with the following commands:
apt update
apt install git
If you don't already have the make command installed, you can get it with:
apt install build-essential
Navigate to /usr/userapps/ (you'll have to create the userapps directory if this is the first project on this SBC) and use the following command to download the server project files:
git clone https://github.com/PhidgetsInc/openpixelcontrol-ph22.git
All of the files and folders for the server code will be added in a folder named openpixelcontrol-ph22.
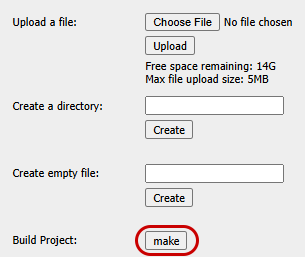
If you're not experienced with the terminal, we recommend switching back to the SBC web interface at this point. Go to the Projects tab and you should see the project folder. Click on the folder to open it.

Scroll down and click the make button to build the project.
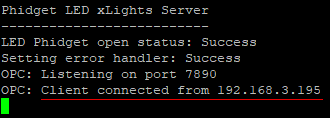
Once it's done building you can test the server by returning to your SSH terminal and typing ./bin/Phidget_server from the project folder. If it's successful, you should see this:
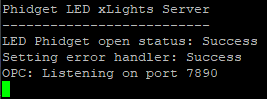
Once the server is running, we can configure our client.
Client Setup
To begin, install xLights on your client computer.
Controller Configuration
Open xLights and add a new ethernet controller under the controllers tab:
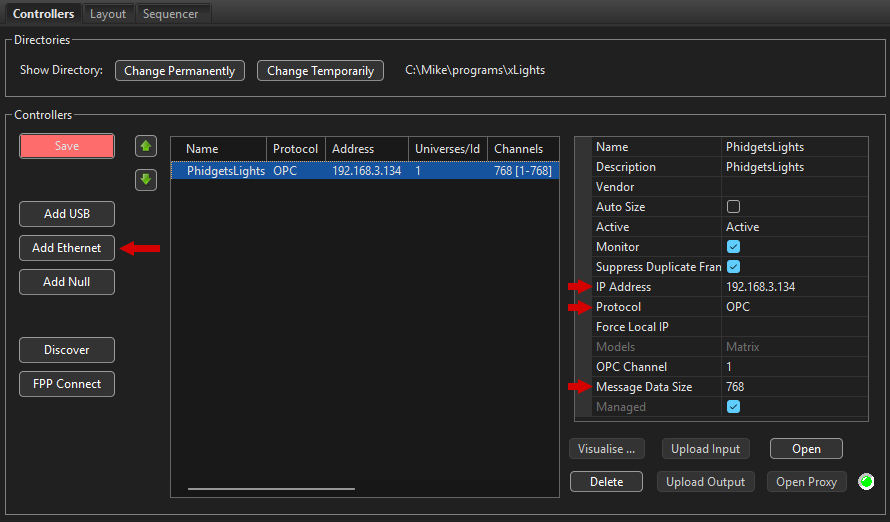
- The Protocol should be set to 'OPC'.
- The Message Data Size should be equal to the number of LEDs in your display multiplied by the number of color channels. This project uses a 16x16 grid of RGB lights, so the data size is 768. For a strand of 100 RGBW lights, the data size would be 400.
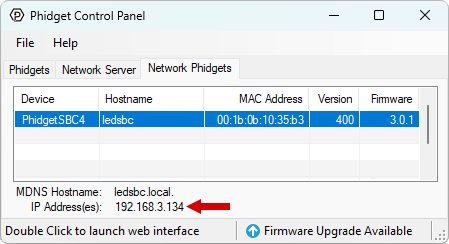
- The IP address needs to be set to the SBC's IP, which you can find in the Phidget Control Panel:
Layout Configuration
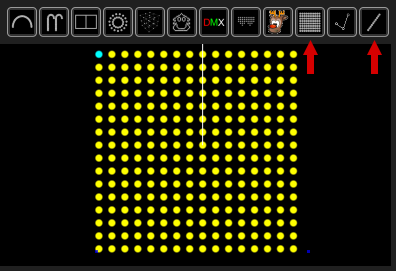
The layout lets you accurately model your lights in xLights. For a simple LED strip click on "Single Line", and for a grid, use "Matrix". Then click and drag in the black space to create the model.
Once it's created, click on your model to access the options.
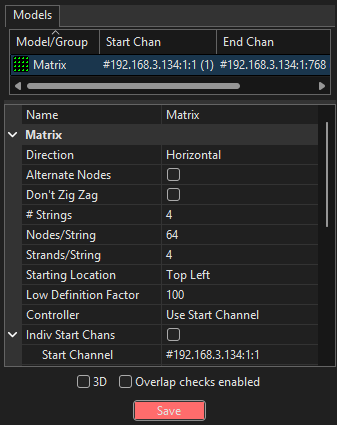
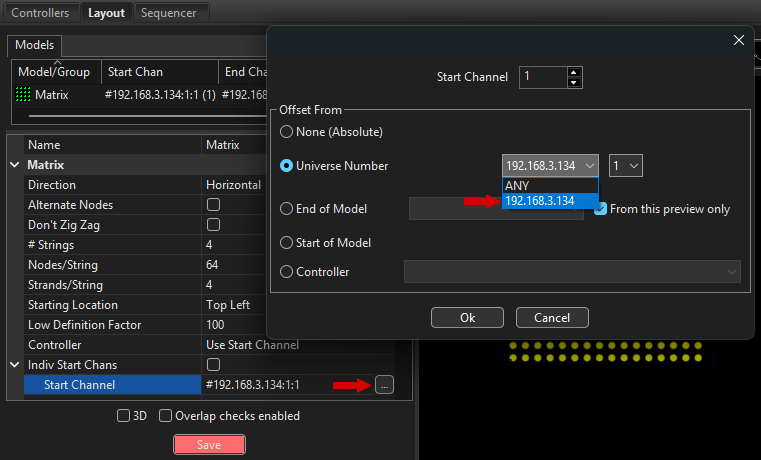
We won't be going in depth on all the layout options in this article, but you can find more information in xLights' official documentation. For now, the important thing is to select Use Start Channel for the controller. Next, click on start channel and click on the '...' that appears. For Universe number select the IP address of the SBC.
In order to have our 16x16 grid display properly, the Strings, Nodes/String, and Strands/String must be set to 4, 64, and 4. This is because the LEDs are laid out in a zig-zag pattern. If you're using a strip, you can just set it to 1, N, 1, where N is the number of lights in your strip.
Sequencer
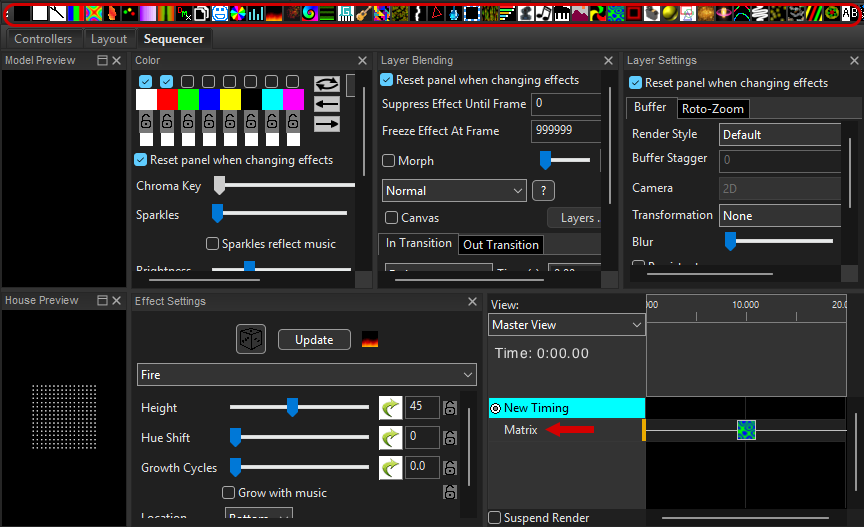
Once your controller and layout are set up, you can move to the sequencer tab and do File -> New Sequence. Select 'Animation', '40fps', and 'Quick Start'.
Now you can choose one of the effects from the effects bar and drag it into the row in the timeline corresponding to the layout you created. Drag it out so it lasts longer than a few seconds. Click on the play button, and you should see the effect play out on the preview in the bottom left. You can play with the Effect Settings and Colors windows to customize the effect.
Further details on creating sequences fall outside of the scope of this article, but you can see the official xLights documentation for more information.
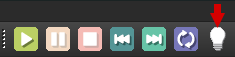
Now that your sequence is set up, you can click the lightbulb icon to attempt to connect to the SBC's server.
If it's successful, you'll see the IP address of your client appear in your SSH terminal:
When you hit play, you should see your lights activate.
Running the Project on Boot
Now that you've confirmed the server and client work using SSH or a local terminal, we can set the program to launch on boot as a daemon.
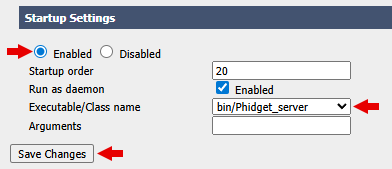
Open the SBC web interface again and navigate to your project. Scroll down to Startup Settings and enable it, selecting bin/Phidget_server as the executable and clicking the save button below.
The next time you power cycle the SBC, the server will run and you should be able to connect with your xLights client.
Running Autonomously on the SBC
You may find that having a second computer running the xLights app 24/7 is a bit overkill for the size and scope of your project. If you just want the SBC to run a few patterns on a loop all by itself, but you still want to use xLights to design the pattern, you can have the SBC act as both client and server for the OPC stream.
Open an SSH connection and go back to the /userapps/ directory on your SBC. Run the following command:
git clone https://github.com/PhidgetsInc/opcdecode-ph22.git
This project requires libzstd to run. Install it with the following command:
apt install libzstd-dev
You should now have a second project visible in the SBC web interface:

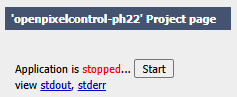
Click on openpixelcontrol-ph22 and start the project:
Then go back and do the same for opcdecode-ph22. You should see your lights turn on and display the default pattern.
You can now configure both projects to run on boot as we did in the previous section, which will cause the pattern to display autonomously on boot, even if the SBC isn't connected to any network. You can design and save your own sequence in xLights and copy the .fseq file to the SBC to customize the pattern.