|
Notice: This page contains information for the legacy Phidget21 Library. Phidget21 is out of support. Bugfixes may be considered on a case by case basis. Phidget21 does not support VINT Phidgets, or new USB Phidgets released after 2020. We maintain a selection of legacy devices for sale that are supported in Phidget21. We recommend that new projects be developed against the Phidget22 Library.
|
Web Page on the SBC
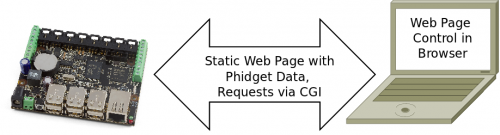
The project described here creates a website hosted on the Phidget Single Board Computer (SBC). The website can both serve static pages, as well as pages that can send simple requests back and forth to the Phidgets attached to the SBC.
With this kind of system, you only need to develop cross-browser compatible web pages, as the code to control the Phidget runs on the SBC.
Practical concepts covered are (click on links to see other projects on that topic):
|
|
As with any of our described projects, Phidgets takes care of the electrical component design. This is a middle-ground solution to controlling Phidgets over a network using the SBC.
- If you just want data to go back and forth between Phidgets and your computer - via the SBC - over the network, you probably want the simple example in the Use Phidgets Wirelessly with the SBC guide.
- If you want something more powerful and flexible than the CGI in this guide to control Phidgets over a network, you may be interested in the full Web Server on the SBC guide coming soon.
| Time: | About two hours |
| Special Needed Tools: | None |
| Materials and Phidgets: | A Phidget SBC, Ethernet and power cords (or Wireless), an LED, and your computer |
You should also have:
- Worked through the 1072 User Guide page to have set up the network on your SBC and obtained its IP or local link address
- Set up SSH on the SBC as described on the OS - Phidget SBC page, and
- Installed Python on the SBC as described on the OS - Phidget SBC page
Introduction
The SBC already runs a web server, with the pages to be served located in the /var/www directory. We take advantage of this by creating a web page using a cgi-bin Python script. Since the script is in Python, it can also control any attached Phidgets, including the Interface Kit on the SBC.
The flow of the system we will build looks like this:
Phidgets
For this, you will need:
- A Phidget Single Board Computer, set up as per the Getting Started guide
- This is the SBC that this guide used; others will probably work fine as well
- An LED, such as one of the ones from Phidgets (many part numbers starting at 3600), attached to digital output port 0 (long wire) and ground (short wire)
Code
First, we build a static web page with no Phidget involvement. If you just want to host a few pages on the SBC, that part of the example will help greatly.
Then we write a separate and unrelated Python script, save it in the SBC's cgi-bin directory, and run it over the network.
Static Page
To create a web page hosted on the SBC, you simply have to create one and save it in the /var/www/ directory.
When you log into the SBC using SSH, you can move into that directory and start editing a simple HTML file by:
cd /var/www
nano helloworld.html
Then, type in a simple web page structure, such as this:
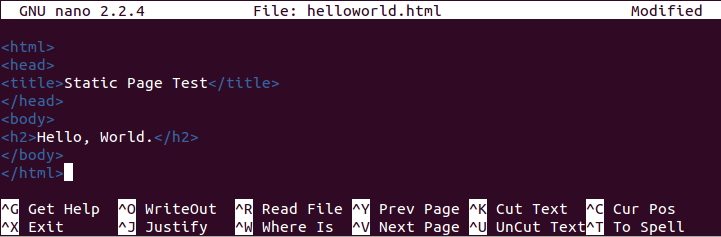
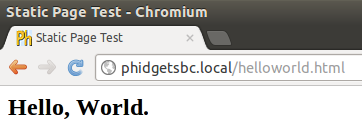
Finally, go to that address in a browser on the same local network as the SBC, using the address http://phidgetsbc.local/helloworld.html (replace the link local address of the SBC and the filename if you've changed them). Which will give you something like this:
Cgi-Bin Page
Script-generated web pages go in a special folder called cgi-bin/ within the /var/www/ directory. In addition, they end with an extension that tells the SBC how to run them. Python cgi scripts end with .py.
To enter the cgi-bin directory, and then create and edit (using nano) a file called led_state.py, you can type the following into an SSH terminal to the SBC:
cd /var/www/cgi-bin/
nano led_state.py
Within the nano editor, you can enter this code:
#! /usr/bin/python

from Phidgets.PhidgetException import *
from Phidgets.Events.Events import *
from Phidgets.Devices.InterfaceKit import *

import cgi
import cgitb

cgitb.enable()
errors = ""
setLED = None
form = cgi.FieldStorage()
ledLocation = 0

# Print the HTML header
print("Content-type: text/html\n\n")
print("<html><title>LED CGI-BIN Control</title><body>\n")

# Create, Open, and Attach the Interface Kit
try:
    interfaceKit = InterfaceKit()
except RuntimeError as e:
    errors = errors + "<h5>Runtime Exception on object creation: " + e.details + "</h5>\n"
try:
    interfaceKit.openPhidget()
except PhidgetException as e:
    errors = errors + "<h5>Phidget Exception on Open: " + e.details + "</h5>\n"
try:
    interfaceKit.waitForAttach(10000)
except PhidgetException as e:
    errors = errors + "<h5>Phidget Exception on Attach: " + e.details + "</h5>\n"
    errors = errors + "<h5>If Phidget is 'Not Physically Attached' it may be in use</h5>\n"

# If we got a request to set the LED to a state, find out which state
if "setLED" in form:
    setLED = int(form["setLED"].value)
    # Check the input we got to make sure it is either a 0 or 1
    if not ((setLED is 0) or (setLED is 1)):
        setLED = None

# If we are dealing with a request
if setLED is not None:
    try:
        interfaceKit.setOutputState(ledLocation,setLED)
        print("<h3>LED state has been set to " + str(setLED) + "</h3>\n")
    except PhidgetException as e:
        errors = errors + "<h5>Phidget Exception on LED Set: " + e.details + "</h5>\n"
# Otherwise, simply print the current LED state
else:
    try:
        setLED = interfaceKit.getOutputState(ledLocation)
        print("<h3>LED state is currently " + str(setLED) + "</h3>\n")
    except PhidgetException as e:
        errors = errors + "<h5>Phidget Exception on LED Get: " + e.details + "</h5>\n"

# Communicate with our user if need be
print(errors)

# If there are no errors, we can safely add the option to toggle the LED
if errors is "":
    # The LED gets set by an int, but getState returns a bool, so we could have either
    if (setLED is 0) or (setLED is False):
        setLED = 1
    else:
        setLED = 0
    print("<a href='http://corasbc2.local/cgi-bin/led_state.py?setLED=" + str(setLED) + "'>Toggle LED</a>")

print("</body></html>\n")

interfaceKit.closePhidget()
exit(0)
Save it, and your SBC is now ready to control the LED over the web!
Putting it All Together
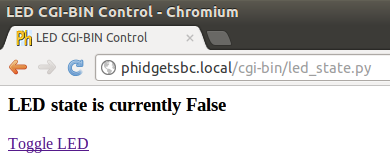
Head over to the web address of your Python cgi script: http://phidgetsbc.local/cgi-bin/led_state.py - replacing the local link address and file name if you've changed them. You will arrive (depending on the initial LED state) at one of a few different pages.
There are essentially four different web pages that this script produces. There are two where we do not include any request in the http address. One where the LED is already on:
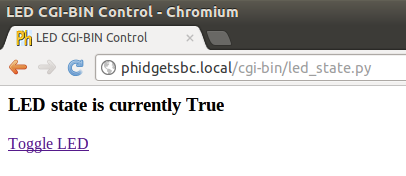
And one where the LED is already off:
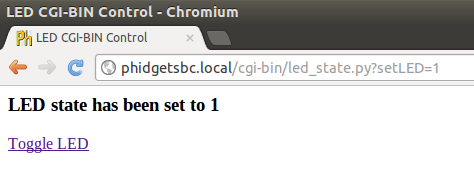
Then there are two pages where we include a request for a new LED state in the http address. You can do this by tacking a ?setLED=0 or ?setLED=1 on to the end of the address.
Requesting that the LED turn on (?setLED=1) gives:
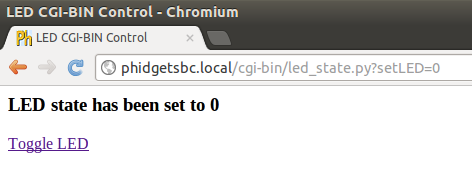
And requesting that the LED turn off (?setLED=0) gives:
The Toggle LED link is just generated in the Python script to be a request-type page with the request toggling the LED.
And you're done! Give the web page address to everyone on your local network, so they can have fun turning your LED on and off at random times.
Extra Credit
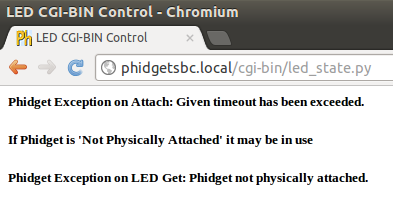
These requests over the web are fast, but theoretically more than one can happen at one time. In that case, the Phidget Interface Kit will already be attached and bound to another program, so you will get an error. With the web script in this application guide, the error will probably look something like this:
- How would you create a mutual exclusion setup to prevent this from happening on the web?
- How would you create a different setup to prevent this from happening with other programs?