|
Notice: This page contains information for the legacy Phidget21 Library. Phidget21 is out of support. Bugfixes may be considered on a case by case basis. Phidget21 does not support VINT Phidgets, or new USB Phidgets released after 2020. We maintain a selection of legacy devices for sale that are supported in Phidget21. We recommend that new projects be developed against the Phidget22 Library.
|
Language - Ruby: Difference between revisions
No edit summary |
|||
| (29 intermediate revisions by 5 users not shown) | |||
| Line 1: | Line 1: | ||
[[Category:Language]] | [[Category:Language]] | ||
[[File:Icon-Ruby.png|64x64px | {{OSLang|[[File:Icon-Ruby.png|64x64px|link=|alt=]]|Ruby is an interpreted and object oriented scripting language with simple syntax created by [http://en.wikipedia.org/wiki/Yukihiro_Matsumoto Yukihiro Matsumoto].}} | ||
__TOC__ | __TOC__ | ||
| Line 7: | Line 7: | ||
{{LanguageSupport|Ruby|the complete Phidget API, including events|all Phidget devices.|Linux and OS X|}} | {{LanguageSupport|Ruby|the complete Phidget API, including events|all Phidget devices.|Linux and OS X|}} | ||
==Quick Downloads== | |||
{{QuickDownloads|Ruby| | {{QuickDownloads|Ruby| | ||
{{APIQuickDownloads|http://www. | {{APIQuickDownloads|http://www.rubydoc.info/gems/phidgets-ffi/frames RubyDoc}}| | ||
{{ExampleQuickDownloads|http://rubygems.org/gems/phidgets-ffi| ( | {{ExampleQuickDownloads|http://rubygems.org/gems/phidgets-ffi| (on RubyGems Server)}}| | ||
{{ExtraLibraryQuickDownloads|http://rubygems.org/gems/phidgets-ffi|Ruby| ( | {{ExtraLibraryQuickDownloads|http://rubygems.org/gems/phidgets-ffi|Ruby| (on RubyGems Server)}} | ||
{{MacQuickDownloads}} | {{MacQuickDownloads}} | ||
{{LinuxQuickDownloads}} | {{LinuxQuickDownloads}}}} | ||
}} | |||
===3rd Party Library=== | |||
The following library was submitted by a user and is an alternative means for using Phidgets in Ruby. It is only suitable for the Spatial, GPS, Interface Kit, and Advanced Servo product lines but more may follow. | |||
*[https://github.com/brighton36/phidgets_native Link] | |||
Please note that this is not Phidgets' official library and we take no responsibility for issues stemming from its use nor are we able to support the library ourselves. We are merely making this available for users who wish for an alternative to our own libraries. | |||
==Getting started with Ruby== | ==Getting started with Ruby== | ||
| Line 21: | Line 29: | ||
{{ExampleCodeReasons}} | {{ExampleCodeReasons}} | ||
Instructions for OS X and Linux are similar, so they | Instructions for OS X and Linux are similar, so they are combined [[#OS X and Linux|into the same section]]. | ||
'''Although Ruby can run on Windows, we do not offer official support for the Phidgets libraries using Ruby on Windows.''' | |||
==OS X and Linux== | |||
Here, we walk you through installing the libraries both on your operating system and within Ruby, and then we walk through examples and writing code from scratch. | |||
== | ===Install the Phidget drivers and libraries=== | ||
If you are using OS X | The first step in using Ruby on OS X or Linux is to install the Phidget libraries. The best way to do this is to go through the ''Getting Started'' guide for your device. This guide can be found in the [[:Category:UserGuide|user guide]]. | ||
This process of installing will put the Phidget libraries on your system. Ruby programs on OS X and Linux depend on the following files from the Phidget libraries: | |||
If you are using OS X: | |||
* <b>{{Code|Phidget21.framework}}</b> contains the actual Phidgets library for OS X, which is used at run-time. | * <b>{{Code|Phidget21.framework}}</b> contains the actual Phidgets library for OS X, which is used at run-time. | ||
If you are using | If you are using Linuxe: | ||
* <b>{{Code|libphidget21.so}}</b> contains the actual Phidgets library for Linux, which is used at run-time. | * <b>{{Code|libphidget21.so}}</b> contains the actual Phidgets library for Linux, which is used at run-time. | ||
===Install phidgets-ffi=== | |||
For both OS X and Linux, you will need the ffi and phidgets-ffi Ruby gems to run Phidgets. This requires that you have RubyGems set up so that you can download and install gems (i.e. third-party software) to plug into Ruby and use. The phidgets-ffi gem contains the Ruby library for Phidgets, and Phidgets example code. | |||
For more information, please see phidgets-ffi at [http://rubygems.org/gems/phidgets-ffi RubyGems] and [https://github.com/kreynolds/phidgets-ffi GitHub]. | |||
Both Ruby and RubyGems are part of the Debian Linux repository. Both Ruby and RubyGems are a part of Mac OS X 10.5 and higher. | |||
RubyGems will give you the command line program {{Code|gem}}. This is the program you can use to install the phidgets-ffi and ffi gems. First use it to install the [http://rubygems.org/gems/ffi ffi gem]: | |||
<div class="source"> | <div class="source"> | ||
| Line 49: | Line 64: | ||
</div> | </div> | ||
Next, please install the phidgets-ffi gem by typing the following into command line: | Note that this should be run using '''{{Code|sudo}}''' on Linux. A version of ffi 1.0.9 or greater is needed. Next, please install the phidgets-ffi gem by typing the following into the command line: | ||
<div class="source"> | <div class="source"> | ||
| Line 57: | Line 72: | ||
</div> | </div> | ||
For OS X systems, the gem will be installed into {{Code|/Library/Ruby/Gems/1.x/phidgets-ffi-x.x.x}}. | Note that this should be run using '''{{Code|sudo}}''' on Linux. For OS X systems, the gem will be installed into {{Code|/Library/Ruby/Gems/1.x/phidgets-ffi-x.x.x}}. For typical Linux systems, the gem will be installed into {{Code|var/lib/gems/1.x/gems/phidgets-ffi-x.x.x}}. | ||
For typical Linux systems, the gem will be installed into {{Code|var/lib/gems/1. | |||
===Use Our Examples=== | ===Use Our Examples=== | ||
Open a command line terminal and navigate to the phidgets-ffi gem directory. {{Code|cd}} into the {{Code|examples}} folder. Here, you will find all of the examples available for Ruby. | Open a command line terminal and navigate to the phidgets-ffi gem directory. {{Code|cd}} into the {{Code|examples}} folder. Here, you will find all of the examples available for Ruby, including a Hello World example that will work with any Phidget. You will also find source code examples specifically designed for each Phidget. {{FindYourDevice}} | ||
The easiest way to confirm that your environment is set up properly will be to compile and run the {{Code|HelloWorld}} Ruby example. | The easiest way to confirm that your environment is set up properly will be to compile and run the {{Code|HelloWorld}} Ruby example. | ||
| Line 74: | Line 87: | ||
</syntaxhighlight> | </syntaxhighlight> | ||
</div> | </div> | ||
Note that, on Linux, unless you have your [[OS_-_Linux#Setting_udev_Rules|udev rules set]], you will need to run Phidgets programs using '''{{Code|sudo}}'''. | |||
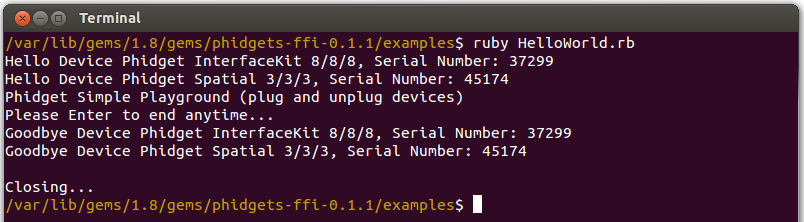
This program will detect for devices that are attached/detached on the computer. Go ahead, and attach or detach your devices! Here is an example output: | This program will detect for devices that are attached/detached on the computer. Go ahead, and attach or detach your devices! Here is an example output: | ||
| Line 79: | Line 94: | ||
[[File:Ruby Linux HelloWorld Output.PNG|link=|alt=HelloWorld Output]] | [[File:Ruby Linux HelloWorld Output.PNG|link=|alt=HelloWorld Output]] | ||
After confirming that the {{Code|HelloWorld}} example is working, you can proceed to run the example for your device. | After confirming that the {{Code|HelloWorld}} example is working, you can proceed to run the example for your device. {{FindYourDevice}} | ||
Once you have the Ruby examples running, we have a [[#Follow the Examples|teaching]] section below to help you follow them. | Once you have the Ruby examples running, we have a [[#Follow the Examples|teaching]] section below to help you follow them. | ||
==Write Your Own Code== | ===Write Your Own Code=== | ||
When you are building a project from scratch, or adding Phidget function calls to an existing project, you'll need to configure your environment to properly link the Phidget Ruby libraries. | When you are building a project from scratch, or adding Phidget function calls to an existing project, you'll need to configure your environment to properly link the Phidget Ruby libraries. | ||
| Line 104: | Line 119: | ||
By following the instructions for your operating system and compiler above, you probably now have a working example and want to understand it better so you can change it to do what you want. This teaching section has resources for you to learn from the examples and write your own. | By following the instructions for your operating system and compiler above, you probably now have a working example and want to understand it better so you can change it to do what you want. This teaching section has resources for you to learn from the examples and write your own. | ||
Your main reference for writing Ruby code will be our Ruby API information, with syntax for all of our functions: | |||
{{UsingAPhidgetInCodeGeneral|both of which are available in Ruby|[http://www. | {{UsingAPhidgetInCodeGeneral|both of which are available in Ruby|[http://www.rubydoc.info/gems/phidgets-ffi/frames Ruby API]}} | ||
===Example Flow=== | ===Example Flow=== | ||
{{ExamplePseudocode|In Ruby, you | {{ExamplePseudocode|In Ruby, you catch these events thrown by Phidgets (on a sensor data change, for example) by using the '''do''' command. There are many events for each Phidget, such as device.on_attach, where device is your Interface Kit, Temperature Sensor, etc, etc. <br> | ||
Some event functions will be common to all Phidgets (attach and detach), and some will be specific to each device, like when a tag is read on an RFID board, or when a sensor value changes on an Interface Kit. | |||
|Creating a Phidget software object in Ruby is specific to the Phidget. For a Phidget Spatial, for example, this would involve creating a {{Code|Spatial}} object. The examples show how to do this and other API functions.<br><br> | |Creating a Phidget software object in Ruby is specific to the Phidget. For a Phidget Spatial, for example, this would involve creating a {{Code|Spatial}} object. The examples show how to do this and other API functions.<br><br> | ||
The object provides device specific methods and properties which are available from the API for your specific Phidget.| | The object provides device specific methods and properties which are available from the API for your specific Phidget.| | ||
[http://www. | [http://www.rubydoc.info/gems/phidgets-ffi/frames Ruby API]}} | ||
===Code Snippets=== | ===Code Snippets=== | ||
| Line 124: | Line 137: | ||
It may help to have the [[General Phidget Programming]] page and this section open at the same time, because they parallel each other and you can refer to the Ruby syntax. However, many additional concepts are covered on the General Phidget Programming page on a high level, such as using multiple Phidgets, handling errors, and different styles of programming. | It may help to have the [[General Phidget Programming]] page and this section open at the same time, because they parallel each other and you can refer to the Ruby syntax. However, many additional concepts are covered on the General Phidget Programming page on a high level, such as using multiple Phidgets, handling errors, and different styles of programming. | ||
For example, if we were using a [ | For example, if we were using a [{{SERVER}}/products.php?product_id=1018 Phidget Interface Kit] as our device, our code snippets would look something like those shown here. | ||
====Step One: Initialize and Open==== | ====Step One: Initialize and Open==== | ||
The Phidget constructor method will need to be called to create the Phidget object. There are two methods or programming a Phidget in Ruby: with and without a block. | The Phidget constructor method will need to be called to create the Phidget object. There are two methods or programming a Phidget in Ruby: with and without a block. | ||
=====Block Programming===== | |||
To initialize and open a Phidget with a block of code following, for example, use this structure: | |||
<div class="source"> | <div class="source"> | ||
<syntaxhighlight lang=ruby> | <syntaxhighlight lang=ruby> | ||
Phidgets::InterfaceKit.new do |device| | |||
.. | |||
end | |||
</syntaxhighlight> | |||
</div> | |||
Note that with block programming, the block between '''do....end''' is your entire program. As described in detail in the [[#Step Two: Wait for Attachment (plugging in) of the Phidget|next code snippet]], a block of code will automatically wait for the Phidget to finish opening and attaching, and will automatically call close on the Phidget at the end of the block. | |||
=====Non Block Programming===== | |||
To simply create and open a Phidget of a certain type - in this case an Interface Kit - use this structure: | |||
<div class="source"> | |||
<syntaxhighlight lang=ruby> | |||
device = Phidgets::InterfaceKit.new | |||
</syntaxhighlight> | </syntaxhighlight> | ||
</div> | </div> | ||
The object name for any type of Phidget is listed in the API manual. Every type of Phidget also inherits functionality from the Phidget base class | The object name for any type of Phidget is listed in the API manual. Here we use the Phidget Interface Kit (the Phidget with digital inputs, outputs, and analog sensor ports), but if you have a different Phidget like a Motor Controller, or a Temperature Sensor, or a Spatial, you would use the software object for your specific Phidget. Every type of Phidget also inherits functionality from the Phidget base class. | ||
=====Options for Open===== | |||
==== | |||
Options can be added to the Open constructor to connect to the first Phidget (of a certain type) that it finds, based on its serial number, label, or even connect across the network. [http://rubydoc.info/gems/phidgets-ffi/0.1.1/frames Rubydocs API documentation] lists all of the available modes that the constructor provides. | |||
For example, the following will try to connect to the first Phidget it finds: | For example, the following will try to connect to the first Phidget it finds: | ||
| Line 166: | Line 189: | ||
</div> | </div> | ||
One important thing to remember is that when working with Phidgets, a local connection will reserve the device until closed. This prevents any other instances from retrieving data from the Phidget, including other programs. The one connection per device limit does not apply when exclusively using the Phidget WebService. | One important thing to remember is that when working with Phidgets, a local connection will reserve the device until closed. This prevents any other instances from retrieving data from the Phidget, including other programs. The one connection per device limit does not apply when exclusively using the [[Phidget WebService]]. | ||
{{Code|Phidgets::InterfaceKit.new}} will tell the program to continuously try to connect to a Phidget, based on the options given (if any), and will even try to reconnect if it gets disconnected. | |||
{{Code| | ====Step Two: Wait for Attachment (plugging in) of the Phidget==== | ||
To use the Phidget, it must be plugged in (attached). Like the create ("new") call above, there are blocking and non-blocking methods of detecting and handling attachment. Attachment in software must be handled for all Phidgets. We can handle it by using event driven programming and tracking the {{Code|on_attach}} and {{Code|on_detach}} events, or by calling: {{Code|wait_for_attachment}}. | |||
=====Block Programming===== | |||
If you are programming inside a block, {{Code|wait_for_attachment}} is automatically called. By default, it will halt the program and try to connect to the Phidget for up to 1000 milliseconds. Afterwards, the block will yield. Finally, close is not needed as it is automatically called once the block has finished. | |||
<div class="source"> | |||
<syntaxhighlight lang=ruby> | |||
options = {:timeout => 2000) | |||
Phidgets::InterfaceKit.new(options) do |device| | |||
... | |||
end | |||
</syntaxhighlight> | |||
</div> | |||
=====Non Block Programming===== | =====Non Block Programming===== | ||
For the non block programming method, simply calling the constructor does not guarantee you can use the Phidget immediately. | |||
For the non block programming method, simply calling the constructor does not guarantee you can use the Phidget immediately. The {{Code|wait_for_attachment}} call will block indefinitely until a connection is made to the Phidget, or an optional timeout is exceeded. | |||
<div class="source"> | <div class="source"> | ||
| Line 188: | Line 229: | ||
</div> | </div> | ||
===== | =====Event Programming===== | ||
Sometimes, it makes more sense to handle the attachment via an event. This would be in instances where the Phidget is being plugged and unplugged, and you want to handle these incidents. Or, when you want to use event-driven programming because you have a GUI-driven program. In these cases, an event-driven code snippet to handle the attachment might look something like this: | Sometimes, it makes more sense to handle the attachment via an event. This would be in instances where the Phidget is being plugged and unplugged, and you want to handle these incidents. Or, when you want to use event-driven programming because you have a GUI-driven program. In these cases, you would use the non-blocking method of creating and opening the Phidget ("new"), and use an event driven function to handle the attach event when thrown. An event-driven code snippet to handle the attachment might look something like this: | ||
<div class="source"> | <div class="source"> | ||
| Line 214: | Line 246: | ||
You can read data and interact with your Phidget both by polling it for its current state (or to set a state), or by catching events that trigger when the data changes. | You can read data and interact with your Phidget both by polling it for its current state (or to set a state), or by catching events that trigger when the data changes. | ||
For our [ | For our [{{SERVER}}/products.php?product_id=1018 Phidget Interface Kit], the polling method of getting the current sensor state and setting an output state looks something like this: | ||
<div class="source"> | <div class="source"> | ||
| Line 240: | Line 272: | ||
====Step Four: Close==== | ====Step Four: Close==== | ||
If you are using the block programming method, you do not need to worry about closing the Phidget | If you are using the block programming method, you do not need to worry about closing the Phidget; it is already taken care of when the block ends. However, if you are using the non block programming method, then you will need ensure that the Phidget is closed. At the end of your program, call {{Code|close}} to free any locks on the Phidget that the Phidget constructor call put in place! | ||
At the end of your program, | |||
<div class="source"> | <div class="source"> | ||
| Line 250: | Line 280: | ||
</div> | </div> | ||
The ''complete'' set of functions you have available for all Phidgets can be found in the [http://rubydoc.info/gems/phidgets-ffi/0.1.1/frames Ruby API]. You can also find more description on any device-specific function | {{MoreHowTos}} | ||
The ''complete'' set of functions you have available for all Phidgets can be found in the [http://rubydoc.info/gems/phidgets-ffi/0.1.1/frames Ruby API]. You can also find more description on any device-specific function in the Device API page for your specific Phidget, which can be found in its [[:Category:UserGuide|user guide]]. | |||
====Raw FFI==== | |||
As an alternative to programming with the method as outlined in this document, you can also program making straight C calls through FFI. Please refer to the files in {{Code|Ruby Gems Directory/phidgets-ffi-x.x.x/lib/phidgets-ffi/ffi}} to see a list of available methods, and the [{{SERVER}}/documentation/Phidget21_C_Doc.zip C API] for usage. There are raw ffi examples in {{Code|Ruby Gems directory/phidgets-ffi-x.x.x/examples/raw-ffi}}. | |||
As an alternative to programming with the method as outlined in this document, you can also program making straight C calls through FFI. Please refer to the files in {{Code|Ruby Gems Directory/phidgets-ffi-x.x.x/lib/phidgets-ffi/ffi}} to see a list of available methods, and the [ | |||
==Common Problems and Solutions/Workarounds== | ==Common Problems and Solutions/Workarounds== | ||
None at this time. | |||
Latest revision as of 13:43, 8 June 2017
| Ruby is an interpreted and object oriented scripting language with simple syntax created by Yukihiro Matsumoto. |
Introduction
If this is your first time working with a Phidget, we suggest starting with the Getting Started page for your specific device. This can be found in the user guide for your device. That page will walk you through installing drivers and libraries for your operating system, and will then bring you back here to use Ruby specifically.
Ruby is capable of using the complete Phidget API, including events. We also provide example code in Ruby for all Phidget devices.
Ruby can be developed with Linux and OS X.
You can compare Ruby with our other supported languages.
Quick Downloads
Just need the Ruby documentation, drivers, libraries, and examples? Here they are:
Documentation
Example Code
Libraries and Drivers
3rd Party Library
The following library was submitted by a user and is an alternative means for using Phidgets in Ruby. It is only suitable for the Spatial, GPS, Interface Kit, and Advanced Servo product lines but more may follow.
Please note that this is not Phidgets' official library and we take no responsibility for issues stemming from its use nor are we able to support the library ourselves. We are merely making this available for users who wish for an alternative to our own libraries.
Getting started with Ruby
If you are new to writing code for Phidgets, we recommend starting by running, then modifying existing examples. This will allow you to:
- Make sure your libraries are properly linked
- Go from source code to a test application as quickly as possible
- Ensure your Phidget is hooked up properly
Instructions for OS X and Linux are similar, so they are combined into the same section. Although Ruby can run on Windows, we do not offer official support for the Phidgets libraries using Ruby on Windows.
OS X and Linux
Here, we walk you through installing the libraries both on your operating system and within Ruby, and then we walk through examples and writing code from scratch.
Install the Phidget drivers and libraries
The first step in using Ruby on OS X or Linux is to install the Phidget libraries. The best way to do this is to go through the Getting Started guide for your device. This guide can be found in the user guide.
This process of installing will put the Phidget libraries on your system. Ruby programs on OS X and Linux depend on the following files from the Phidget libraries:
If you are using OS X:
Phidget21.frameworkcontains the actual Phidgets library for OS X, which is used at run-time.
If you are using Linuxe:
libphidget21.socontains the actual Phidgets library for Linux, which is used at run-time.
Install phidgets-ffi
For both OS X and Linux, you will need the ffi and phidgets-ffi Ruby gems to run Phidgets. This requires that you have RubyGems set up so that you can download and install gems (i.e. third-party software) to plug into Ruby and use. The phidgets-ffi gem contains the Ruby library for Phidgets, and Phidgets example code.
For more information, please see phidgets-ffi at RubyGems and GitHub.
Both Ruby and RubyGems are part of the Debian Linux repository. Both Ruby and RubyGems are a part of Mac OS X 10.5 and higher.
RubyGems will give you the command line program gem. This is the program you can use to install the phidgets-ffi and ffi gems. First use it to install the ffi gem:
gem install ffi
Note that this should be run using sudo on Linux. A version of ffi 1.0.9 or greater is needed. Next, please install the phidgets-ffi gem by typing the following into the command line:
gem install phidgets-ffi
Note that this should be run using sudo on Linux. For OS X systems, the gem will be installed into /Library/Ruby/Gems/1.x/phidgets-ffi-x.x.x. For typical Linux systems, the gem will be installed into var/lib/gems/1.x/gems/phidgets-ffi-x.x.x.
Use Our Examples
Open a command line terminal and navigate to the phidgets-ffi gem directory. cd into the examples folder. Here, you will find all of the examples available for Ruby, including a Hello World example that will work with any Phidget. You will also find source code examples specifically designed for each Phidget. The source file will be named the same as the software object for your device. If you are not sure what the software object for your device is, find your Phidget on our webpage, and then check the API documentation for it.
The easiest way to confirm that your environment is set up properly will be to compile and run the HelloWorld Ruby example.
The only thing left to do is to run the examples! Type the following into command line:
ruby HelloWorld.rb
Note that, on Linux, unless you have your udev rules set, you will need to run Phidgets programs using sudo.
This program will detect for devices that are attached/detached on the computer. Go ahead, and attach or detach your devices! Here is an example output:
After confirming that the HelloWorld example is working, you can proceed to run the example for your device. The source file will be named the same as the software object for your device. If you are not sure what the software object for your device is, find your Phidget on our webpage, and then check the API documentation for it.
Once you have the Ruby examples running, we have a teaching section below to help you follow them.
Write Your Own Code
When you are building a project from scratch, or adding Phidget function calls to an existing project, you'll need to configure your environment to properly link the Phidget Ruby libraries.
Simply, add the following two lines to the beginning of any .rb script to make use of the phidgets-ffi gem
  require 'rubygems'
  require 'phidgets-ffi'
The project now has access to the Phidget21 function calls and you are ready to begin coding.
The same teaching section which describes the examples also has further resources for programming your Phidget.
Follow the Examples
By following the instructions for your operating system and compiler above, you probably now have a working example and want to understand it better so you can change it to do what you want. This teaching section has resources for you to learn from the examples and write your own.
Your main reference for writing Ruby code will be our Ruby API information, with syntax for all of our functions:
- Ruby API (This is the complete set of functions you have available for all Phidgets)
- Device Specific APIs - The one for your Phidget can be found in its user guide.
To learn the details behind opening, configuring, using, and closing your Phidget, try the General Phidget Programming page. That page also describes using the Phidget in an event-driven manner and in a traditional manner, both of which are available in Ruby.
Example Flow
The Hello World example has this general structure so you can follow along. We also have an in-depth general introduction to writing Phidget code (like open, read data, etc), as well as the Ruby API for specific syntax:
|
// ----- Event and Other Functions ----- Create any Language-Specific Functions (exception handling) Create General Attach, Detach, and Error Handling Functions:
|
In Ruby, you catch these events thrown by Phidgets (on a sensor data change, for example) by using the do command. There are many events for each Phidget, such as device.on_attach, where device is your Interface Kit, Temperature Sensor, etc, etc. | |
|
// ----- Main Code -----
Close Device Delete Device
|
Creating a Phidget software object in Ruby is specific to the Phidget. For a Phidget Spatial, for example, this would involve creating a |
Code Snippets
Specific calls in Ruby will differ in syntax from those on the General Phidget Programming page, but the concepts stay the same.
It may help to have the General Phidget Programming page and this section open at the same time, because they parallel each other and you can refer to the Ruby syntax. However, many additional concepts are covered on the General Phidget Programming page on a high level, such as using multiple Phidgets, handling errors, and different styles of programming.
For example, if we were using a Phidget Interface Kit as our device, our code snippets would look something like those shown here.
Step One: Initialize and Open
The Phidget constructor method will need to be called to create the Phidget object. There are two methods or programming a Phidget in Ruby: with and without a block.
Block Programming
To initialize and open a Phidget with a block of code following, for example, use this structure:
  Phidgets::InterfaceKit.new do |device|
    ..
  end
Note that with block programming, the block between do....end is your entire program. As described in detail in the next code snippet, a block of code will automatically wait for the Phidget to finish opening and attaching, and will automatically call close on the Phidget at the end of the block.
Non Block Programming
To simply create and open a Phidget of a certain type - in this case an Interface Kit - use this structure:
device = Phidgets::InterfaceKit.new
The object name for any type of Phidget is listed in the API manual. Here we use the Phidget Interface Kit (the Phidget with digital inputs, outputs, and analog sensor ports), but if you have a different Phidget like a Motor Controller, or a Temperature Sensor, or a Spatial, you would use the software object for your specific Phidget. Every type of Phidget also inherits functionality from the Phidget base class.
Options for Open
Options can be added to the Open constructor to connect to the first Phidget (of a certain type) that it finds, based on its serial number, label, or even connect across the network. Rubydocs API documentation lists all of the available modes that the constructor provides.
For example, the following will try to connect to the first Phidget it finds:
device= Phidgets::InterfaceKit.new
The following will try to connect to a Phidget over the Phidget WebService with a serial number of 99999, and a server id of myserver:
  options = {:serial_number => 99999, :server_id => ‘myserver’, :password => nil}
  device= Phidgets::InterfaceKit.new(options)
One important thing to remember is that when working with Phidgets, a local connection will reserve the device until closed. This prevents any other instances from retrieving data from the Phidget, including other programs. The one connection per device limit does not apply when exclusively using the Phidget WebService.
Phidgets::InterfaceKit.new will tell the program to continuously try to connect to a Phidget, based on the options given (if any), and will even try to reconnect if it gets disconnected.
Step Two: Wait for Attachment (plugging in) of the Phidget
To use the Phidget, it must be plugged in (attached). Like the create ("new") call above, there are blocking and non-blocking methods of detecting and handling attachment. Attachment in software must be handled for all Phidgets. We can handle it by using event driven programming and tracking the on_attach and on_detach events, or by calling: wait_for_attachment.
Block Programming
If you are programming inside a block, wait_for_attachment is automatically called. By default, it will halt the program and try to connect to the Phidget for up to 1000 milliseconds. Afterwards, the block will yield. Finally, close is not needed as it is automatically called once the block has finished.
  options = {:timeout => 2000)
  Phidgets::InterfaceKit.new(options) do |device|
    ...
  end
Non Block Programming
For the non block programming method, simply calling the constructor does not guarantee you can use the Phidget immediately. The wait_for_attachment call will block indefinitely until a connection is made to the Phidget, or an optional timeout is exceeded.
  device= Phidgets::InterfaceKit.new
  device.wait_for_attachment 2000 #halt the program for up 2000 milliseconds or until the Phidget is connected
Please also remember to call close at the end or the program to free any locks on the Phidget
device.close
Event Programming
Sometimes, it makes more sense to handle the attachment via an event. This would be in instances where the Phidget is being plugged and unplugged, and you want to handle these incidents. Or, when you want to use event-driven programming because you have a GUI-driven program. In these cases, you would use the non-blocking method of creating and opening the Phidget ("new"), and use an event driven function to handle the attach event when thrown. An event-driven code snippet to handle the attachment might look something like this:
  device.on_attach  do |device, obj|
    puts "Id: #{device.id}"
    puts "Serial number: #{device.serial_number}"
  end
Step Three: Do Things with the Phidget
You can read data and interact with your Phidget both by polling it for its current state (or to set a state), or by catching events that trigger when the data changes.
For our Phidget Interface Kit, the polling method of getting the current sensor state and setting an output state looks something like this:
# Get a data point from Analog Port 0
puts "Sensor value[0]: #{device.sensors[0].to_i}"

# Set digital output port 0 to be on
device.outputs[0].state = true
To catch data changes via events, you would use something like this:
  device.on_sensor_change do |device, input, value, obj|
    puts "Sensor #{input.index}'s value has changed to #{value}"
  end
Step Four: Close
If you are using the block programming method, you do not need to worry about closing the Phidget; it is already taken care of when the block ends. However, if you are using the non block programming method, then you will need ensure that the Phidget is closed. At the end of your program, call close to free any locks on the Phidget that the Phidget constructor call put in place!
device.close
More How-To's
The General Phidget Programming page gives more information about:
- Using Multiple Phidgets (or a Phidget other than the Interface Kit)
- Catching exceptions and errors and using logging
- Event catching versus direct polling
- And more....
The complete set of functions you have available for all Phidgets can be found in the Ruby API. You can also find more description on any device-specific function in the Device API page for your specific Phidget, which can be found in its user guide.
Raw FFI
As an alternative to programming with the method as outlined in this document, you can also program making straight C calls through FFI. Please refer to the files in Ruby Gems Directory/phidgets-ffi-x.x.x/lib/phidgets-ffi/ffi to see a list of available methods, and the C API for usage. There are raw ffi examples in Ruby Gems directory/phidgets-ffi-x.x.x/examples/raw-ffi.
Common Problems and Solutions/Workarounds
None at this time.