|
Notice: This page contains information for the legacy Phidget21 Library. Phidget21 is out of support. Bugfixes may be considered on a case by case basis. Phidget21 does not support VINT Phidgets, or new USB Phidgets released after 2020. We maintain a selection of legacy devices for sale that are supported in Phidget21. We recommend that new projects be developed against the Phidget22 Library.
|
Language - Android Java
![]() Android Java is the main language used to program for the Android OS.
Android Java is the main language used to program for the Android OS.
Introduction
If this is your first time working with a Phidget, we suggest starting with the Getting Started page for your specific device. This can be found in the user guide for your device. That page will walk you through installing drivers and libraries for your operating system, and will then bring you back here to use Android specifically.
Android is capable of using nearly the complete Phidget API, including events, and only excepting a few open() calls outlined later. We also provide example code in Android for the Phidget Interface Kit and two Hello World examples.
Android can be developed with Eclipse on Windows, Mac OS, and Linux.
You can compare Android with our other supported languages.
Quick Downloads
Just need the Android documentation, drivers, libraries, and examples? Here they are:
Documentation
Example Code
Libraries and Drivers
- Libraries (Phidget21.jar included in Examples)
- 32-bit Windows Drivers Installer
- 64-bit Windows Drivers Installer
- Windows Driver and Library Files (Zipped)
- OS X Drivers Installer
- Linux Libraries (Source Code)
Getting Started with Android Java (Eclipse)
If you are new to writing code for Phidgets, we recommend starting by running, then modifying existing examples. This will allow you to:
- Make sure your libraries are properly linked
- Go from source code to a test application as quickly as possible
- Ensure your Phidget is hooked up properly
As Android development is primarily done on Eclipse, and Eclipse is relatively platform-independent, we provide instructions for Eclipse rather than by operating system.
For basic differences on installing and setting up Eclipse on your development system, you can try the Android Operating System page. However, your best bet for information about general use of Eclipse on your development operating system (Windows, Mac, or Linux) will be the Eclipse support page or the Internet at large.
Phidgets can run directly plugged in to Android devices with a USB port and system 3.1 or later.
Otherwise, Android can control a Phidget remotely over a network, by using the Phidget Webservice
Hence, we split instructions up by Android OS version number.
Android Under 3.1 (and/or no USB Port)
These types of phones and tablets can use Phidgets only remotely over a network using the Phidget Webservice.
Use Our Examples
Download and unpack the Phidget Examples for Android. There are two Hello World examples: HelloWorldRemote (the one you want), and HelloWorldUSB (for tablets with a USB port).
Import the HelloWorldRemote example into Eclipse:
- File → Import... → General → Existing Projects Into Workspace → (Next)
- Select
HelloWorldRemoteroot directory → Select all files → Finish
Next, you must change the IP address within the example code to the IP address of the computer directly connected to the Phidget you are trying to control. This happens on the line that says something like:
device.open("192.168.3.133", 5001);
Also, note that the HelloWorldRemote example was written for Android 2.1. If needed, you can change this in: (Right Click on Project) → Properties → Resource (on left) → Android
To run the example: Right-click on project in Package Explorer (To open the Package Explorer, use Window → Show View → Package Explorer)
Select Run As... → Android Application
This will bring up the Android Virtual Device manager window. If your Android hardware is plugged in to your debugging computer, you will see the hardware as an option on which to run the example. You should run it directly on your Android device, unless you are comfortable setting up the emulator to run on your local network.
After the HelloWorldRemote application starts running on your Android device:
- Make sure the Phidget Webservice is running on the computer with the IP address you put into the code
- For directions on how to set up and run the webservice on a remote computer, refer to the page for that operating system
- Plug a Phidget into that computer
And on your Android device, depending on which Phidget you plug in, you should see something like:

And when you unplug that Phidget from the remote computer, you should see something like this on your Android device:

If you have the specific Phidget for the other included Android examples (i.e. the InterfaceKit), you can run the other examples in the same way.
To envision the system in the background, you can refer to the Webservice section on the OS - Android page.
Write Your Own Code
To write your own code from scratch, start with an Android project in Eclipse (File → New → Android Project). Then....
Step One: Link the Phidget Libraries to your Project
When you download and unzip the Phidget Examples for Android, each project folder will (in addition to the project files themselves) contain three things:
- A libs/ folder (containing an armabi/ folder and a single file called libphidget21.so)
- A jar file containing the general Phidget java library (phidget21.jar)
- A jar file for directly driving USB devices from a USB port on the Android device (PhidgetsUSB.jar)
Move the libs folder, the PhidgetsUSB.jar file, and the phidget21.jar file to your project folder.
To install libraries to run a Phidget remotely over a network using the Webservice:
- Add the libs/ folder to your project
- To add the libs/ folder in Eclipse, simply place it in the root folder of your project
- Add the phidget21.jar file to your project
- In Eclipse use the top-bar menu: Project → Properties → Java Build Path → Libraries (tab) → Add JAR
Step Two: Give your Program Permission to use the Internet
Add the following to your AndroidManifest.xml file:
<uses-permission android:name="android.permission.INTERNET"></uses-permission>
Step Three: Include the Phidget Libraries in your Source
Then, in your code, include an import reference to the library. In Android Java:
  // This contains all of the devices and the exceptions
  import com.phidgets.*;

  // This contains all of the event listeners
  import com.phidgets.event.*;
Then you are ready to begin coding!
Android 3.1+ with USB Port
If your tablet has a USB host port and is running Android 3.1 or later, you can plug Phidgets directly into it.
Use Our Examples
Download and unpack the Phidget Examples for Android. There are two Hello World examples: HelloWorldUSB (the one you want), and HelloWorldRemote (for controlling Phidgets over the Webservice).
Import the HelloWorldUSB example into Eclipse:
- File → Import... → General → Existing Projects Into Workspace → (Next)
- Select
HelloWorldRemoteroot directory → Select all files → Finish
Note that the HelloWorldUSB example was written for Android 3.1. If needed, you can change this in: (Right Click on Project) → Properties → Resource (on left) → Android
To run the example: Right-click on project in Package Explorer (To open the Package Explorer, use Window → Show View → Package Explorer)
Select Run As... → Android Application
This will bring up the Android Virtual Device manager window. If your Android hardware is plugged in to your debugging computer, you will see the hardware as an option on which to run the example. You should run it directly on your Android device, unless you are comfortable setting up the emulator to use your development computer's USB hub.
After the HelloWorldUSB application starts running on your Android device, plug a Phidget into your Android tablet's USB port!
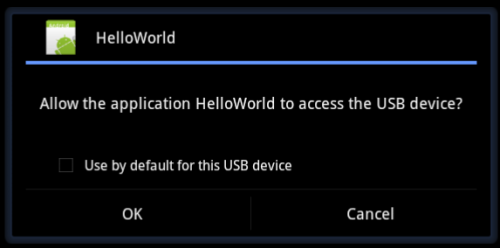
Since the USB device requires special permission, the first thing you will probably see is a request from the Phidget example to use the USB port:
And on your Android device, depending on which Phidget you plug in, you should see something like:

And when you unplug that Phidget from the remote computer, you should see something like this on your Android device:

If you have the specific Phidget for the other included Android examples (i.e. the InterfaceKit), you can run the other examples in the same way.
If you are having trouble running the examples, a method to debug the Android USB port is on the OS - Android page, under the Hardware section.
Write Your Own Code
To write your own code from scratch, start with an Android project in Eclipse (File → New → Android Project). Then....
Step One: Link the Phidget Libraries to your Project
When you download and unzip the Phidget Examples for Android, each project folder will (in addition to the project files themselves) contain three things:
- A libs/ folder (containing an armabi/ folder and a single file called libphidget21.so)
- A jar file containing the general Phidget java library (phidget21.jar)
- A jar file for directly driving USB devices from a USB port on the Android device (PhidgetsUSB.jar)
Move the libs folder, the PhidgetsUSB.jar file, and the phidget21.jar file to your project folder.
To install libraries to run a Phidget remotely over a network using the Webservice:
- Add the libs/ folder to your project
- To add the libs/ folder in Eclipse, simply place it in the root folder of your project
- Add the phidget21.jar file to your project
- Also add the PhidgetsUSB.jar file to your project
- In Eclipse, to add jar files use the top-bar menu: Project → Properties → Java Build Path → Libraries (tab) → Add JAR
Step One: Include the Phidget Libraries in your Source
import com.phidgets.*;
import com.phidgets.event.*;
Step Two: Link the Phidget Libraries to your Project
When you download and unzip the Phidget Library for Android, it will contain three things:
- A libs/ folder
- A jar file containing the general Phidget java library (phidget21.jar)
- A jar file for directly driving USB devices from a USB port on the Android device (PhidgetsUSB.jar)
Move the libs folder, the PhidgetsUSB.jar file, and the phidget21.jar file to your project folder.
In Eclipse, jar files and library files can be added to a project by:
- Project → Properties → Java Build Path → Libraries (tab) → Add JAR
- Project → Properties → Java Build Path → Libraries (tab) → Add Library
To install libraries to run a Phidget directly (Android 3.1 and later, with USB port on device):
- Add libs/, phidget21.jar, and PhidgetsUSB.jar to your project
Step Three: Give your Program Permission to use USB
Add the following to your AndroidManifest.xml file:
<uses-feature android:name="android.hardware.usb.host" />
Before you can use the Phidget, you must include a reference in the code to the library. In Android Java:
  // This contains all of the devices and the exceptions
  import com.phidgets.*;

  // This contains all of the event listeners
  import com.phidgets.event.*;
Remember to add your libraries and .jar files to where Java can find them. In Eclipse, jar files and library files can be added to a project by:
- Project → Properties → Java Build Path → Libraries (tab) → Add JAR
- Project → Properties → Java Build Path → Libraries (tab) → Add Library
Follow the Examples
Code Snippets
Before writing code of your own, it may help to read about General Phidget Programming before proceeding. We cover all of the following concepts (open, attach, etc) there in-depth.
Step One: Initialize and Open
In your code, you can open and connect to a Phidget using open() or openAny().
When using a Phidget over a network, you can open the remote Phidget using one of the supported Java API calls:
void open(int serial, java.lang.String ipAddress, int port)
void open(int serial, java.lang.String ipAddress, int port, java.lang.String password)
void openAny(java.lang.String ipAddress, int port)
void openAny(java.lang.String ipAddress, int port, java.lang.String password)
void openLabel(java.lang.String label, java.lang.String ipAddress, int port)
void openLabel(java.lang.String label, java.lang.String ipAddress, int port, java.lang.String password)
When using a Phidget when it is directly plugged in to an Android 3.1 or later tablet, you can use one of these supported Java API calls:
void open(int serial)
void openAny()
void openLabel(java.lang.String label)
This leaves these Java API calls, which are unsupported on Android:
void open(int serial, java.lang.String serverID)
void open(int serial, java.lang.String serverID, java.lang.String password)
void openAny(java.lang.String serverID)
void openAny(java.lang.String serverID, java.lang.String password)
void openLabel(java.lang.String label, java.lang.String serverID)
void openLabel(java.lang.String label, java.lang.String serverID,
java.lang.String password)
Next, the program needs to try and connect to the Phidget through an open call. The open will tell the program to continuously try to connect to a Phidget, based on the parameters given, even trying to reconnect if it gets disconnected. This means that simply calling open does not guarantee you can use the Phidget immediately. We can handle this by using event driven programming and tracking the AttachEvents and DetachEvents, or by calling waitForAttachment. WaitForAttachment will block indefinitely until a connection is made to the Phidget, or an optional timeout is exceeded.
  ik.openAny();
  ik.waitForAttachment();
The parameters can be used to open the first Phidget of a type it can find, open based on its serial number, or even open across the network. The API manual lists all of the available modes that open provides. One important thing to remember is that when working with Phidgets, a local connection will reserve the device until closed. This prevents any other instances from retrieving data from the Phidget, including other programs. The one connection per device limit does not apply when exclusively using the Phidget Webservice. At the end of your program, don’t forget to call close to free any locks on the Phidget.
  ik.close();
  ik = null;
Event Driven Programming
We recommend the use of event driven programming when working with Phidgets. In Java, we hook an event handler with the following code:
  ik.addSensorChangeListener(new SensorChangeListener()
  {
      public void sensorChanged(SensorChangeEvent se)
      {
        //Insert your code here
        System.out.println(se.getValue());
      }
  });
With this method, the code inside sensorChanged will get executed every time the PhidgetInterfaceKit reports a change on one of its analog inputs. The items from the event, such as the index or reported value, can be accessed from the SensorChangeEvent object properties. Some events such as Attach and Detach belong to the base Phidget object and thus are common to all types of Phidgets. Please refer to the API manual for a full list of events and their usage.
Working Directly With the Phidget
Some values can be directly read and set on the Phidget. Simply use the instance’s properties or call member functions such as getSensorValue(int index) or setOutputState(int index, boolean newVal) for PhidgetInterfaceKits. These methods can be used inside a polling loop as an alternative to event driven programming.
Working With Multiple Phidgets
Other Phidgets
Common Problems and Solutions/Workarounds
This section contains some Android Java and Eclipse-specific common problems. For more answers about using Phidgets, visit our forums, FAQ, or contact us.
Eclipse Error: Unable to get view server protocol version from device emulator
Likely Fix: Project → Clean... → Clean All (If that does not work, clean again and restart Eclipse)
Eclipse Error: Android requires compiler compliance level 5.0 or 6.0. Found 'X.Y' instead
Likely Fix: This may happen when running the examples. The javac and java version on the example do not match those on your computer.
- Find the version of java and javac on your computer (for example,
java -versionon the command line) - In Eclipse, open the Package Explorer (Window → Show View → Package Explorer)
- Find the project, right-click and select Properties
- In Properties → Java Compiler → (Checkbox) Enable Project Specific Settings → Set Compiler Compliance Level = Java Version → Apply
- When told this requires rebuild, say Rebuild Now