Template:SDCardImage: Difference between revisions
No edit summary |
|||
| (5 intermediate revisions by 2 users not shown) | |||
| Line 1: | Line 1: | ||
__NOTOC__ | __NOTOC__ | ||
If you would like to reflash your micro SD card, your first step will be to download the SBC4 | If you would like to reflash your micro SD card, your first step will be to download the [{{SERVER}}/downloads/phidgetsbc/SBC3003/phidgetsbc4.zip SBC4 SD Card Image]. After downloading, unzip to get the .img file. | ||
The next step is to flash your card. We recommend [https://etcher.io/ Etcher] for flashing - this supports Windows, macOS, and Linux. It's also possible to flash from the command line on macOS and Linux, but this is not recommended as it does not verify the image (See [[#Command Line|Command Line]]). | |||
[[ | |||
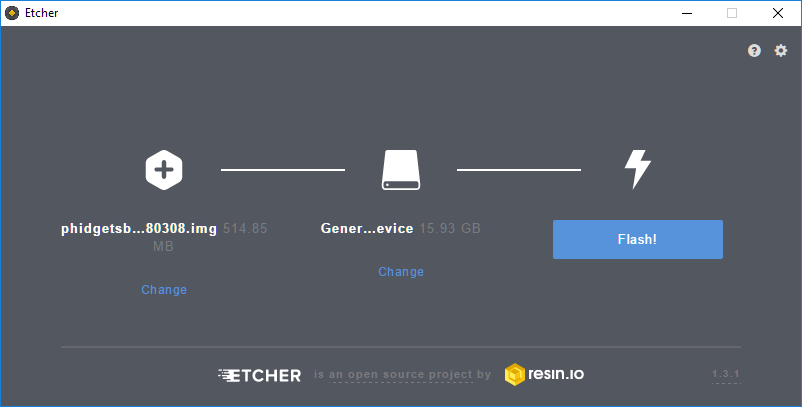
Download and run [https://etcher.io/ Etcher]. Plug in the MicroSD card using a card reader. Etcher will probably pick up the card automatically - otherwise, chose the card. Select the .img file using the select image button. : | |||
[[File:etcher1.png|link=|alt=|center]] | |||
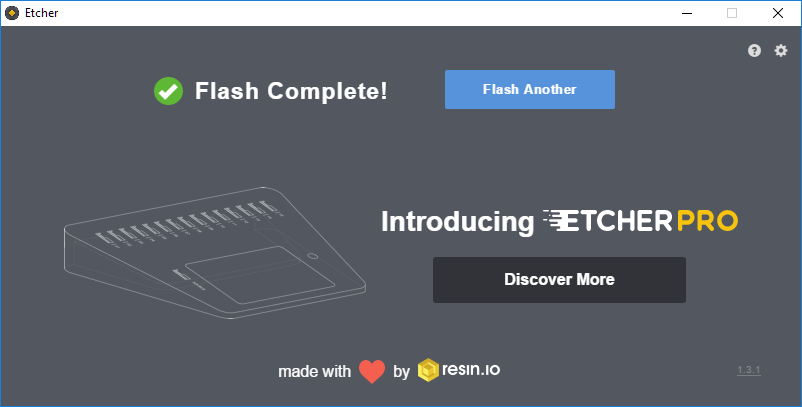
Next, | Next, press the ''Flash!'' button. After writing and verifying, you will see: | ||
[[File: | [[File:etcher2.png|link=|alt=|center]] | ||
The next step is to plug the SD card back into the SBC and expand the file system. Jump ahead to [[#Expanding your File System|expanding your file system]]. | |||
====Command Line==== | |||
NOTE: Flashing from command line is not recommended. Please consider using Etcher on Windows, macOS or Linux. | |||
{{hiddenh5|macOS}} | |||
You should have already completed the first step, which is downloading the SD card image: | You should have already completed the first step, which is downloading the SD card image: | ||
[[File:Sdcard_mac_download.png|link=|alt=|center]] | [[File:Sdcard_mac_download.png|link=|alt=|center]] | ||
Next, make sure your SD card is plugged in, and enter the following into your terminal: | Next, make sure your SD card is plugged in, and enter the following into your terminal: | ||
| Line 34: | Line 24: | ||
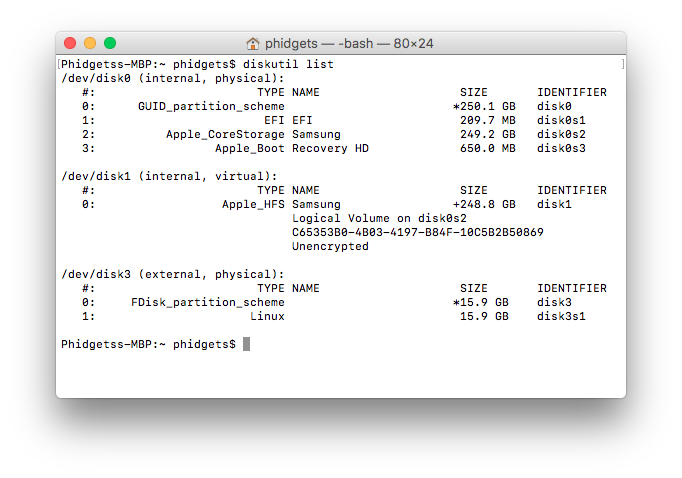
This will list all of the devices currently mounted on your system: | This will list all of the devices currently mounted on your system: | ||
[[File:Sdcard_mac_list.png|link=|alt=|center]] | [[File:Sdcard_mac_list.png|link=|alt=|center]] | ||
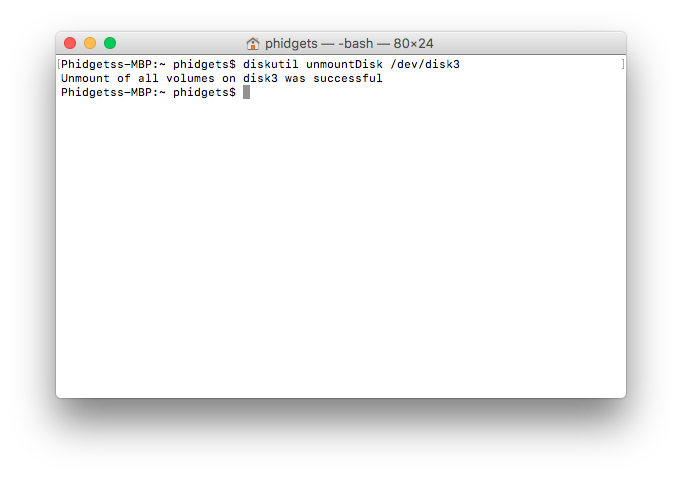
After verifying which device is your SD card, unmount it using the following command: | After verifying which device is your SD card, unmount it using the following command: | ||
| Line 40: | Line 29: | ||
'''Warning: Ensure you are writing to the correct disk''' | '''Warning: Ensure you are writing to the correct disk''' | ||
[[File:Sdcard_mac_unmount.png|link=|alt=|center]] | [[File:Sdcard_mac_unmount.png|link=|alt=|center]] | ||
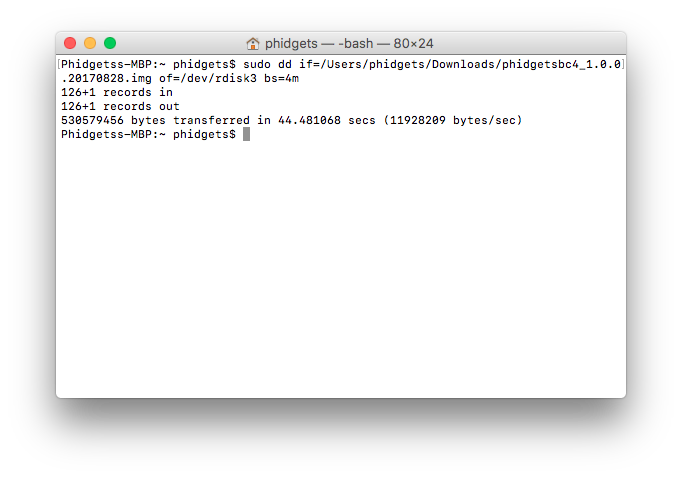
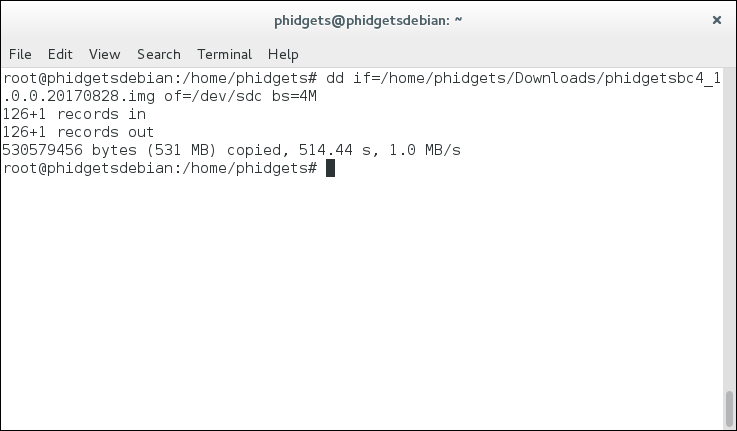
Next, we can write the image file to the SD card: | Next, we can write the image file to the SD card: | ||
| Line 47: | Line 35: | ||
[[File:Sdcard_mac_complete.png|link=|alt=|center]] | [[File:Sdcard_mac_complete.png|link=|alt=|center]] | ||
After writing, you are almost done. The next step is to plug the SD card back into the SBC and expand the file system. Jump ahead to [[#Expanding your File System|expanding your file system]]. | |||
After writing, you are almost done. The next step is to plug the SD card back into the SBC and expand the file system. Jump ahead to [[#Expanding your | {{hiddenh5|Linux}} | ||
You should have already completed the first step, which is downloading the SD card image: | You should have already completed the first step, which is downloading the SD card image: | ||
[[File:Sdcard_linux_download.PNG|link=|alt=|center]] | [[File:Sdcard_linux_download.PNG|link=|alt=|center]] | ||
| Line 57: | Line 44: | ||
This will list all of the devices currently mounted on your system: | This will list all of the devices currently mounted on your system: | ||
[[File:Sdcard_linux_list.PNG|link=|alt=|center]] | [[File:Sdcard_linux_list.PNG|link=|alt=|center]] | ||
After verifying which device is your SD card, unmount it using the following command: | After verifying which device is your SD card, unmount it using the following command: | ||
*umount /dev/sdXX | *umount /dev/sdXX | ||
[[File:Sdcard_linux_unmount.PNG|link=|alt=|center]] | [[File:Sdcard_linux_unmount.PNG|link=|alt=|center]] | ||
Next, we can write the image file to the SD card: | Next, we can write the image file to the SD card: | ||
| Line 70: | Line 55: | ||
[[File:Sdcard_linux_complete.PNG|link=|alt=|center]] | [[File:Sdcard_linux_complete.PNG|link=|alt=|center]] | ||
After writing, you are almost done. The next step is to plug the SD card back into the SBC and expand the file system. | |||
====Expanding your File System==== | |||
====Expanding your | |||
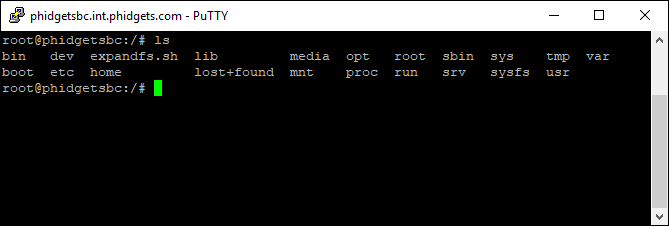
After writing the image file to your SD card, you will need to expand the file system size in order to take advantage of the full capacity of your card. In order to do this, you must run the ''expandfs.sh'' script which can be accessed at the '''/''' directory as shown here: | After writing the image file to your SD card, you will need to expand the file system size in order to take advantage of the full capacity of your card. In order to do this, you must run the ''expandfs.sh'' script which can be accessed at the '''/''' directory as shown here: | ||
[[File:Sdcard_expand_ls.PNG|link=|alt=|center]] | [[File:Sdcard_expand_ls.PNG|link=|alt=|center]] | ||
Note: if you plan on using SSH in order to run this script, you will need to enable SSH first (as it is turned off by default). Enabling SSH was covered above in the [[OS_-_Phidget_SBC#SSH|SSH section]]. | |||
Note: if you | |||
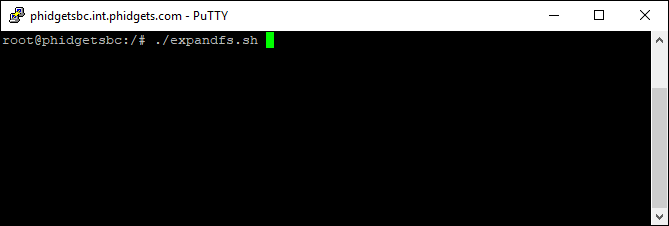
Next, simply run the script: | Next, simply run the script: | ||
[[File:Sdcard_expand_run.PNG|link=|alt=|center]] | [[File:Sdcard_expand_run.PNG|link=|alt=|center]] | ||
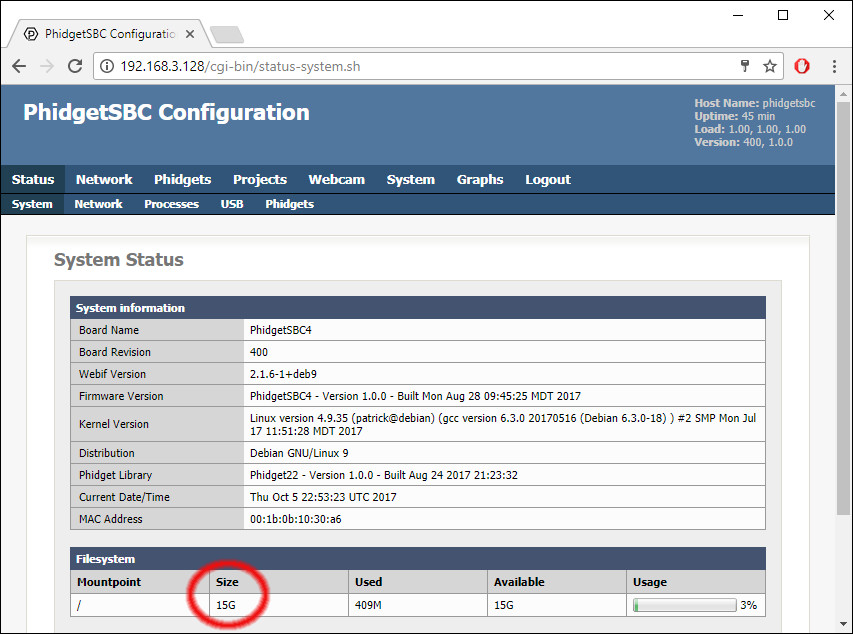
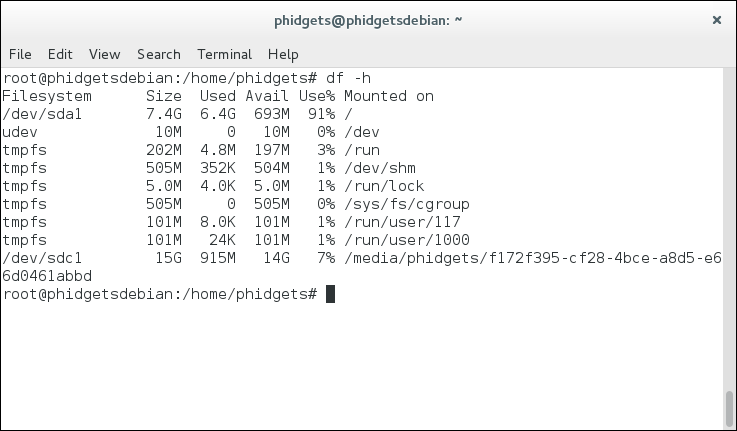
The SBC will automatically reboot, and your file system will be expanded. You can confirm that it has expanded by checking the file system size report. | The SBC will automatically reboot, and your file system will be expanded. You can confirm that it has expanded by checking the file system size report. | ||
[[File:Sdcard_filesystem.jpg|link=|alt=|center]] | [[File:Sdcard_filesystem.jpg|link=|alt=|center]] | ||
Revision as of 19:23, 27 February 2020
If you would like to reflash your micro SD card, your first step will be to download the SBC4 SD Card Image. After downloading, unzip to get the .img file.
The next step is to flash your card. We recommend Etcher for flashing - this supports Windows, macOS, and Linux. It's also possible to flash from the command line on macOS and Linux, but this is not recommended as it does not verify the image (See Command Line).
Download and run Etcher. Plug in the MicroSD card using a card reader. Etcher will probably pick up the card automatically - otherwise, chose the card. Select the .img file using the select image button. :
Next, press the Flash! button. After writing and verifying, you will see:
The next step is to plug the SD card back into the SBC and expand the file system. Jump ahead to expanding your file system.
Command Line
NOTE: Flashing from command line is not recommended. Please consider using Etcher on Windows, macOS or Linux.
You should have already completed the first step, which is downloading the SD card image:

Next, make sure your SD card is plugged in, and enter the following into your terminal:
- diskutil list
This will list all of the devices currently mounted on your system:
After verifying which device is your SD card, unmount it using the following command:
- diskutil unmountDisk /dev/diskX
Warning: Ensure you are writing to the correct disk
Next, we can write the image file to the SD card:
- if= path to your image file
- of = where to write output (note using rdisk instead of disk will result in faster write times)
After writing, you are almost done. The next step is to plug the SD card back into the SBC and expand the file system. Jump ahead to expanding your file system.
You should have already completed the first step, which is downloading the SD card image:
Next, make sure your SD card is plugged in, and enter the following into your terminal:
- dh -f
This will list all of the devices currently mounted on your system:
After verifying which device is your SD card, unmount it using the following command:
- umount /dev/sdXX

Next, we can write the image file to the SD card:
- if= path to your image file
- of = where to write output (note: do not include partition number)
Warning: Ensure you are writing to the correct disk
After writing, you are almost done. The next step is to plug the SD card back into the SBC and expand the file system.
Expanding your File System
After writing the image file to your SD card, you will need to expand the file system size in order to take advantage of the full capacity of your card. In order to do this, you must run the expandfs.sh script which can be accessed at the / directory as shown here:
Note: if you plan on using SSH in order to run this script, you will need to enable SSH first (as it is turned off by default). Enabling SSH was covered above in the SSH section.
Next, simply run the script:
The SBC will automatically reboot, and your file system will be expanded. You can confirm that it has expanded by checking the file system size report.