Language - Visual Basic .NET: Difference between revisions
No edit summary |
|||
| Line 83: | Line 83: | ||
====Use Our Examples==== | ====Use Our Examples==== | ||
We do not have Visual Basic .NET examples for the Mono framework. Fortunately, you can take a look at the source code for our [[Visual Studio 2015 examples]] for valuable programming insight. We have a [[#Edit the Examples|teaching section]] below to help you follow them. | We do not have Visual Basic .NET examples for the Mono framework. Fortunately, you can take a look at the source code for our [[#Example_Code|Visual Studio 2015 examples]] for valuable programming insight. We have a [[#Edit the Examples|teaching section]] below to help you follow them. | ||
====Write Your Own Code==== | ====Write Your Own Code==== | ||
Revision as of 14:34, 26 April 2017
Visual Basic .NET, developed by Microsoft is a modern object oriented programming language and the successor to Visual Basic 6.0
Introduction
If this is your first time working with a Phidget, we suggest starting with the Getting Started page for your specific device. This can be found in the user guide for your device. That page will walk you through installing drivers and libraries for your operating system, and will then bring you back here to use VB.NET specifically. VB.NET is capable of using the complete Phidget22 API, including events. We also provide example code in VB.NET for all Phidget devices.
VB.NET with Phidgets is only supported on Windows, and can be used with Visual Studio 2015, Mono, or MonoDevelop.
Quick Downloads
List of download links, to be added once files are available
Documentation
Example Code
Libraries and Drivers
Getting Started with VB.NET
If you are new to writing code for Phidgets, we recommend starting by running, then modifying existing examples. This will allow you to:
- Make sure your libraries are properly linked
- Go from source code to a test application as quickly as possible
- Ensure your Phidget is hooked up properly
Instructions are divided up by operating system. Choose:
Windows
Description of Library Files
Visual Basic .NET programs on Windows depend on the following files, which the installers above put onto your system:
- phidget22.dll contains the actual Phidget library, which is used at run-time. By default, it is placed in C:\Windows\System32.
- Phidget22.NET.dll is the Phidget library for .NET framework 2.0 or higher. Your compiler has to know where this file is. By default, it is placed into C:\Program Files\Phidgets\Phidget22. You can either point your compiler to that location, or copy and link to it in a directory for your project workspace.
You can optionally install the following files:
- Phidget22.NET.XML provides the IntelliSense in-line documentation for the .NET library in Visual Studio/MonoDevelop. This documentation is also visible in the Object Browser in Visual Studio. By default, it is placed into C:\Program Files\Phidgets\Phidget22.
Running the examples and writing your own code can be fairly compiler-specific, so we include instructions for each compiler below.
Visual Studio 2015
Use Our Examples
Please start by downloading the examples and unpacking them into a folder. Since the examples were written in Visual Studio 2015, you will need to use Visual Studio 2015 or later in order to run the examples. To load all projects in Visual Studio, go to File → Open → Project, and open AllExamples/AllExamples.sln.
The easiest way to confirm that your environment is set up properly will be to compile and run the HelloWorld Visual Basic .NET example.
Start by setting the HelloWorld project as your start up project.
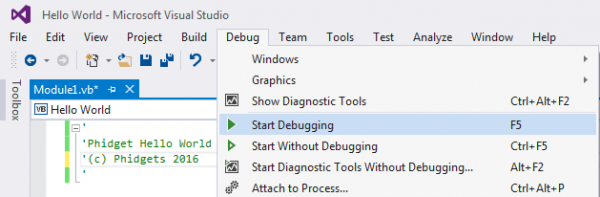
The only thing left to do is to run the example! Click on Debug → Start Debugging. Please note that the projects, by default try to find the Phidget22.NET.dll in the C:\Program Files\Phidgets\Phidget22. If you have it installed in another location, please change the path to the file's location accordingly. If you are receiving an error message regarding that the namespace Phidget22 cannot be found, please re-add the reference to Phidget22.NET.dll. Please see the Write Your Own Code section for details.
This program will detect for devices that are attached/detached on the computer. Go ahead, and attach or detach your devices! Here is an example output:

After confirming that the HelloWorld example is working, you can proceed to run the example for your device. The source file will be named the same as the software object for your device. If you are not sure what the software object for your device is, find your Phidget on our webpage, and then check the Phidget22 API documentation for it.
Once you have the Visual Basic .NET examples running, we have a teaching section below to help you follow them.
Write Your Own Code
When you are building a project from scratch, or adding Phidget function calls to an existing project, you'll need to configure your environment to properly link the Phidget .NET libraries. To begin:
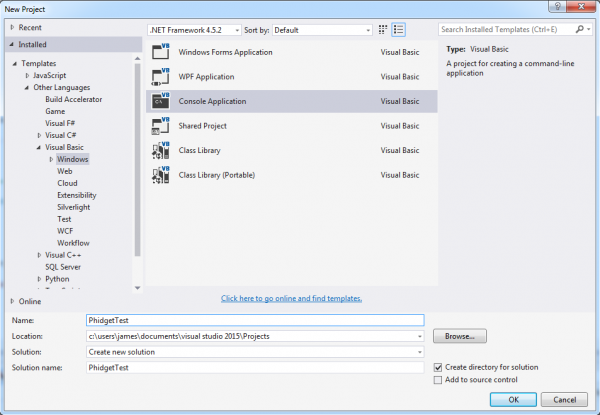
1. Generate a new Visual Basic .NET Windows Applications project with a descriptive name such as PhidgetTest.
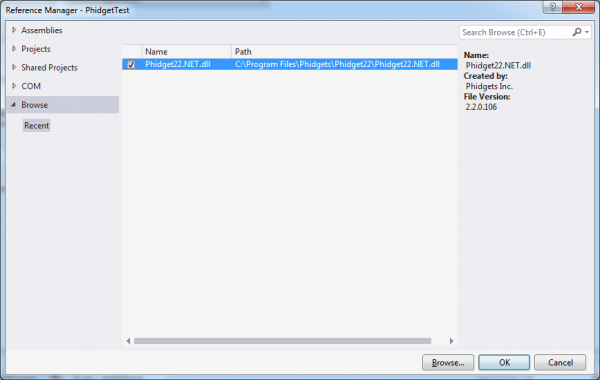
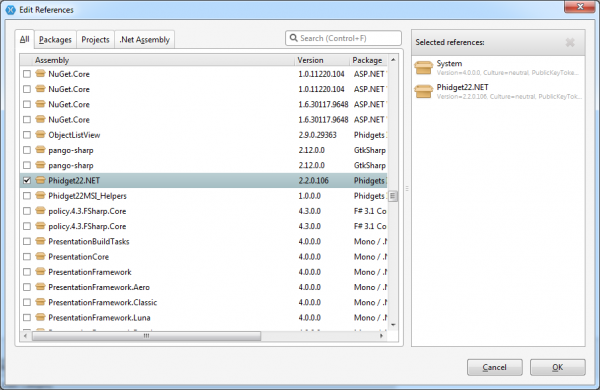
2. Add a reference to the Phidget .NET library.

3. Click Browse and navigate to the location of Phidget22.NET.dll, and add the file. If you used our installer, these files are installed in C:\Program Files\Phidgets\Phidget22, by default. If you have already done this for a previous project, you should be able to find Phidget22.NET.dll under the Browse → Recent tab.
The project now has access to the Phidget function calls and you are ready to begin coding.
The same teaching section which describes the examples also has further resources for programming your Phidget.
Mono
This section will provide instructions on how to compile using the vbnc compiler.
Use Our Examples
We do not have Visual Basic .NET examples for the Mono framework. Fortunately, you can take a look at the source code for our Visual Studio 2015 examples for valuable programming insight. We have a teaching section below to help you follow them.
Write Your Own Code
When you are building a project from scratch, or adding Phidget function calls to an existing project, you'll need to configure your compiler to properly link the Phidget .NET library.
Place Phidget22.NET.dll in the same directory as your source code. To compile and build an executable, run:
To compile and build an executable, run:
vbnc /out:example.exe /r:phidget22.NET.dll Example.vb
If you have the Phidget22.NET.dll installed in another location, please change the path to the file's location accordingly.
Afterwards, you will have an executable named example.exe that you can run. Type the following to run the program:
mono example.exe
The teaching section also has further resources for programming your Phidget.
MonoDevelop/Xamarin Studio
Use Our Examples
Download the examples and unpack them into a folder. Here, you can find example programs for all the devices, as well as a HelloWorld program that will work with any Phidget. The source file will be named the same as the software object for your device. If you are not sure what the software object for your device is, find your Phidget on our webpage, and then check the Phidget22 API documentation for it.
These examples were written in Visual Studio 2015, but are also compatible with MonoDevelop/Xamarin Studio.
To load all projects in MonoDevelop/Xamarin Studio, go to File → Open, and open AllExamples/AllExamples.sln
This will load all of the examples available for Visual Basic .NET, and then you can set your main project to be the one that matches your device. If you are running under the .NET framework, you can use full examples. Otherwise, if you are running under the Mono framework, please only use the HelloWorld example. The full examples use Windows Forms, which is not completely compatible with Mono's Gtk#.
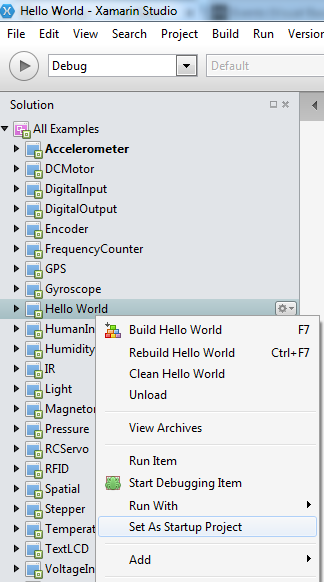
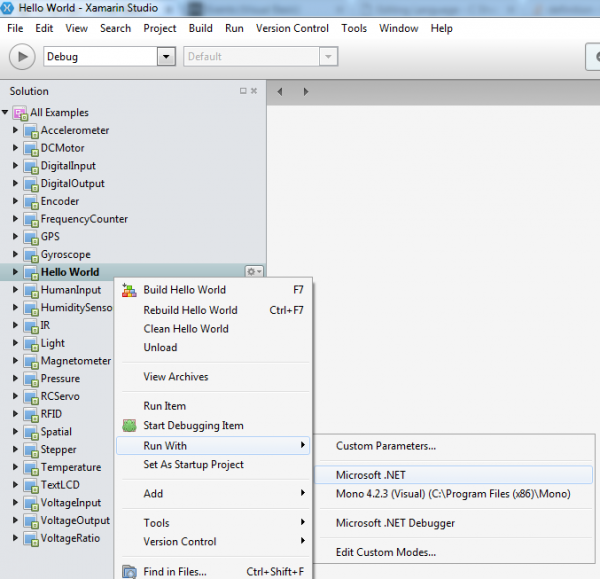
The only thing left to do is to run the examples! Right click the project, and click on Run With and select the target framework. Please note that the projects, by default try to find the Phidget22.NET.dll in the C\Program Files\Phidgets\Phidget22. If you have it installed in another location, please change the path to the file's location accordingly. If you are receiving an error message regarding that the namespace Phidget22 cannot be found, please re-add the reference to Phidget22.NET.dll. Please see the Write Your Own Code section for details.
Once you have the Visual Basic .NET examples running, we have a teaching section below to help you follow them.
Write Your Own Code
When you are building a project from scratch, or adding Phidget function calls to an existing project, you'll need to configure your development environment to properly link the Phidget .NET library. To begin:
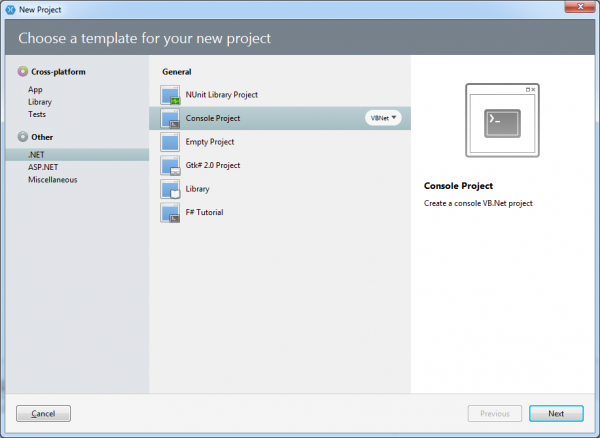
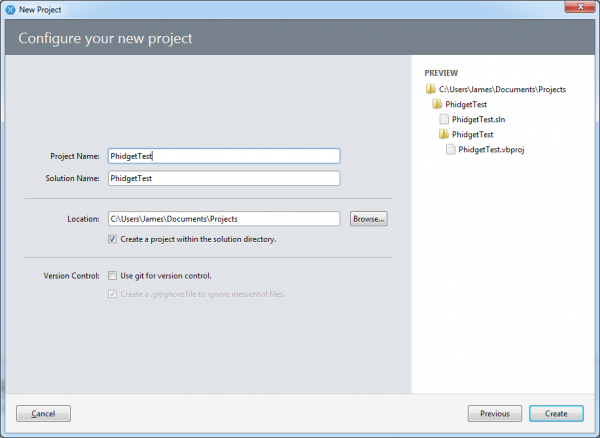
1. Create a new Visual Basic .NET Console project with a descriptive name such as PhidgetTest.
2. Add a reference to the Phidget .NET library.
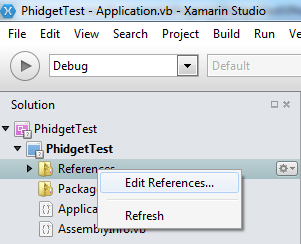
3. Select Phidget22.NET.dll. If you used our installer, by default, this file is placed in C:\Program Files\Phidgets\Phidget22. If it is in another location, please change the path to the file's location accordingly.
The project now has access to the Phidget function calls and you are ready to begin coding.
The same teaching section which describes the examples also has further resources for programming your Phidget.
Edit the Examples
By following the instructions for your operating system and compiler above, you probably now have a working example and want to understand it better so you can change it to do what you want. This teaching section has resources for you to learn from the examples and write your own. Your main reference for writing VB.NET code will be the Phidget22 API Manual.
Code Snippets
The following code snippets describe how to do various general tasks with Phidgets. You should be able to find places in the examples where these snippets exist, and modify them to suit your requirements.
Step One: Initialize and Open
The Open() function opens the software object, but not hardware. So, it is not a guarantee you can use the Phidget immediately.
For example, if we were using an Digital Input as our device, the create and open calls would look like this:
device = New Phidget22.DigitalInput()
device.Open()
Step Two: Wait for Attachment (plugging in) of the Phidget
To use the Phidget, it must be plugged in (attached). We can handle this simply by calling open with a number as a parameter in place of the basic open. This function works for any Phidget. This will block until a connection is made to the Phidget, or the specified timeout is exceeded:
device.Open(5000);
Sometimes, it makes more sense to handle the attachment via an event. This would be in instances where the Phidget is being plugged and unplugged, and you want to handle these incidents. Or, when you want to use event-driven programming because you have a GUI-driven program. In these cases, an event-driven code snippet to handle the attachment might look something like this:
Private Sub device_Attach(ByVal sender As Object, ByVal e As Phidget22.Events.AttachEventArgs) Handles device.Attach
  Dim attachedDevice As Phidget22.Phidget = CType(sender, Phidget22.Phidget)
  Dim serialNumber as Integer
  Dim deviceName as String
  serialNumber = attachedDevice.DeviceSerialNumber;
  deviceName = attachedDevice.DeviceName;
  Console.WriteLine("Hello Device {0},  Serial Number: {1}!", deviceName, serialNumber.ToString());
End Sub
Step Three: Do Things with the Phidget
We recommend the use of event driven programming when working with Phidgets. This allows the program to execute other tasks until the Phidget generates a new event. You can hook a custom function into an event trigger like this, using a Digital Input Phidget as an example:
Private Sub device_DigitalInputChange(ByVal sender As Object, ByVal e As Phidget22.Events.DigitalInputStateChangeEventArgs) Handles device.StateChange
  textBox1.Text = "State: " + e.State;
End Sub
Some values can be directly read and set on the Phidget. These functions can be used inside a polling loop as an alternative to event driven programming. The line inside the loop would be something like this, after which you could do something with the value:
val = device.State;

device.State = true;
Step Four: Close and Delete
At the end of your program, be sure to close your device.
Private Sub Form1_FormClosing(ByVal sender As Object, ByVal e As System.Windows.Forms.FormClosingEventArgs) Handles Me.FormClosing
    device.Close();
End Sub
Further Reading
Phidget Programming Basics - Here you can find the basic concepts to help you get started with making your own programs that use Phidgets.
Data Interval/Change Trigger - Learn about these two properties that control how much data comes in from your sensors.
Using Multiple Phidgets - It can be difficult to figure out how to use more than one Phidget in your program. This page will guide you through the steps.
Polling vs. Events - Your program can gather data in either a polling-driven or event-driven manner. Learn the difference to determine which is best for your application.
Logging, Exceptions, and Errors - Learn about all the tools you can use to debug your program.
Phidget Network Service - Phidgets can be controlled and communicated with over your network- either wirelessly or over ethernet.